35
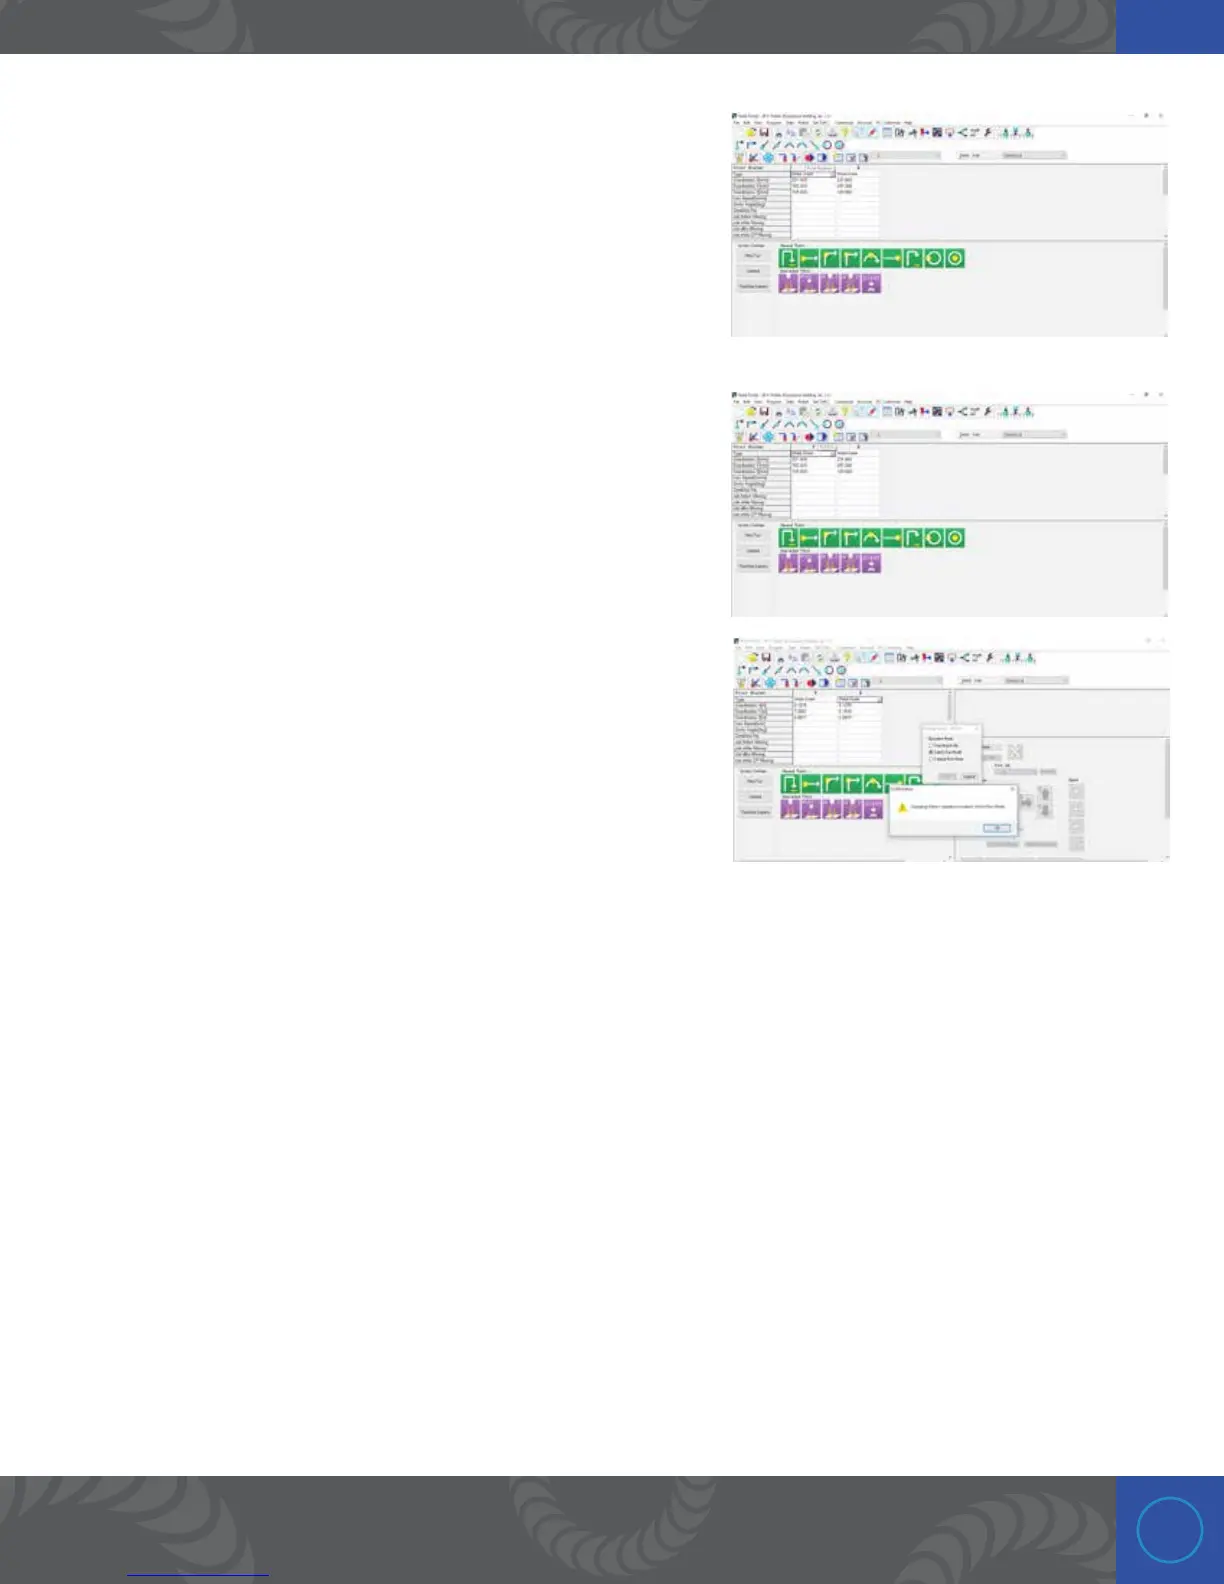
Step 37:
If you click the “Point Playback” icon the robot will go to
the currently selected point and make a weld. In this case
you will not need to trigger the weld, because the robot will
automatically do this for you.
Step 38:
You can have the robot automatically run though each point and
weld and then return to home by clicking on the “Test Run” icon.
Step 39
Once ready to use robot in run mode, click on “Robot,” drop
down and click on “Change Mode.” Click on “Switch Run Mode”
and click “O” twice. Now the green button on the Janome
robot will start the weld process and run through each of the
programmed weld points and then return home when finished.
Chapter 7: Operation
Power Up
• Press the power button on the lower right side of the i2 to power up the machine.
• Flip the rocker switch on the front of the weld head to the “ON” position. e green LED should
illuminate and the i2 should detect the weld head and switch to EV mode.
• Flip the rocker switch on the back of the robot to power up the system and make sure the
emergency stop button is not depressed. e screen should light up and the teach pendant should
be active.

 Loading...


