9
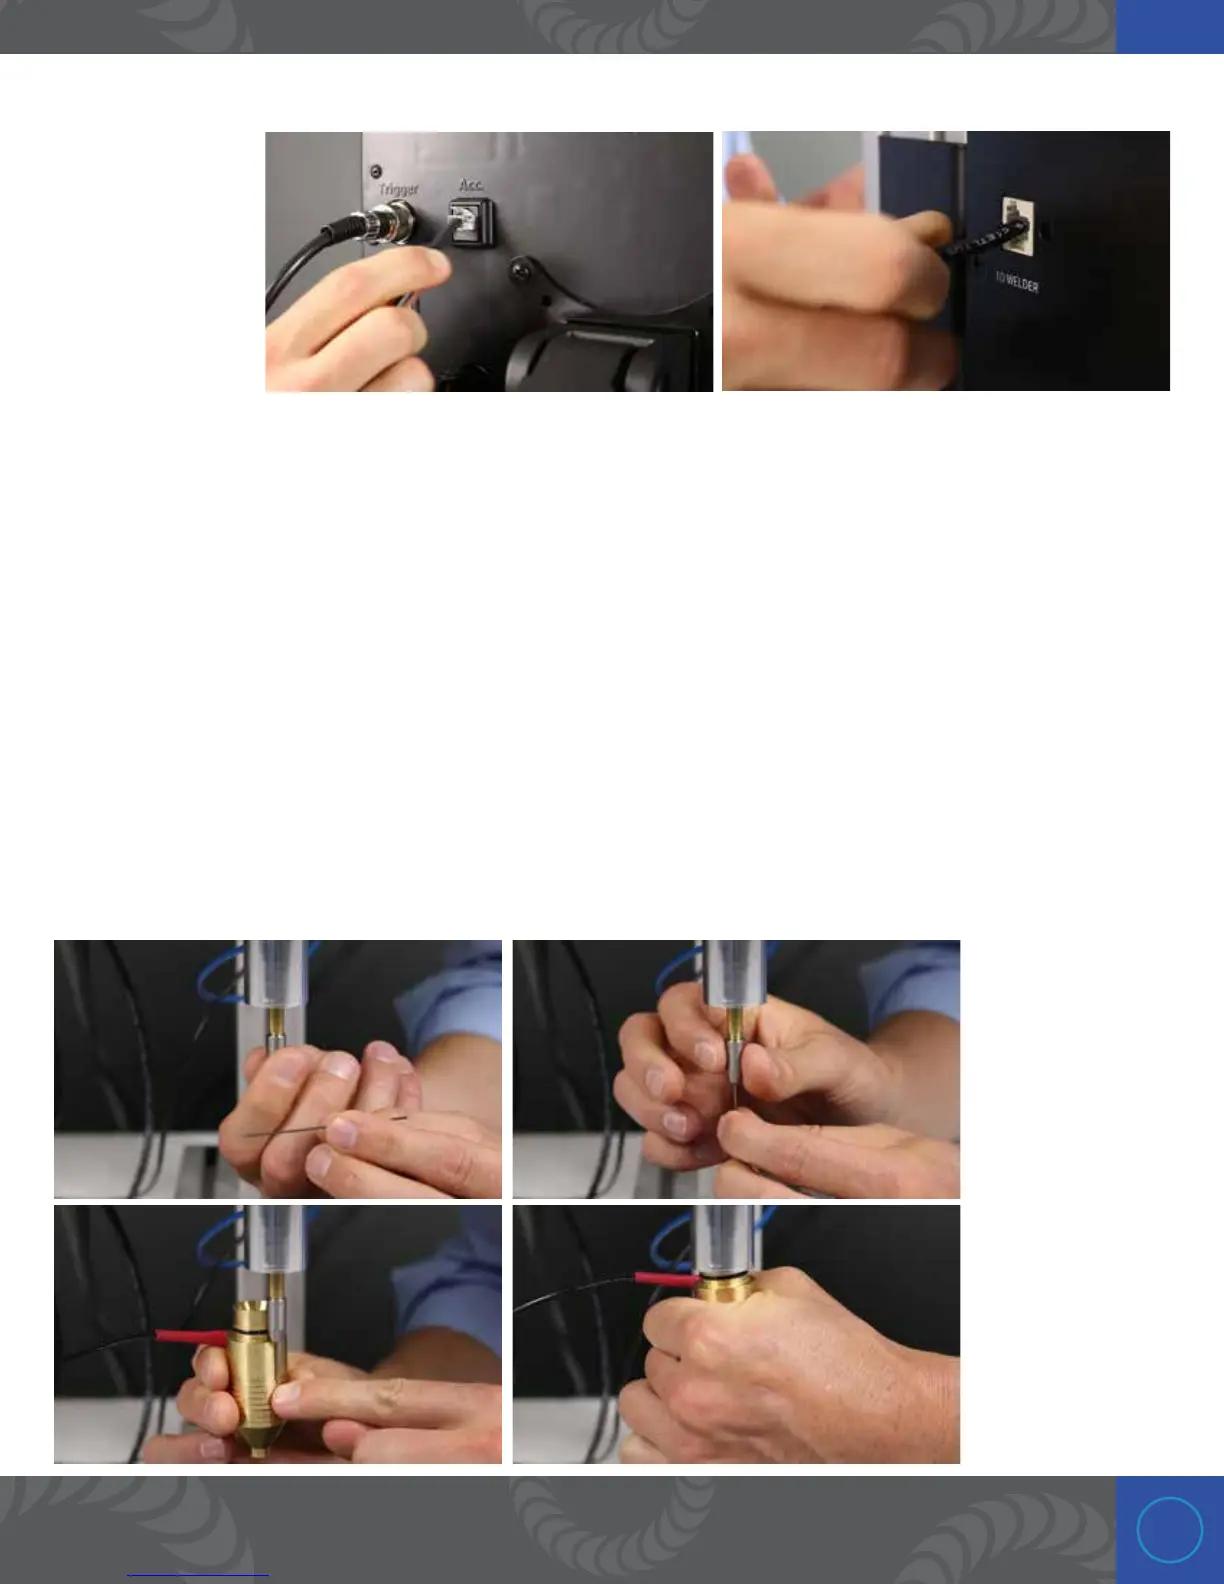
Step 7: Connect the EV weld head to the welder using the RJ-11 cable
Plug the RJ-11 jack
from the cable
chain wire harness
into the “Acc. Port”
on the back of the
welder then to the
port on the weld
head that reads “to
welder”.
Step 8: Plug in the weld head power cord
e weld head has a power cord coming out of the cable chain wire harness. Connect this to an electrical
outlet.
Step 9: Install the electrode in the nose cap
Remove the nose cap from the weld head and twist the electrode holder counter clockwise to open the
collet. Insert the electrode into the collet. Tighten the electrode holder clockwise to secure the electrode in
place. e electrode should protrude about a half inch out of the holder. Now replace the nose cap.

 Loading...


