12
5.2.2 Static Alignment
Static alignment process (see fig.9)
Required materials and tools:
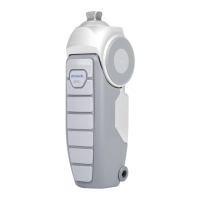
743L100 L.A.S.A.R. Posture
To determine the load line, position the patient on the L.A.S.A.R. Posture as follows:
• Prosthesis side on force measurement plate (sufficient load: >35% body weight)
• Other side on height compensation plate
Optimise the static alignment solely by changing the plantar flexion.
a–p positioning of the alignment reference point (rotation axis of the prosthetic knee
joint) to the load line:
-35 mm
5.2.3 Dynamic Trial Fitting
CAUTION
Reaching into the area of the joint mechanism
Pinching of limbs (e.g. fingers) and the skin due to uncontrolled joint movement
►
Do not reach into the joint mechanism during daily use.
►
Close attention is required during assembly and adjustment tasks.
CAUTION
Dynamic trial fitting without parallel bars
Fall due to lack of patient experience or functional changes
►
Perform the dynamic trial fitting using parallel bars when the prosthesis is first used and also
after any change is made to the prosthesis.
During dynamic trial fitting, the alignment and settings of the prosthesis are checked and adapted
for optimum walking according to the needs and abilities of the patient.
Electronic control for switching between stance phase and swing phase is calibrated within the
first 20steps.
5.2.3.1 Setting flexion and extension damping
INFORMATION
The valves for flexion and extension are located under the cover at the front of the prosthetic
knee joint.
The desired gait pattern is achieved by adjusting the damping behaviour of the prosthetic knee
joint for flexion and extension in the swing phase.
Valve Symbol Factory setting (damping)
Flexion valve (F) Minimum
Extension valve (E) Minimum
> Required tools and materials:
710H10=2x3 adjustment wrench
1) Use the adjustment wrench to set the flexion resistance (see fig.12).
2) Use the adjustment wrench to set the extension resistance (see fig.13).
Situation Measures Setting
Lower leg swings through too far Increase damping Turn flexion valve to the right (+)
Lower leg does not swing through
sufficiently
Reduce damping Turn flexion valve to the left (–)