1)
YYYY = year of manufacture; WW = week of manufacture; PP = production site; XXXX = sequential production
number
2)
YYYY = year of manufacture; MM = month of manufacture; DD = day of manufacture
3)
UDI-PI to GS1 standard; UDI = Unique Device Identifier, PI = Product Identifier
4)
UDI-DI to GS1 standard; UDI = Unique Device Identifier, DI = Device Identifier
See the instructions for use (user) for additional warning labels.
4 Delivery
4.1 Scope of delivery
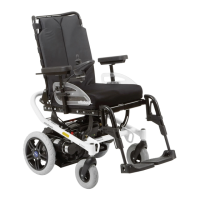
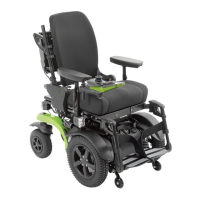
• Preassembled wheelchair
• Two drive wheels (installed or included)
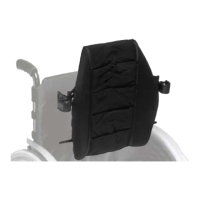
• Options according to the order
• Instructions for use (qualified personnel), instructions for use (user)
• Instructions for use for accessories (depending on equipment)
The seat cushion is not included in the standard package.
4.2 Options
The functionality and operation of the options are described in more detail in the instructions for use (user).
All of the available options/accessories are listed on the order form.
4.3 Storage
Store the wheelchair in a dry, enclosed room, protected from external influences. Specific information about stor
age conditions: see Page30.
During extended storage, the knee lever wheel lock on wheelchairs with PU tyres must be released since tyre
deformation may otherwise result.
Maintain sufficient clearance from sources of heat. If the product is parked for an extended period of time or the
tyres overheat (e.g.in the vicinity of radiators or in case of exposure to strong sunlight behind glass), the tyres may
become permanently deformed.
5 Preparing the product for use
5.1 Assembly
CAUTION
Exposed pinch points
Crushing, pinching due to incorrect handling
► When folding out the backrest, only grip by the specified components.
CAUTION
Failure to verify readiness for use before putting into operation
Tipping, falling due to incorrect adjustment or installation
► Check the existing settings prior to first use.
► After every assembly, check for proper mounting of the drive wheels. The quick-release axles must be
securely locked in the receiver bushings.
► Pay particular attention to the stability against tipping, free running of the drive wheels and correct function of
the wheel locks.
► Check the tyre pressure. The correct tyre pressure is printed on the sidewall. Ensure that the pressure is the
same in both tyres.
1) Push the drive wheels into the wheel brackets. The quick-release axles must not be able to be removed after
the push-button has been released.
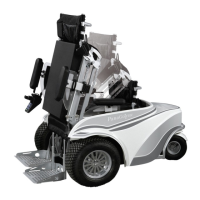
2) If necessary, position the backrest upright and allow the latch to engage.
3) Rotate the side panels into position and insert them into the side panel supports.
4) If necessary, insert the calf strap.
5) Place the cushion on the seat.
7Ventus
Delivery