7.8 Introduction to Expert Triggers.
The Expert Trigger page has two main sections. The "Trigger Input Config" section lists all
the possible trigger inputs. Below this, the "Trigger Action" section shows a list of possible
actions as a result of a Trigger Input.
Each Trigger Input can be associated to one or more Trigger Actions. To configure a Trigger,
place a tick () next to the required Trigger Input row and a green or red traffic light ( or )
in same column of the required Trigger Action row. A green traffic light represents the start
of the trigger (eg a switch closing or PIR becoming active) a red traffic represents the end
of the trigger (eg a switch opened or a PIR becoming inactive).
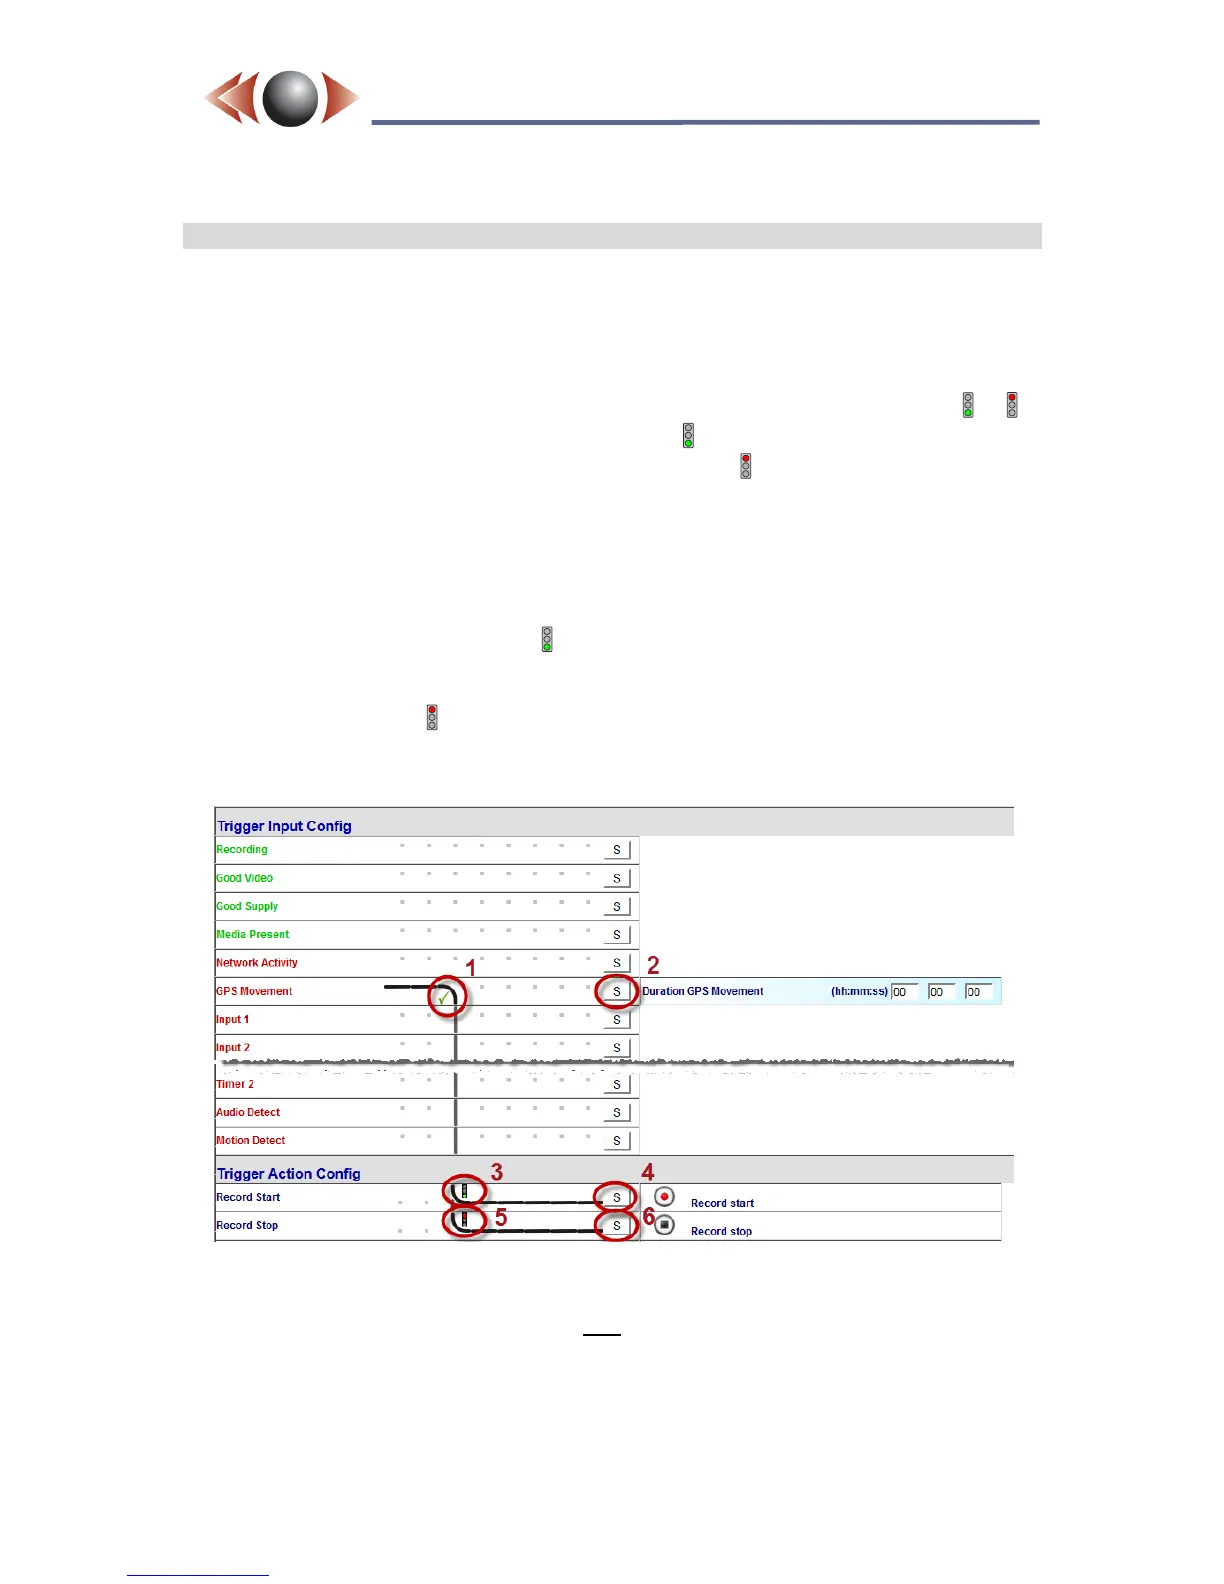
The following example is the set up for starting / stopping recording on GPS Movement:
1. Click a “• “ in an unused column of the “GPS Movement” row until is shown.
2. Press [S] (store) the in the "GPS Movement” row.
3. Click to place a green traffic light ( ) in the same column as the above, and in the
same row as the required Trigger Action (in this case the "Record Start" row).
4. Press [S] (store) in the "Record Start" row, this stores the configuration.
5. Set a red traffic light ( ) in the "Record Stop" row, this stops recording when the GPS
trigger stops.
6. Press [S] in the "Record Stop" to store.
Figure 20: Example Expert Trigger: set input 1 to start / stop
Recording on GPS movement
NB► A red tick is also available (), this is only required for triggers which work in reverse,
i.e. external triggers which are active when open, rather than active when closed.
TIP► The list of possible trigger inputs shows inputs which are currently active in green,
inactive in red.