EasyManuals Logo

OWC data doubler Installation Guide

OWC data doubler
80 pages
To Next Page IconTo Next Page
To Previous Page IconTo Previous Page
Page #20 background imageLoading...
Page #20 background image
OWC Data Doubler Installation
18
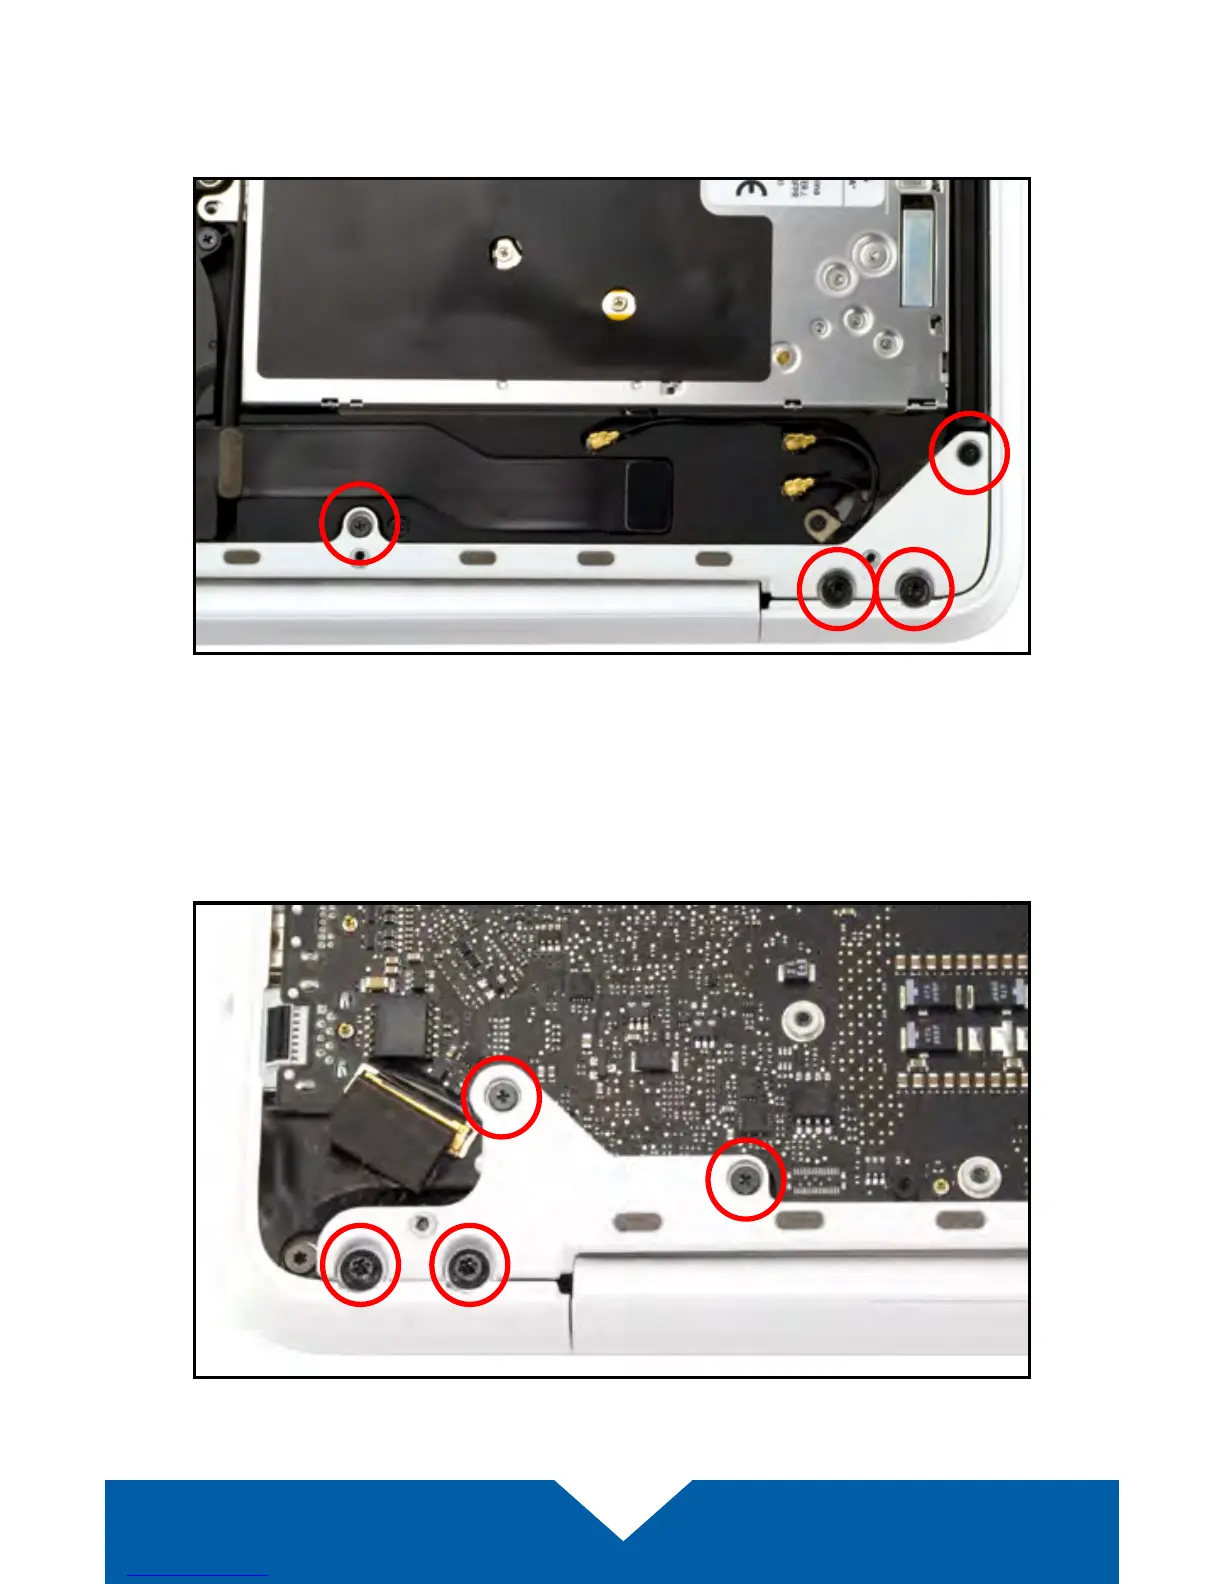
7. Along the bottom-right corner of the chassis, there are four screws that
need to be removed (shown below in red). The two smaller screws are
Phillips screws, the two larger screws are Torx T8. Set the screws aside.
8. Along the bottom-left of the chassis there are four additional screws that
need to be removed. Again the two smaller screws are Phillips screws and
the two larger screws are Torx T8. Set the screws aside.

Other manuals for OWC data doubler

Questions and Answers:

Question and Answer IconNeed help?

Do you have a question about the OWC data doubler and is the answer not in the manual?

OWC data doubler Specifications

General IconGeneral
BrandOWC
Modeldata doubler
CategoryComputer Accessories
LanguageEnglish

Related product manuals