OWC Data Doubler Installation
35
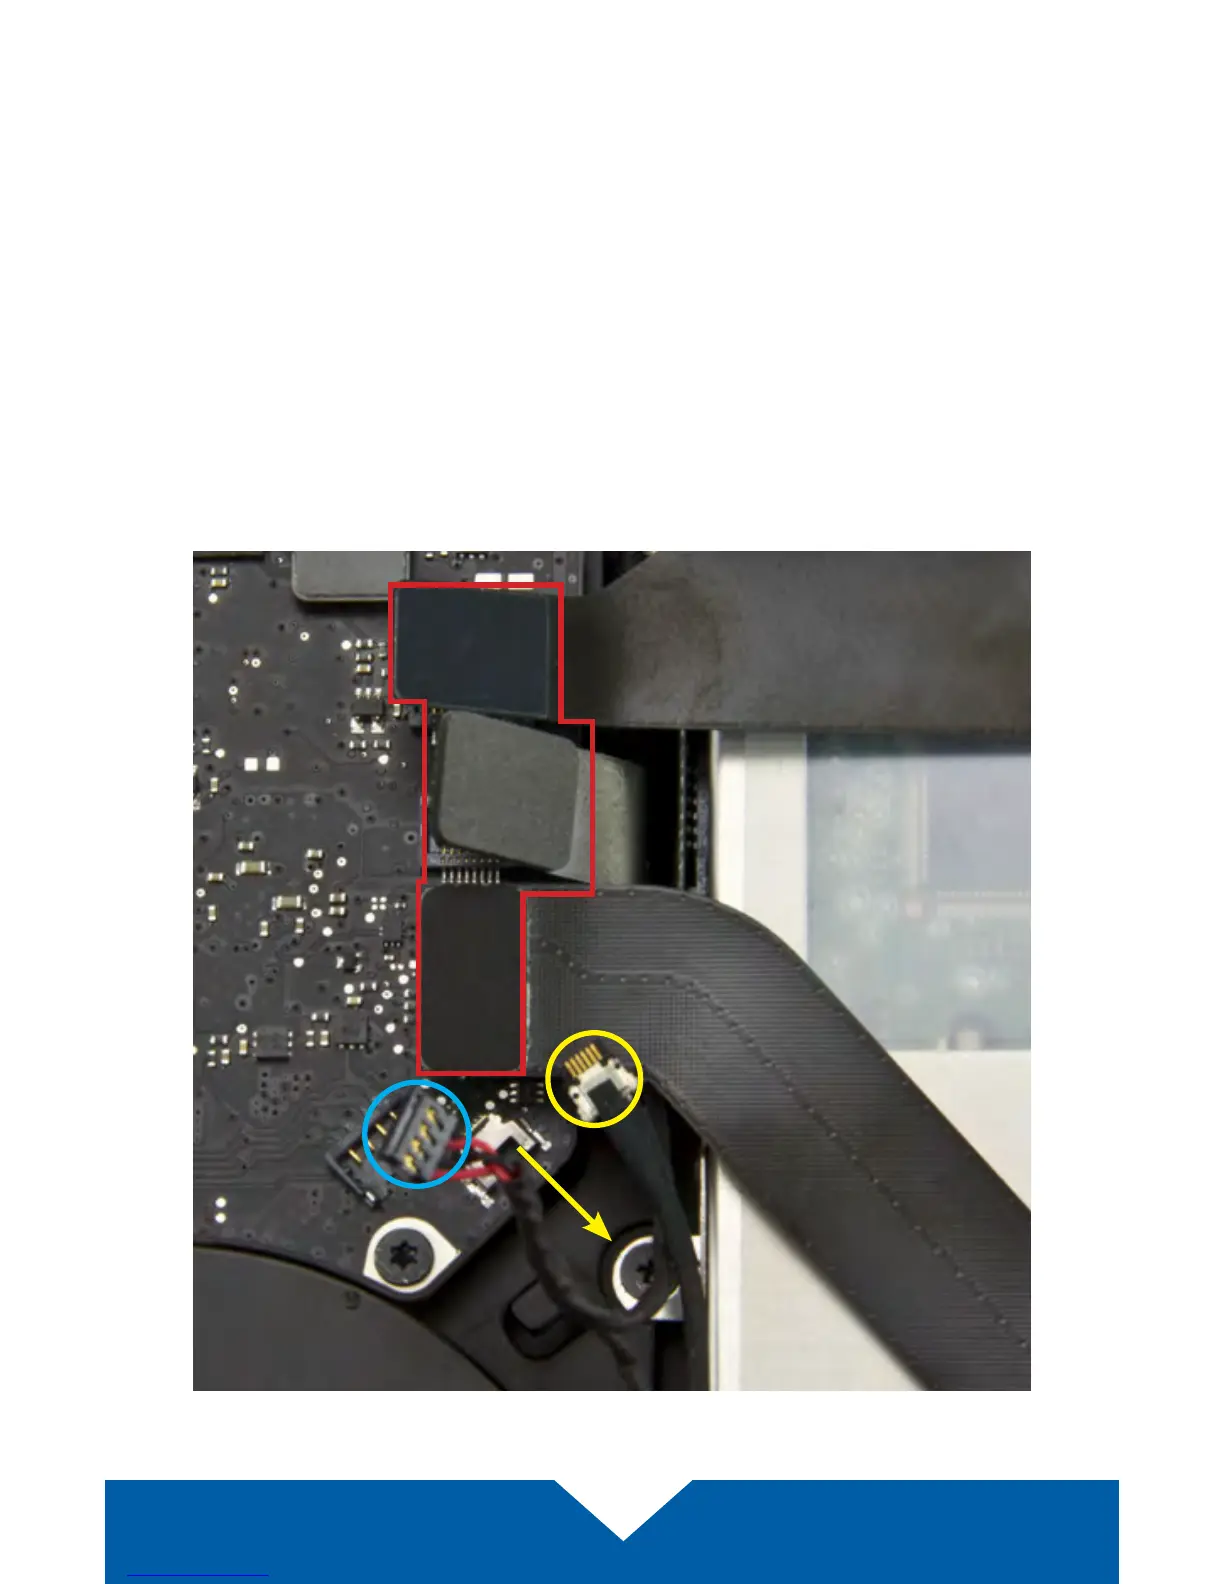
5. Follow the two black ribbon cables that sit atop the optical drive to their
connection points on the logic board. There is also a third ribbon cable
connector between them. All are highlighted below in red. Carefully
disconnect all three using the nylon pry tool.
6. Between the ribbon cables that were disconnected in Step 5 and the
fan, there are two additional cables — one black cable with two red
wires (highlighted in blue) and another black cable with a silver connector
(highlighted in yellow). For the latter, carefully pull the cable towards the
optical drive, in the direction shown. For the connector highlighted in blue,
use the nylon pry tool to gently lift the corner of the connector from the logic
board (try lifting the corner nearest the screw). Caution: the cables shown
in this step are damaged easily.