MECH-4
1-5. Connection of LISTA Adjustment System
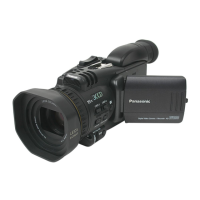
TAPE VFM3000LS (DV LISTA)
M. EQ Personal Computer (A/D Board should be installed.)
TOOL VFK1481N (LISTA Software), VFK1186 (LISTA Cable), VFK1300 (A/D Converter Board),
VFK1308P (Measuring Board), VFK1409A (Measuring Board) ← NOTE 2
VFK1317 (30P flat cable): 2pcs, VFK1309A (EVR connector board) ← NOTE 1
VFK1763 (Connection Adapter), VFK1982 (Extension Cable), VJA0941 (DC cable): 2pcs.
TP In case of use VFK1409A
F2 : ATF-ERR (VFK1409A), TP2 : TRG/HSW (VFK1409A), GND : GND (VFK1409A)
In case of use VFK1409S
F2 : ATF-ERR (VFK1409S), TP2 : TRG/HSW (VFK1810), GND : GND (VFK1409S)
NOTE 1:
Enable to use with VFK1309.
NOTE 2:
If you already have VFK1409S (Measuring board), it can be used to perform LISTA adjustment with VFK1810.
Please refer to next explanation for installation of VFK1409S.
1. Set the switches on the Measuring Board as shown below.
SW NAME& No. Setting Position
SW NAME& No. Setting Position
RS232C SEL (SW101) D-SUB
RS232C SEL (S110) D-SUB
VTR TEST (SW103) L
REC I (S101) NOR
BST TEST (SW104) NORMAL
LSI TEST (S102) NOR
SW105 H
S104 NOR
SW106 OFF
S114 EXT
SW107 CENTER position
S201 Right side
SW108 H
S202 Right side
FLUSH1 (SW102) NORMAL
S203 Right side
FLUSH2 (SW109) NORMAL
LISTA ON-OFF ON
1. Install the two test points of VFK1810 to through hole in this area and solder it at test point
at foil side of VFK1409S to fixed VFK1810.
VFK1810
Red colour of Lead wire
Black colour of Lead wire
TP1
TP2
2. Insert the two lead wires of VFK1810 to through hole.
3. Solder the red color of lead wire to pin1 of P108 on foil side on VFK1409S.
4. Solder the black color of lead wire to pin3 of P106 on foil side on VFK1409S.
VFK1409S
<VFK1308P>
<VFK1409S or VFK1409A>
 Loading...