33
DVQX2448 (ENG)
2. Getting Started
Attaching a Lens
• Make sure that the camera is turned off.
• Change the lens in a location where there is not a lot of dirt and dust.
• When attaching or detaching the interchangeable lens (H-FS12032), retract
the lens barrel.
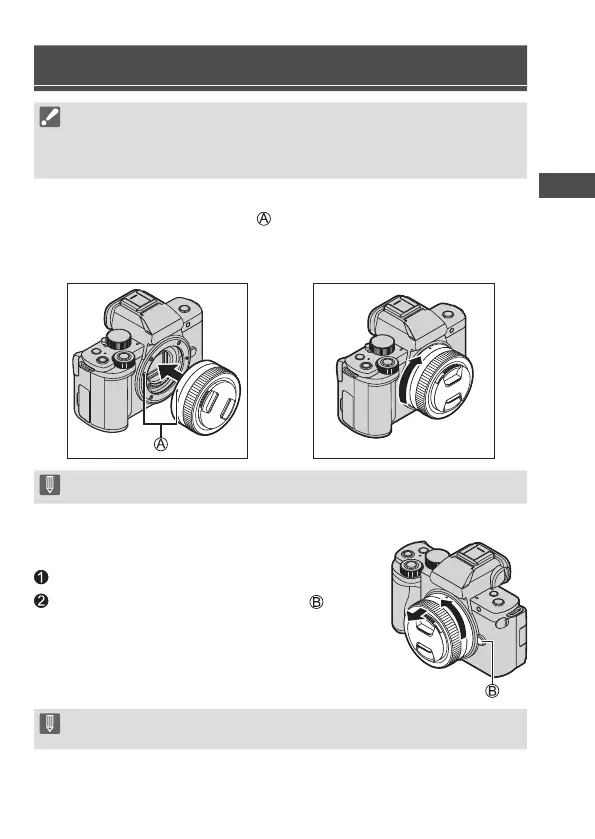
Align the lens fitting marks on the lens and camera and
then rotate the lens in the direction of the arrow.
● Attach the lens by rotating it until it clicks.
1
2
• Insert the lens straight in.
Removing a Lens
Set the camera on/off switch to [OFF].
While pressing the lens release button ,
rotate the lens in the direction of the arrow
until it stops and then remove it.
• After removing the lens, be sure to attach the body cap and the lens rear
cap.

 Loading...