Chapter 2 Getting Started — Setting up
36 - ENGLISH
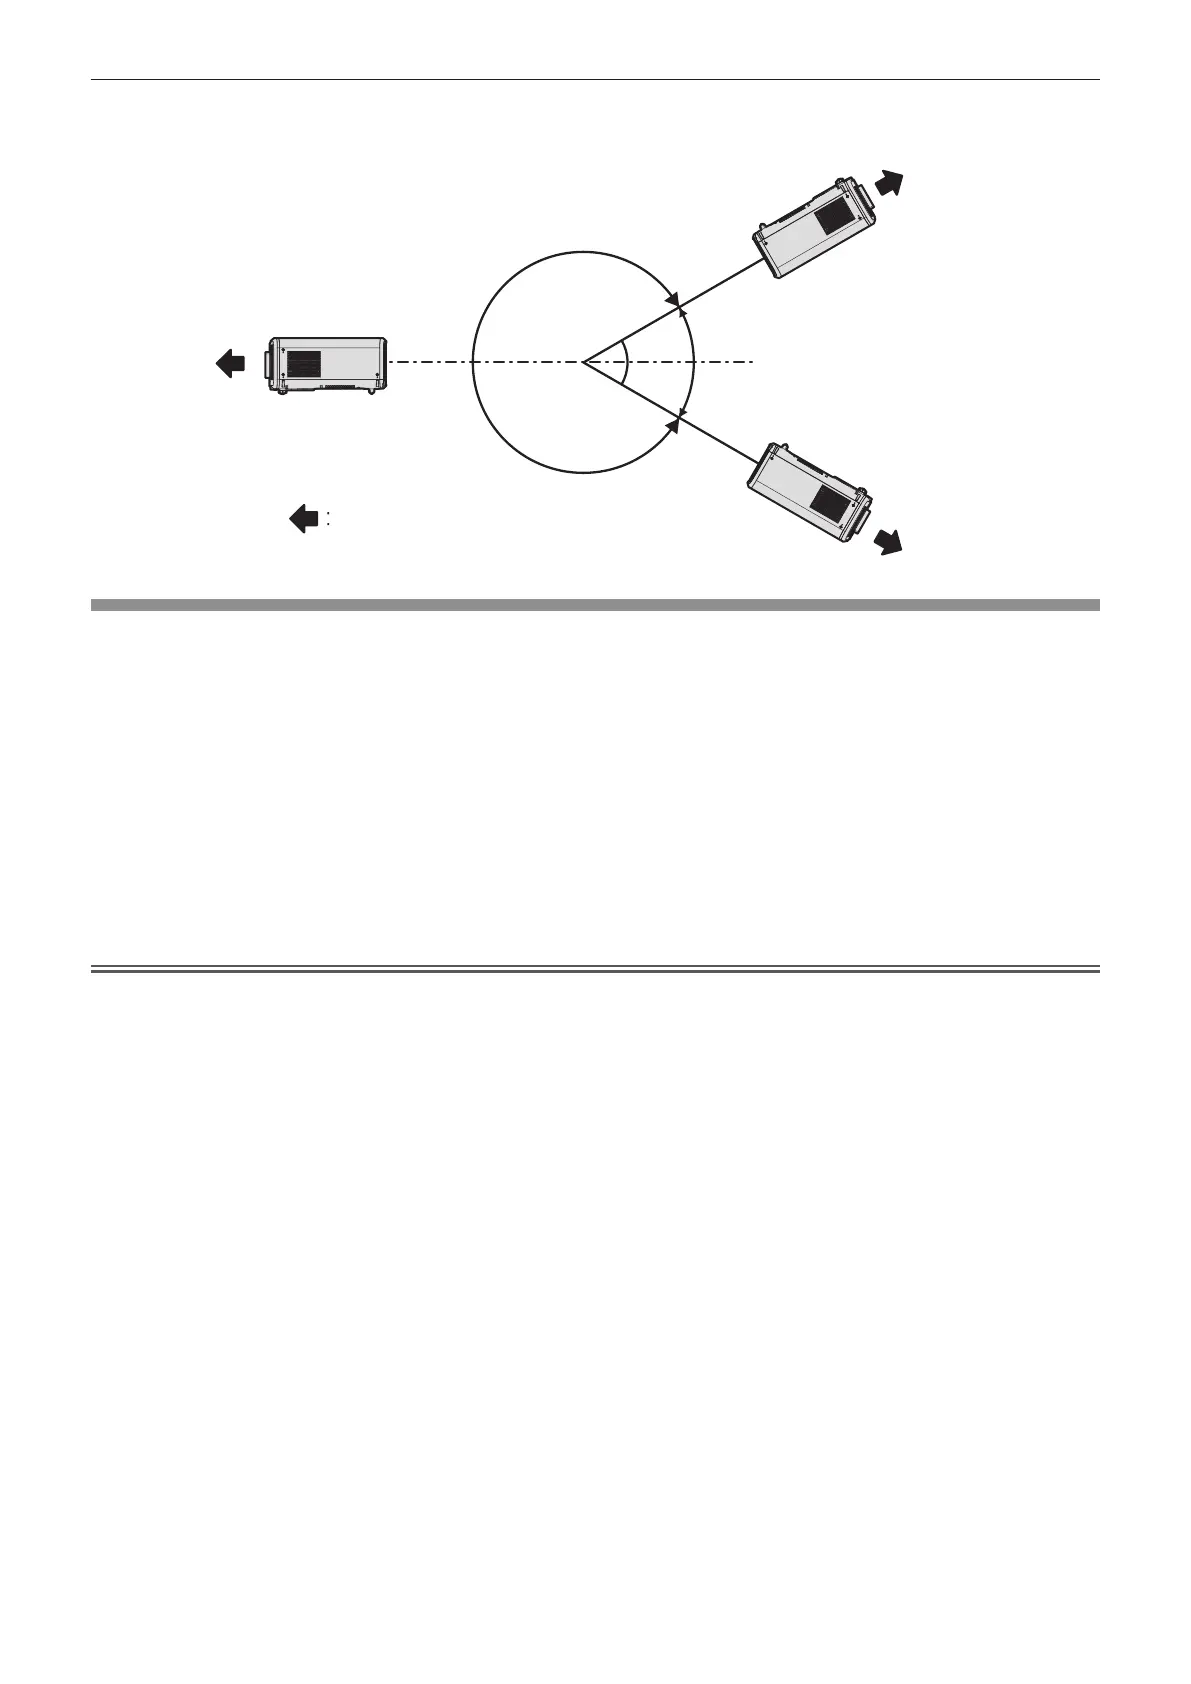
r Angle sensor
The range of the installation attitude that is detected by the angle sensor built-in the projector is as follows.
30°
30°
Floor standing installation
Floor standing installation
Projection direction
Ceiling mount installation
Parts for installation (optional)
The optional Ceiling Mount Bracket is required. The Ceiling Mount Bracket (Model No.: ET-PKD120H (for
High Ceilings) or ET-PKD120S (for Low Ceilings)) is used together with the Ceiling Mount Bracket (Model No.:
ET-PKE301B (Projector Mount Bracket)).
Model No.: ET‑PKD120H (for High Ceilings), ET‑PKD120S (for Low Ceilings), ET‑PKE301B (Projector
Mount Bracket)
When the projector is mounted to the existing Ceiling Mount Bracket (in combination with the Model No.:
ET-PKD120H (for High Ceilings) or ET-PKD120S (for Low Ceilings), and the Model No.: ET-PKE300B (Projector
Mount Bracket)), it is necessary to replace the drop-prevention wire rope with the one corresponding to this
projector. Consult your dealer.
Drop-prevention set (service model no.: DPPW1004ZA/X1)
f Be sure to use the Ceiling Mount Bracket specied for this projector.
f Refer to the Installation Instructions of the Ceiling Mount Bracket when installing and setting up the projector.
Attention
f To ensure projector performance and security, installation of the Ceiling Mount Bracket must be carried out by your dealer or a qualied
technician.

 Loading...


