Why does image in 3D eyewear flicker with Panasonic PT-RZ12K?
- AAaron SellersSep 23, 2025
If the image in the 3D eyewear flickers while using your Panasonic Projector, make sure you are within the reception range.
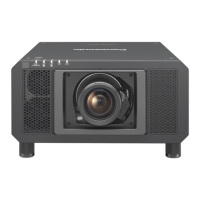
Why does image in 3D eyewear flicker with Panasonic PT-RZ12K?
If the image in the 3D eyewear flickers while using your Panasonic Projector, make sure you are within the reception range.
Why is 3D eyewear not functioning with Panasonic Projector?
If your 3D eyewear is not functioning with the Panasonic Projector: * Check if the battery is dead. Charge the battery for rechargeable eyewear, or replace the battery for battery-type eyewear. * Ensure the [3D SETTINGS] are correct.
What to do if the DIGITAL LINK input image is not displayed on Panasonic Projector?
If the DIGITAL LINK input image isn't displaying on your Panasonic Projector, verify that the connections between the twisted-pair-cable transmitter and the projector or external device are correctly done. Check that [DIGITAL LINK MODE] is set to [AUTO] or [DIGITAL LINK], and not [ETHERNET]. Finally, ensure that the input signal is compatible with the twisted-pair-cable transmitter.
What to do if my Panasonic PT-RZ12K has no image?
If you're not seeing an image on your Panasonic Projector, make sure all connections to external devices are correctly connected, and the input selection setting is correct. Verify that the [BRIGHTNESS] adjustment isn't at its minimum. Ensure the external device connected to the projector is working correctly. Check if the shutter function is in use or if the lens cover is still attached. If the power indicator is blinking red, it is recommended to consult your dealer.
How to fix Panasonic PT-RZ12K when image from computer does not appear?
If the image from a computer is not appearing on your Panasonic Projector, and you're using a D-Sub cable, ensure the cable is not longer than 10 m (32'10"). Also, check the external video output settings on the laptop; these settings may be switched by pressing the “Fn” + “F3” or “Fn” + “F10” simultaneously. Refer to your computer's user manual for specific instructions, as the method varies.
Why Panasonic Projector power does not turn on?
If your Panasonic Projector isn't powering on, verify that the power plug is securely inserted into the outlet and that the switch is set to . Also, check if the wall outlet is supplying electricity and if the circuit breakers have tripped. Finally, check whether the light source indicators / or the temperature indicator are lighting or blinking.
Why is the image on my Panasonic PT-RZ12K fuzzy?
If the image from your Panasonic Projector is fuzzy, check if the lens focus is set correctly and that the projection distance is appropriate. Also, verify if the lens is dirty and ensure the projector is installed perpendicular to the screen.
Why does the Panasonic PT-RZ12K remote control not respond?
If the remote control for your Panasonic Projector isn't responding, first check if the batteries are depleted and if the polarity is set correctly. Ensure there are no obstructions between the remote and the projector's signal receiver. Verify that you're using the remote within its effective range and that other light sources aren't interfering. Check if the [REMOTE CONTROL] setting in [CONTROL DEVICE SETUP] is set to [DISABLE] or if the terminal is used for contact control. Finally, confirm the ID number setting operation is correct.
What to do if buttons on the Panasonic Projector control panel do not operate?
If the buttons on the control panel of your Panasonic Projector are not operating, check if the [CONTROL PANEL] setting in [CONTROL DEVICE SETUP] is set to [DISABLE]. Also, check if the terminal is used for contact control.
Why does the image output from DVI-D of the computer not appear on my Panasonic PT-RZ12K Projector?
If the image from DVI-D of the computer does not appear on your Panasonic Projector, check if the [EDID SELECT] setting in [DVI-D IN] is set to [EDID3] or [EDID2:PC]. You might need to update the graphics accelerator driver of the computer to the latest version. Also, try making the [EDID SELECT] setting in [DVI-D IN] and then restarting the computer.
| Matrix size | 0.96 \ |
|---|---|
| Heat dissipation | 4096 BTU/h |
| Native aspect ratio | 16:10 |
| Vertical scan range | 24 - 120 Hz |
| Horizontal scan range | 15 - 100 kHz |
| Projection technology | 3-Chip DLP |
| Contrast ratio (typical) | 20000:1 |
| Screen size compatibility | 70 - 1000 \ |
| Projector native resolution | WUXGA (1920x1200) |
| Keystone correction, vertical | -40 - 40 ° |
| Keystone correction, horizontal | -15 - 15 ° |
| Resource CD | Yes |
| Cables included | AC |
| Noise level | 43 dB |
| 2D/3D frequency image | 120 Hz |
| Dot clock scanning frequency | 162 MHz |
| Placement | Ceiling, Floor |
| Product type | Ceiling / Floor mounted projector |
| Product color | Black |
| Housing material | Plastic |
| Market positioning | - |
| Focal length range | - mm |
| Vertical lens shift range | -55 - 55 % |
| Horizontal lens shift range | -20 - 20 % |
| Built-in display | No |
| AC input voltage | 100 - 240 V |
| AC input frequency | 50 - 60 Hz |
| Power consumption (max) | 1200 W |
| Power consumption (standby) | 4 W |
| Power consumption (typical) | 800 W |
| Power consumption (economy mode) | 620 W |
| Lamps quantity | 1 lamp(s) |
| Light source type | Laser |
| Service life of light source | 20000 h |
| Service life of light source (economic mode) | 24000 h |
| Supported video modes | 480i, 480p, 720p, 1080i, 1080p |
| Analog signal format system | NTSC, PAL, SECAM |
| BNC input ports | 2 |
| Composite video in | 0 |
| Serial interface type | RS-232 |
| USB 2.0 ports quantity | USB 2.0 ports have a data transmission speed of 480 Mbps, and are backwards compatible with USB 1.1 ports. You can connect all kinds of peripheral devices to them. |
| Ethernet LAN data rates | 10, 100 Mbit/s |
| Operating temperature (T-T) | 0 - 50 °C |
| Operating relative humidity (H-H) | 10 - 80 % |
| Depth | 740 mm |
|---|---|
| Width | 578 mm |
| Height | 323.5 mm |
| Weight | 44000 g |
| Package depth | 964 mm |
| Package width | 824 mm |
| Package height | 399 mm |
| Package weight | 53400 g |
Important safety guidelines and warnings before using the projector.
Guidelines and warnings related to projector installation locations and methods.
Measures to take for product security and preventing unauthorized access.
General warnings and advice for optimal picture quality and projector care.
Detailed explanation of the remote control buttons and their functions.
Description of all input/output terminals on the projector body.
Information on different installation modes for projector placement.
Information on image size and projection distance based on lens choice.
Tables detailing projection distances for various lenses and aspect ratios.
Formulas to calculate projection distance based on image size and lens.
Guidance on connecting external devices and cables to the projector.
Important considerations before making any cable connections.
Example setup for connecting devices via DIGITAL LINK.
Step-by-step guide for powering the projector on and off safely.
Initial setup procedures including focus adjustment and language selection.
Configuring operating parameters like operating mode and light output.
Setting the projector's projection method based on installation.
Basic steps for projecting an image, including signal selection and adjustment.
Methods for adjusting lens position for optimal image clarity and placement.
Specific procedures for adjusting the fixed-focus lens for optimal image.
Detailed instructions on using the remote control for various projector functions.
How to navigate and use the projector's on-screen menu system for settings.
Step-by-step guide for interacting with the projector's menu interface.
Picture settings including mode, contrast, brightness, color, and tint.
Position settings for shift, aspect ratio, zoom, and geometry.
Advanced settings for digital cinema reality, blanking, and input resolution.
Advanced menu options like clamp position, edge blending, and frame response.
Settings for color matching, screen correction, auto signal, and input options.
Display options like image rotation, back color, startup logo, and uniformity.
Core projector setup options including ID, projection method, and operation settings.
Security features like password protection and device control settings.
Adjustments for image quality including mode, contrast, brightness, color, and tint.
Switching between different picture modes for optimal viewing.
Adjusting the color contrast of the projected image.
Adjusting the dark (black) parts of the projected image.
Adjusting the color saturation of the projected image.
Adjusting the skin tone in the projected image.
Adjusting color temperature for bluish or reddish image tones.
Adjusting the sharpness of the projected image.
Automatic light adjustment for optimal contrast.
Settings for adjusting image position, aspect ratio, zoom, and geometry.
Moving the image position vertically or horizontally.
Adjusting the image size using the zoom function.
Correcting various types of distortion in a projected image.
Adjusting trapezoidal or curved image distortion.
Advanced image processing settings like digital cinema reality and blanking.
Seamlessly overlapping multiple projector images by adjusting brightness.
Settings for color matching, screen correction, auto signal, and input options.
Correcting color differences between projectors when using multiple units.
Setting backup function for seamless signal switching during disruption.
Core projector setup options including ID, projection method, and operation settings.
Setting the projector's projection method based on installation.
Configuring operating parameters like operating mode and light output.
Selecting operating modes like NORMAL, ECO, and LONG LIFE.
Adjusting the maximum brightness level.
Adjusting the brightness of the light source.
Setting the operation of the brightness control function.
Security features like password protection and device control settings.
Enabling or disabling the security password prompt.
Enabling/disabling button operations on the control panel and remote.
Specific instructions for enabling/disabling individual buttons.
Network configuration for Digital Link, Art-Net, and web control.
Initial network configuration before using network functions.
Setting up network control methods like web control and PJLink.
Information on network connectivity and supported control software.
Displays detailed status of projector components like power, temperature, and runtime.
Information on error and warning codes, with troubleshooting measures.
Lists of specific components that have failed and require attention.
Lists of warning conditions such as high temperatures or filter issues.
Basic projector controls like power, shutter, input selection, and system settings.
Advanced projector controls including sub memory, projection method, and test patterns.
Configuring network settings such as IP address, subnet mask, and DNS.
Configuring E-mail settings for sending alerts and reports.
Explains indicator lights for problems and their meanings.
Procedures for cleaning and replacing projector parts like the air filter.
Cleaning the outer case and lens front surface.
Information on the air filter unit, including cleaning and attachment.
Procedures for replacing the air filter unit.
A guide to diagnosing and resolving common projector problems.
Information on projector error and warning codes displayed by the self-diagnosis system.
Comprehensive list of video signals and resolutions supported by the projector.
Table specifying compatible 3D video signals for projection.
Detailed list of projector terminals and their specifications.



 Loading...