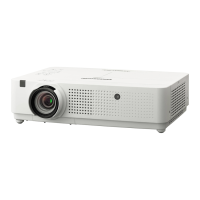
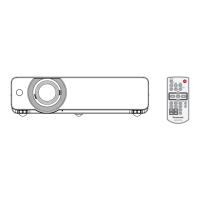
About your projector
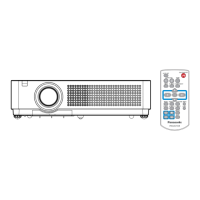
Remote control
1
2
3
4
5
6
7
8
9
10
14
13
12
15
16
17
18
11
Attention
f Do not drop the remote control.
f Avoid contact with liquids.
f Do not attempt to modify or disassemble the remote control.
f Please observe the following contents that are described on
the back of the remote control unit (see the right picture).
g Do not use a new battery together with an old battery.
g Do not use unspecied batteries.
g Make sure the polarities (+ and -) are correct when inserting the batteries.
In addition, please read the contents that are related to batteries in the “Read this rst!”.
1. 请勿把旧电池和新电池一起使用。
2. 请勿使用不合规格的电池。
3. 确保电池安装正确。
原产地:中国
1.Do not use old battery with new one.
2.Do not use batteries other than the
type specified.
3.Be sure the batteries are inserted properly.
1 Power <v/b> button (v Standby / b Power on)
Sets the projector to the state where the projector is switched
off (standby mode). Also starts projection when the power is
switched off (standby mode).
2 Input selection buttons (<COMPUTER 1> / <COMPUTER 2>/
<HDMI 1/2> / <VIDEO> / <MEMORY VIEWER/USB DISPLAY/
NETWORK>)
Switches the input signal to project. (
Æ
page 43)
3 <MENU> button / <RETURN> button / asqw buttons /
<ENTER> button
Used to navigate through the menu screen. (x page 52)
The asqw buttons are also used to enter password or
characters for [SECURITY].
4 <FREEZE> button
Pauses the projected image and mute the audio temporarily.
(x page 46)
5 Number (<1> - <6>) buttons
Used for entering the ID number in a multiple projector
environment or a password.
6 Remote control signal transmitter
7 <AUTO SETUP> button
Used to perform automatic adjustment while projecting the
image (
Æ
page 47).
8 <MUTE> button
Used to mute the audio. (
Æ
page 46)
9 <AV MUTE> button
Used to turn off the audio and video temporarily. (
Æ
page 46)
10 <DAYLIGHT VIEW> button
Used to correct the image when the projector is used in a bright
surroundings. (
Æ
pages 49, 58)
11 <DEFAULT> button
Resets the content of the sub-menu to the factory default.
(
Æ
page 53)
12 <ID SET> button
Sets the projector ID on the remote control for a system using
multiple projectors. (x page 27)
13 <D.ZOOM+> button / <D.ZOOM-> button
Zooms in and out the images. (
Æ
page 48)
14 <VOL+> button / <VOL-> button
Adjusts the volume level of the built-in speaker or the audio
output. (
Æ
page 46)
15 <FUNCTION> button
Specifys a shortcut button for a frequently used operation.
(
Æ
page 49)
16 <ID ALL> button
Used to simultaneously control all the projectors with one
remote control when using multiple projectors. (x page 27)
17 <P-TIMER> button
Operate the P-TIMER function. (
Æ
page 48)
18 <SCREEN ADJ> button
Corrects the distortion of the projected image. (
Æ
page 47)
Caution label at the back of the remote control
ENGLISH - 23
Chapter 1 Preparation - About your projector
 Loading...
