EasyManua.ls Logo

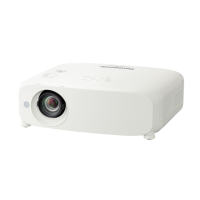
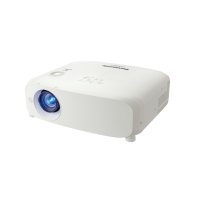
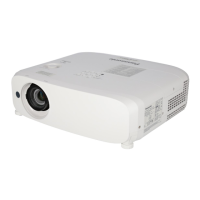
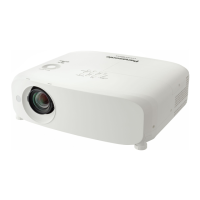
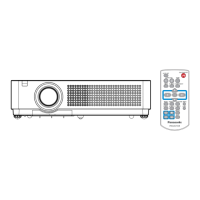
Panasonic PT-VZ585N

Panasonic PT-VZ585N
181 pages
To Next Page IconTo Next Page
Loading...
Operating Instructions
Functional Manual
LCD Projector
Commercial Use
Thank you for purchasing this Panasonic product.
This manual is intended for products manufactured from Aug. 2018 and beyond.
Before operating this product, please read the instructions carefully, and save this manual for
future use.
Before using your projector, be sure to read “Read this rst!” (
Æ
pages 4 to 15).
Model No.
PT-VZ585N
PT-VW545N
PT-VX615N
ENGLISH
DPQP1163ZE/X1

Table of Contents

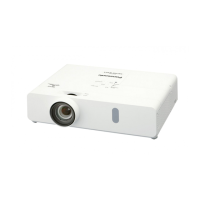
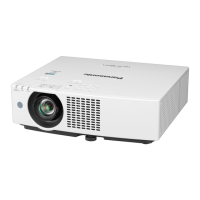
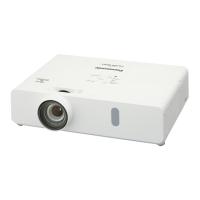
Other manuals for Panasonic PT-VZ585N

Questions and Answers:

Panasonic PT-VZ585N Specifications

General IconGeneral
Native aspect ratio16:10
Projection distance- m
Projection technology3LCD
Contrast ratio (typical)16000:1
Screen size compatibility30 - 300 \
Projector native resolutionWUXGA (1920x1200)
Lamp typeUHM
Lamp power280 W
Light source typeLamp
Service life of light source- h
FocusManual
Throw ratio1.09–1.77:1
Zoom capabilityYes
Focal length range15.3 - 24.6 mm
Vertical lens shift range0 - 44 %
Analog signal format system-
DVI portNo
USB 2.0 ports quantityUSB 2.0 ports have a data transmission speed of 480 Mbps, and are backwards compatible with USB 1.1 ports. You can connect all kinds of peripheral devices to them.
Ethernet LAN (RJ-45) ports1
Noise level37 dB
RMS rated power10 W
PlacementDesktop
Product typeStandard throw projector
Product colorWhite
Market positioningPresentation
Power sourceAC
AC input voltage120 V
AC input frequency50 - 60 Hz
Power consumption (standby)- W
Power consumption (typical)410 W
Operating temperature (T-T)0 - 40 °C
Operating relative humidity (H-H)20 - 80 %
Quantity per pack1 pc(s)
Weight and Dimensions IconWeight and Dimensions
Depth332 mm
Width389 mm
Height125 mm
Weight4800 g

Summary

Read This First! Safety and Compliance

General Safety Precautions

Safety warnings regarding electrical shock, fire hazards, and proper handling during operation.

Molded Plug Safety Instructions

Safety instructions and wiring details for the molded mains plug.

Power and Installation Safety Warnings

Important safety warnings for power connection and projector installation.

Handling Precautions and Accessory Safety

Warnings for handling the projector body, lens, and accessories, including battery safety.

Additional Safety Warnings

Further safety warnings covering power, installation, lamp replacement, and battery handling.

Chapter 1 Preparation Overview

Precautions for Use

Essential precautions for transporting, installing, and operating the projector.

Security Measures

Safety measures for using the projector, focusing on preventing information leaks and unauthorized access.

Projector Body and Controls Overview

Identification of the projector's external parts and features, including ports and indicators.

Projector Terminals and Control Panel

Details on connecting terminals and the projector's control panel and indicators.

Chapter 2 Getting Started

Projector Setup and Installation Modes

Explanation of different installation modes (desk, ceiling) and the projector's angle sensor.

Ceiling Mount and Projection Distance Setup

Information on optional ceiling mount brackets and guidelines for screen size and throw distance.

Chapter 3 Basic Operations

Projector Power Operations

Instructions for connecting/disconnecting the power cord and understanding the power indicator status.

Initial Projector Setup

Steps for initial setup, including language selection and basic projector configuration.

Image Adjustments and Powering Off

Steps for making image adjustments and the procedure for turning the projector off.

Projecting and Input Source Selection

How to start projecting and switch between different input sources using the remote control.

Adjusting Image State

Steps for adjusting projection angle, zoom, focus, and vertical shift for optimal image display.

Remote Control Operations: Image and Screen Adjustments

Using remote control for auto setup, screen adjustment (keystone, corner, curve), and digital zoom.

Chapter 4 Settings Overview

On-Screen Menu Navigation

How to navigate and use the projector's on-screen menu system for various settings.

Picture Menu: Basic Image Adjustments

Adjusting picture mode, contrast, brightness, and color saturation for optimal image quality.

Picture Menu: Color, Tint, Sharpness, Temperature

Adjusting tint, sharpness, and color temperature for fine-tuning the image appearance.

Picture Menu: Advanced Image Settings

Advanced picture settings including gamma, iris, daylight view, and digital cinema reality.

Position Menu: Keystone and Screen Adjustment

Using real-time keystone and screen adjustment for correcting image distortion.

Position Menu: Distortion Correction

Detailed steps for adjusting keystone and corner correction to fix image shape distortions.

Position Menu: Image Aspect Ratio

Adjusting overscan and aspect ratio settings for proper image display on different screens.

Display Option Menu: Color Adjustments

Adjusting color settings for 3 colors (RGB) and white balance for multi-projector use.

Display Option Menu: Advanced Color and Correction

Advanced color adjustments for 6 colors and color correction for specific input signals.

Projector Setup Menu: Status and ID Settings

Viewing projector status, selecting computer inputs/outputs, and setting projector IDs for multi-projector control.

Projector Setup Menu: Startup and Projection Method

Configuring startup behavior, projection method based on installation, and lamp power settings.

Projector Setup Menu: Eco Management

Optimizing power usage with eco management settings like auto power save and power management.

Projector Setup Menu: Audio Settings

Detailed audio settings including volume, mute, standby output, and input selection.

Security Menu: Password Management

Setting and changing the security password for projector access and initial setup.

NetworkUSB Menu: Digital Link Settings

Configuring DIGITAL LINK communication modes and checking connection status.

NetworkUSB Menu: Wired LAN Settings

Performing wired LAN connection settings, including DHCP, IP address, and security configurations.

NetworkUSB Menu: Wireless LAN Setup Modes

Setting up wireless LAN connections using SIMPLE, M-DIRECT, or USER modes.

Chapter 5 Operation of Function

Web Control Function Overview

How to access and use the projector's web control interface for management and settings.

Chapter 6 Maintenance

Lamp and Temperature Indicators

Understanding projector indicators for lamp status and temperature warnings, and basic troubleshooting.

Maintenance Procedures

How to perform maintenance on the outer case, lens, and air filter unit.

Air Filter Maintenance

Step-by-step instructions for removing, washing, and drying the air filter unit.

Reattaching and Resetting Air Filter

Procedure for reattaching the air filter unit and resetting the filter counter after maintenance.

Lamp Unit Replacement

Information on replacing the lamp unit, including warnings, notes, and when replacement is needed.

Procedure for Lamp Unit Replacement

Detailed steps for safely replacing the projector's lamp unit.

Replacing the Air Filter Unit

Instructions for replacing the air filter unit and associated procedures.

Troubleshooting Common Problems

A guide to troubleshooting common projector issues and their potential solutions with page references.

Related product manuals