12
RQT7801
Recording tips
Your attention is drawn to the fact recording pre-recorded tapes or
discs or other published or broadcast material may infringe
copyright laws.
Use normal position/TYPE
I
tape only.
Preparation:
Wind the cassette just past its leader so that recording can begin
immediately.
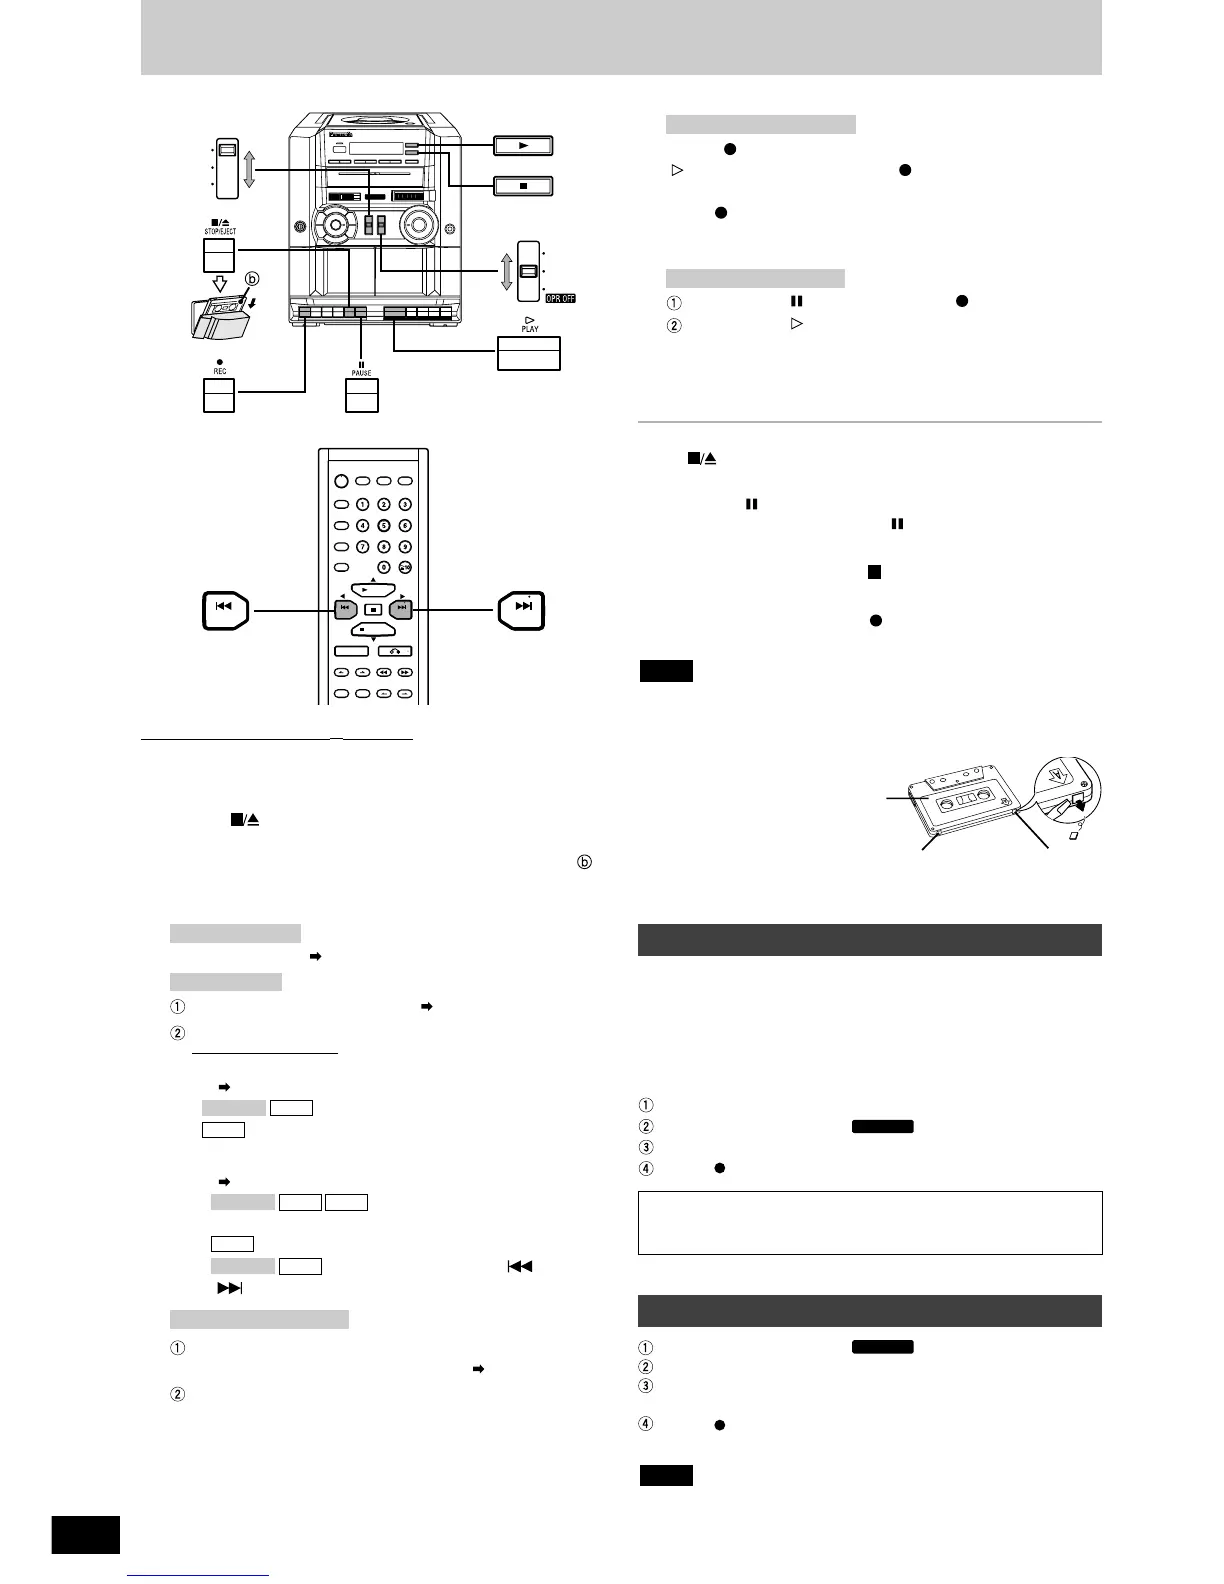
1
Press [ STOP/EJECT] and insert the cassette to
be recorded in DECK1.
Insert the tape with the side to be recorded facing out ( ).
Close the tape deck by hand.
2
Set [SELECTOR] to the source to be recorded.
Tune in the station. ( page 11)
Insert the CD you want to record ( page 6).
Prepare the desired CD recording mode.
Remote control only
• To record programmed tracks
( Program play on page 8)
: do steps 1-2
: do steps 1, 3-4
• To record CD/tracks by using CD Play Modes
( CD Play Modes on page 8)
1. : do step 1
Make sure that the CD is stopped.
2. 1-REPEAT mode: do steps 1,3-4
3. 1-REPEAT mode: Press [ PREV] or
[ NEXT] to select the track.
Insert the tape inside DECK 2 with the side to be played
facing out. Close the tape deck by hand. ( page 11).
Set [EDIT/FM MODE/BP] to HIGH or NORMAL.
HIGH: High speed
NORMAL: Normal speed
Tape-to-tape recording:
CDVCD 1.1
MP3
MP3CDVCD 1.1
MP3
CDVCD 1.1
CD recording:
Radio recording:
3
Press [ REC] to start recording.
[ PLAY] is also depressed with [ REC].
Note for CD recording:
Press [ REC] after the track numbers and so on are shown on
the unit display.
Recording and CD play automatically begin simultaneously.
Press DECK1 [ PAUSE], then press [ REC].
Press DECK2 [ PLAY] to start recording.
Deck2 playback and Deck1 recording start simultaneously.
Recording stops and the buttons are released when the end of the
tape is reached. (DECK1)
To stop recording
Press [ STOP/EJECT].
To pause recording
Press DECK 1 [ PAUSE].
To resume recording, press DECK 1 [ PAUSE] again.
If the tape finishes before the CD
The CD continues playing. Press [ PBC/CLEAR, STOP] to stop it.
To record on the other side of the cassette
Turn the cassette over and press [ REC].
Tape-to-tape recording:
Radio and CD recording:
Recording
• Do not change the editing selector during editing. The playback
sound may flutter.
• Any changes made to the volume or sound quality during recording
will not affect the recording.
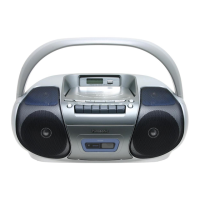
Erasure prevention
Break the tab.
Cover the tab with
adhesive tape when you
want to use the tape for
recording again.
Note
Side A
Tab for side B
Tab for side A
• Changes to volume and tone will not affect the recording.
• Wind the cassette just past its leader so that recording can begin
immediately.
• When recording MW, set [EDIT/FM MODE/BP] to the position
where there is least noise.
• Use the AC power supply cord or insert fresh batteries.
• When erasing recorded sound,
Insert the tape in DECK 1.
Set [SELECTOR] to TAPE/ .
Set [EDIT/FM MODE/BP] to HIGH or NORMAL .
Press [ REC].
Recording through the built-in microphone (MIC)
Set [SELECTOR] to TAPE/ .
Set [EDIT/FM MODE/BP] to MIC/MONO.
Insert the tape in DECK 1 with the side to be recorded facing out.
Close the tape deck by hand.
Press [ REC].
Face towards the sound source.
• When recording through the built-in microphone, no sound will be
heard from the speakers.
Note