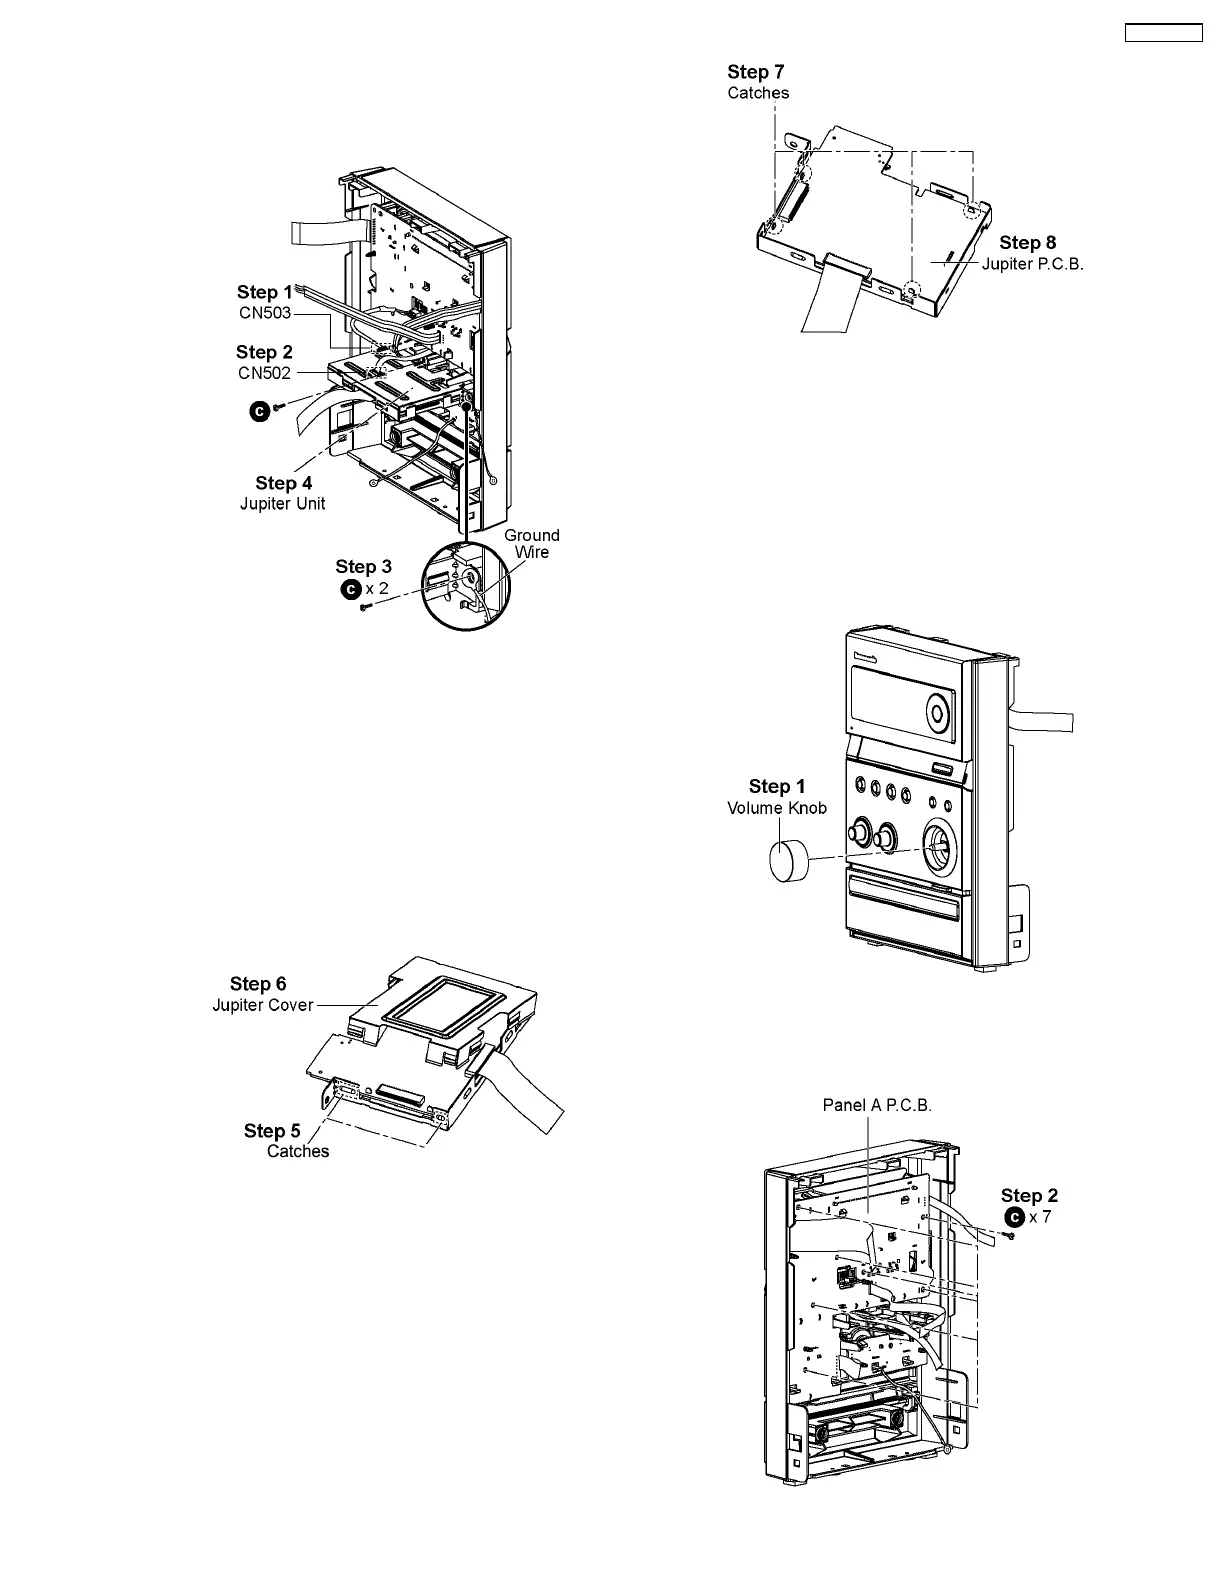
8.5. Disassembly of Jupiter P.C.B.
• Follow the (Step 1) - (Step 5) of Item 8.3
• Follow the (Step 1) - (Step 8) of Item 8.4
Step 1 : Detach 5P cable at the connector (CN503) on Jupiter
P.C.B..
Step 2 : Detach 6P FFC cable at the connector (CN502) on
Jupiter P.C.B..
Step 3 : Remove 2 screws.
Caution : Keep the Ground wire in safe place. Place it back
during assembling.
Step 4 : Remove the Jupiter Unit.
• Disassembly of Jupiter P.C.B. (Jupiter Unit)
Step 5 : Release all the catches.
Step 6 : Remove Jupiter Cover.
Step 7 : Desolder 4 points.
Step 8 : Remove Jupiter P.C.B..
Note : During reassembling procedures, ensure 4 points is
solder onto Jupiter P.C.B..
8.6. Disassembly of Panel A P.C.B.
• Follow the (Step 1) - (Step 5) of Item 8.3
• Follow the (Step 1) - (Step 8) of Item 8.4
• Follow the (Step 1) - (Step 4) of Item 8.5
Step 1 : Remove the Volume Knob.
23
SA-PMX3GN