10.7 Disassembly of Main P.C.B.
· Follow the (Step 1) - (Step 2) of Item 10.3 -
Disassembly of Top Cabinet
· Follow the (Step 1) - (Step 6) of Item 10.4 -
Disassembly of CD Lid
· Follow the (Step 1) of Item 10.5 - Disassembly of the
Rear Panel
· Follow the (Step 1) - (Step 3) of Item 10.6 -
Disassembly of the CD Mechanism Unit
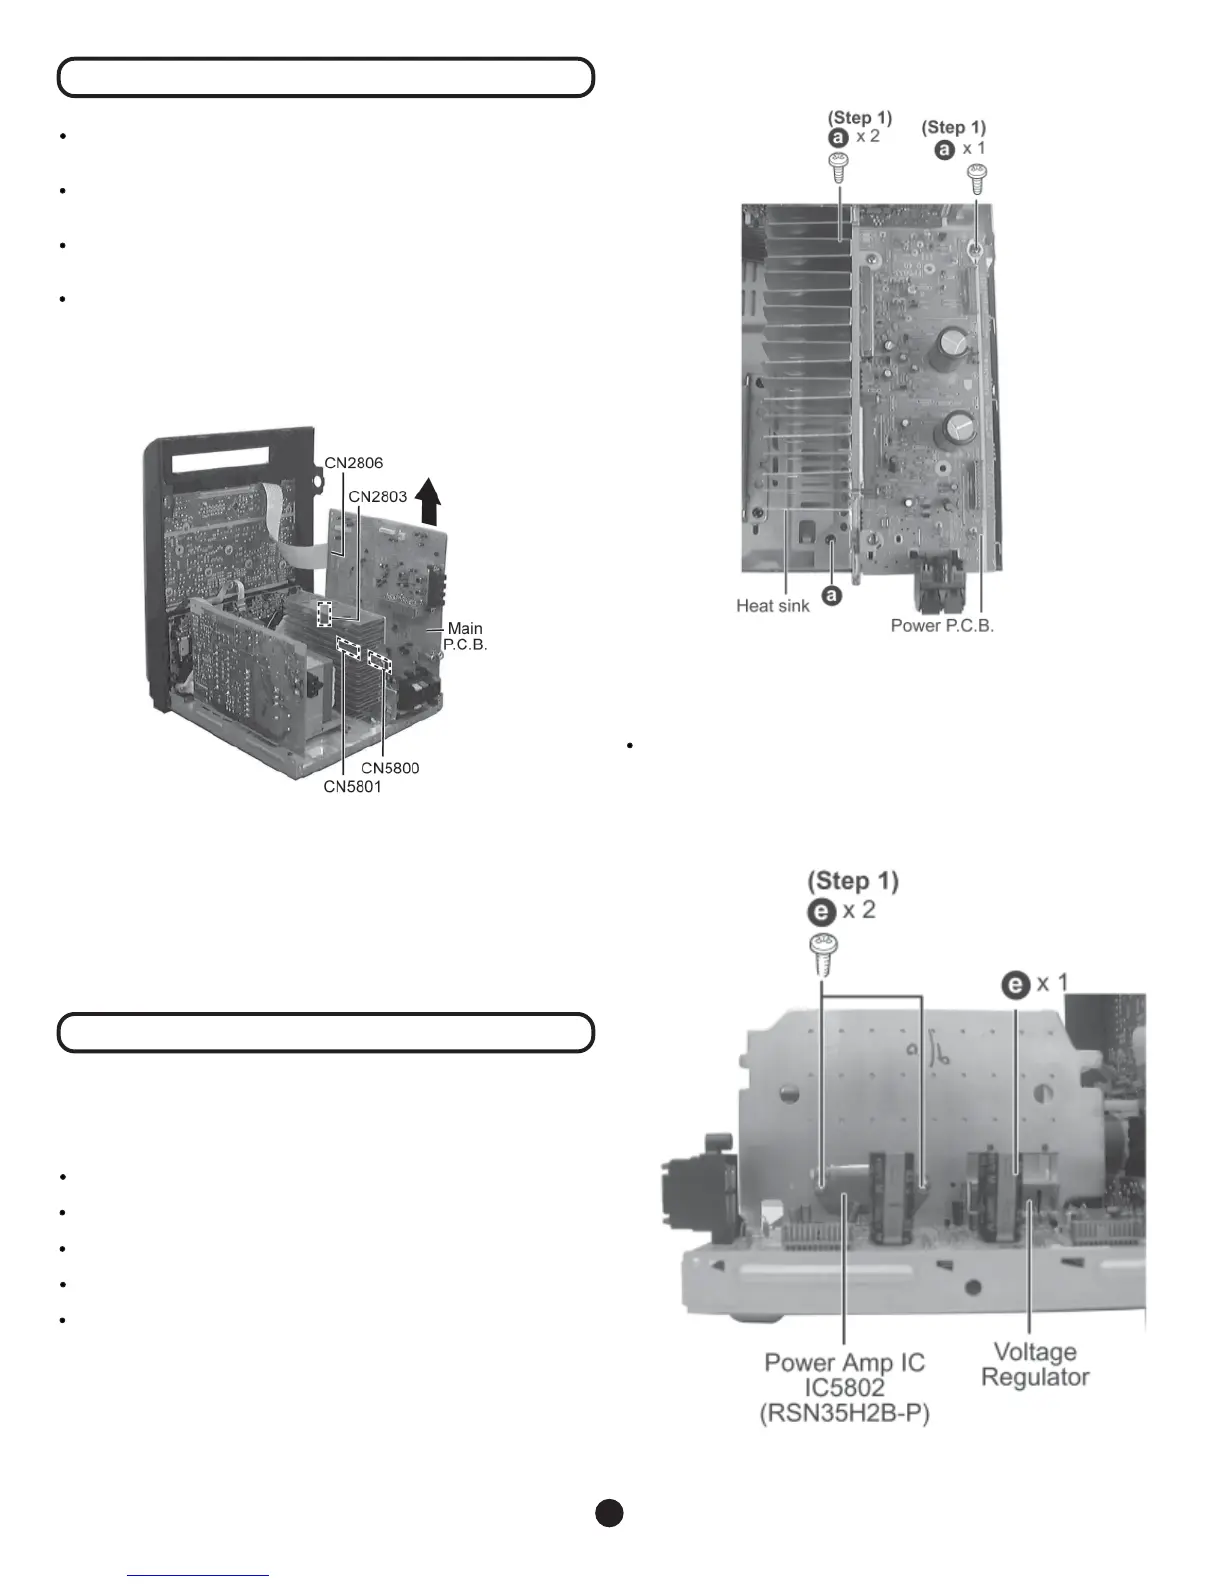
Step 1 Disconnect FFC wires CN2803 & CN2806 from Main
P.C.B.
Step 2 Lift up Main P.C.B. by disconnecting connectors
CN5800 & CN5801 as arrow shown above.
10.8 Disassembly of Power P.C.B.
· Follow the (Step 1) - (Step 2) of Item 10.3 - Disassembly
of Top Cabinet
· Follow the (Step 1) - (Step 6) of Item 10.4 - Disassembly
of CD Lid
· Follow the (Step 1) of Item 10.5 - Disassembly of the
Rear Panel
· Follow the (Step 1) - (Step 3) of Item 10.6 - Disassembly
of the CD Mechanism Unit
· Follow the (Step 1) - (Step 2) of Item 10.7 - Disassembly
of the Main P.C.B.
Step 1 Remove the 2 screws fixed at heat sink and 1 screw
fixed at Power P.C.B..
Note:
Insulate the Power P.C.B. with insulation material to avoid
short circuit.
· Replacement of the Power Amplifier IC/ Voltage
Regulator
Step 1 Remove 2 screws fixed to the Power Amplifier IC and 1
screw to Voltage Regulator.
13