20
TH-50VX100U / TH-50VX100E
8 Disassembly and Assem-
bly Instructions
• To disassemble P.C.B., wait for 1 minute after power was off
for discharge from electrolysis capacitors.
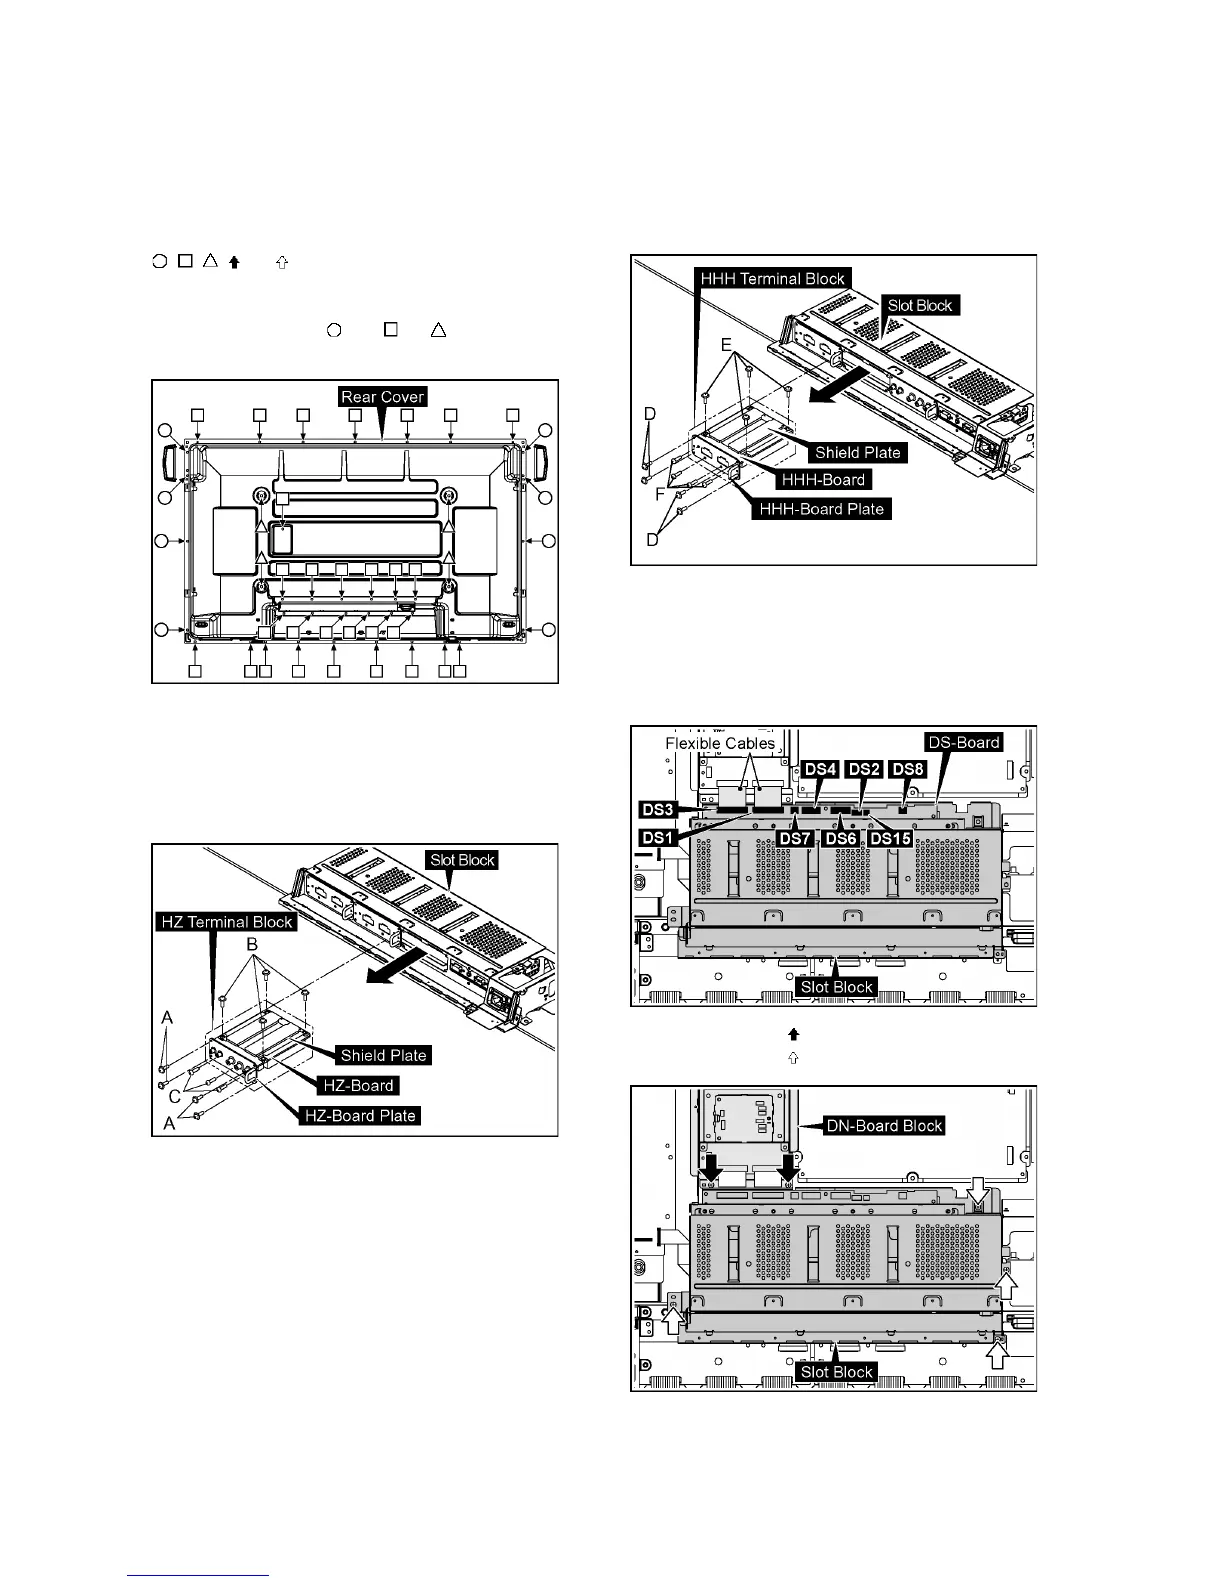
• , , , and marks indicate screw positions.
8.1. Removal of Rear Cover
1. Remove screws ( ×8 , ×28 , ×4 ) and then remove
the Rear Cover.
8.2. Removal of HZ-Board
1. Remove 4 screws (A) and then remove the HZ Terminal
Block.
2. Remove 4 screws (B).
3. Remove 3 screws (C) and then remove HZ-Board.
8.3. Removal of HHH-Board
1. Remove 4 screws (D) and then remove the HHH Terminal
Block.
2. Remove 4 screws (E).
3. Remove 4 screws (F) and then remove HHH-Board.
8.4. Removal of Slot Block
1. Disconnect the connectors (DS2, DS4, DS6, DS7, DS8,
DS15).
2. Remove the flexible cables from the connectors (DS1,
DS3).
3. Remove 2 screws ( ).
4. Remove 4 screws ( ) and then remove the Slot Block.




 To Next Page