29
TH-65PF11UK
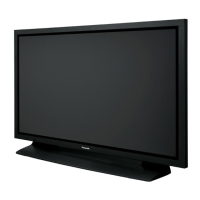
8.19.4. Removal of C4-Board
1. Disconnect the connectors (C43, C45).
2. Remove the flexible cable from the connector (C41).
3. Remove 10 screws ( ) and then remove the flexible
cables from the connectors (CB11, CB12, CB13, CB14,
CB15).
4. Remove 5 screws ( ) and then remove C4-Board.
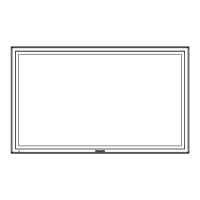
8.19.5. Removal of C5-Board
1. Remove the flexible cables from the connectors (C50,
C51, C52, C53).
2. Remove 10 screws ( ) and then remove the flexible
cables from the connectors (CB6, CB7, CB8, CB9,
CB10).
3. Remove 5 screws ( ) and then remove C5-Board.
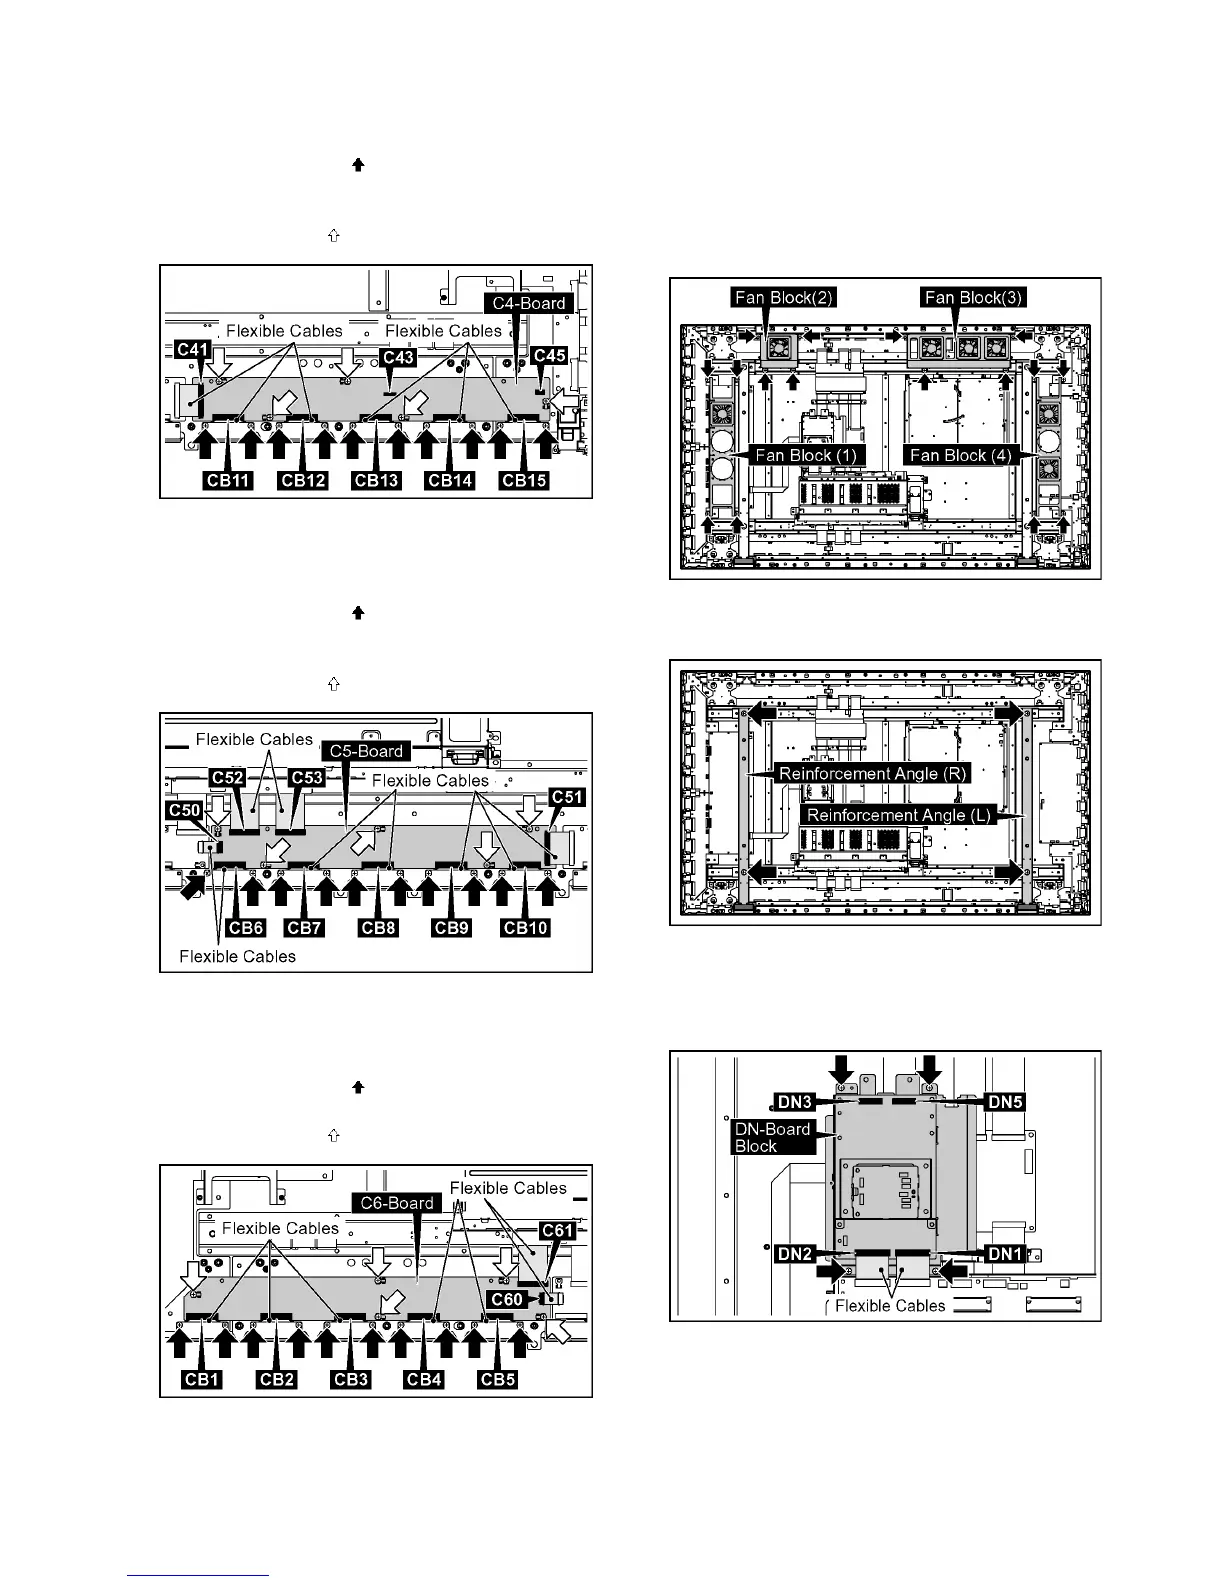
8.19.6. Removal of C6-Board
1. Remove the flexible cables from the connectors (C60,
C61).
2. Remove 10 screws ( ) and then remove the flexible
cables from the connectors (CB1, CB2, CB3, CB4, CB5).
3. Remove 5 screws ( ) and then remove C6-Board.
8.20. Removal of Plasma Display
Panel
The C1, C2, C3, C4, C5, C6 Boards are connected with the
Plasma Display Panel for the repair.
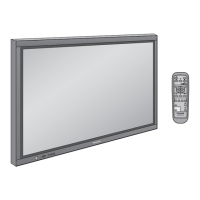
1. Disconnect the Fan Relay Connectors.
2. Remove 16 screws and then remove the Fan Blocks (1,
2, 3, 4).
3. Remove 4 screws and then remove the Reinforcement
Angles (L), (R).
4. Disconnect the connectors (DN3, DN5).
5. Remove the flexible cables from the connectors (DN1,
DN2).
6. Remove 4 screws and then remove the DN-Board Block.
 Loading...