28
TH-85PF12U
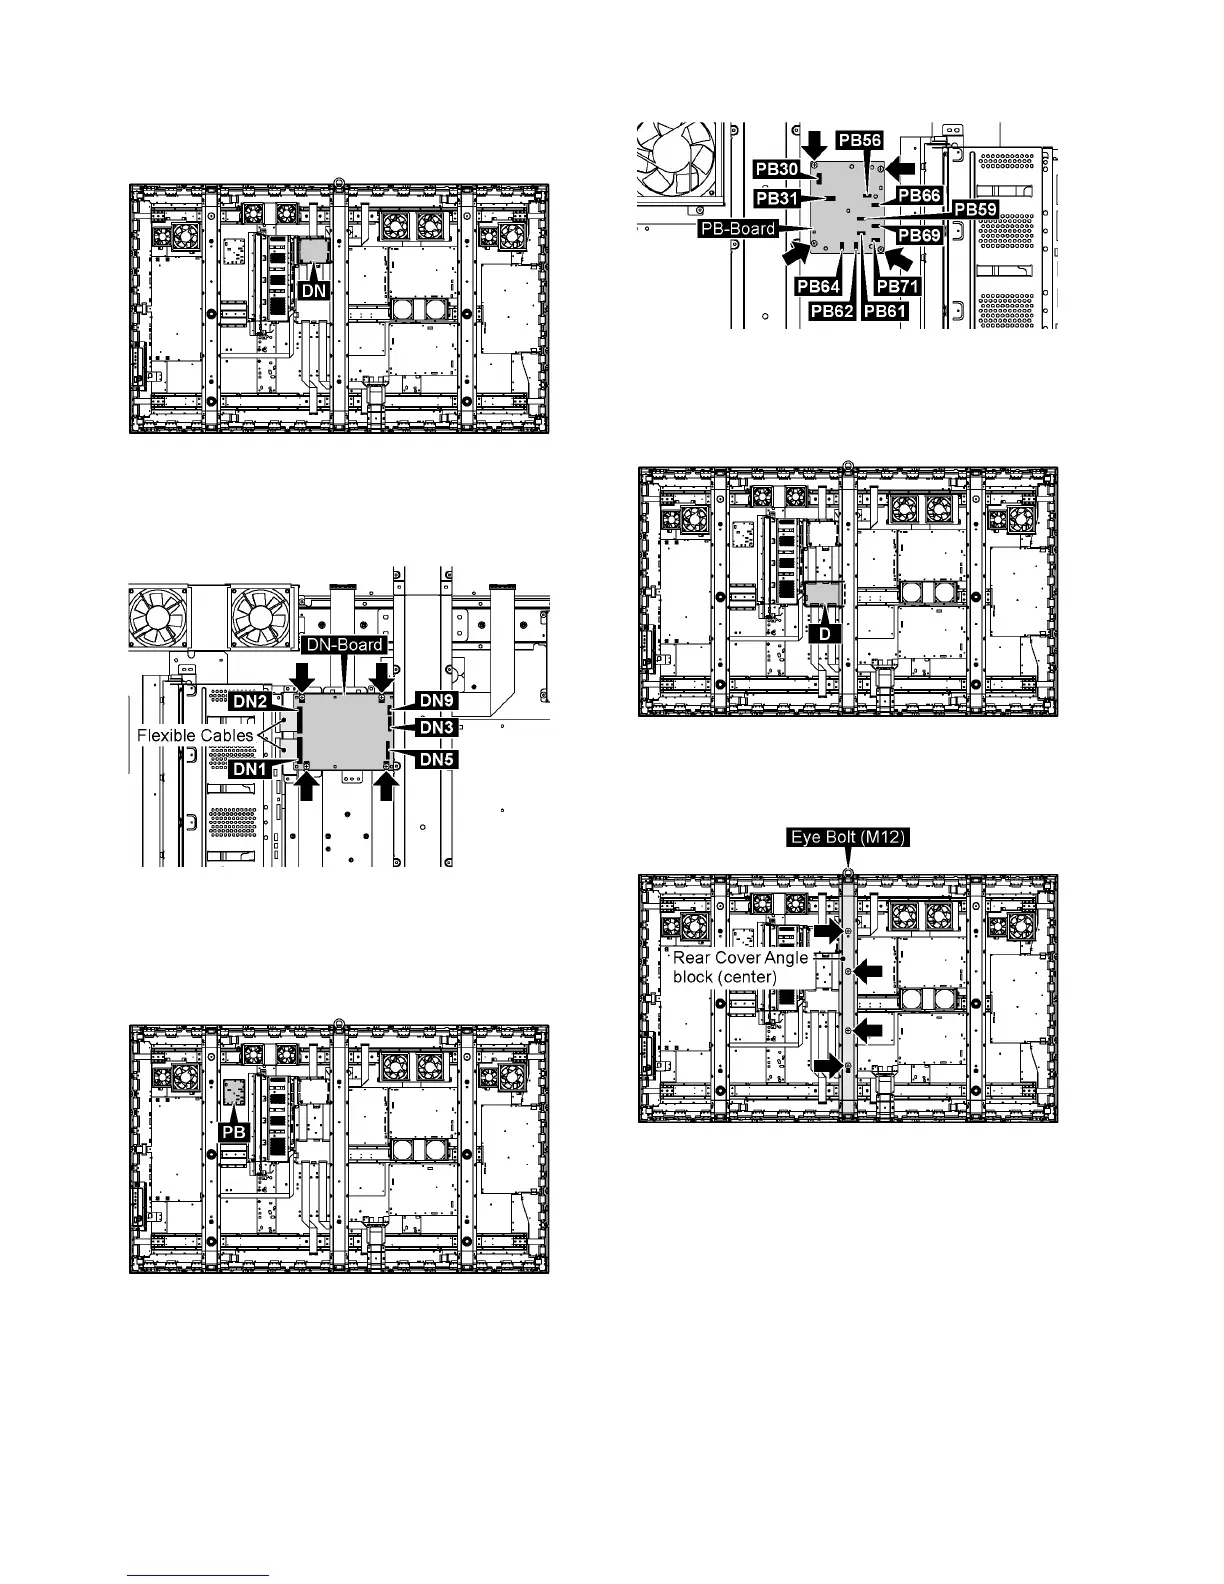
9.8. Removal of DN-Board
Check that no bright points appears by Ve Life adjustment
after both D and DN board exchange.
1. Disconnect the connectors (DN3, DN5, DN9).
2. Remove the flexible cables from the connectors (DN1,
DN2)
3. Remove 4 screws and then remove DN-Board.
Note:
A re-setup of the destination is performed by MS
mode after DN-Board exchange.
9.9. Removal of PB-Board
1. Disconnect the connectors (PB30, PB31, PB56, PB59,
PB61, PB62, PB64, PB66, PB69, PB71).
2. Remove 4 screws and then remove PB-Board.
9.10. Removal of D-Board
Check that no bright points appears by Ve Life adjustment
after both D and DN board exchange.
1. Remove the Eye Bolt (M12).
2. Remove 4 screws and then remove the Rear Cover Angle
block (center).
3. Disconnect the connectors (D3, D5, D21, D25).
4. Remove the flexible cables from the connectors (D20,
D31, D32, D33, D34).
 Loading...