40
TH-85PF12U
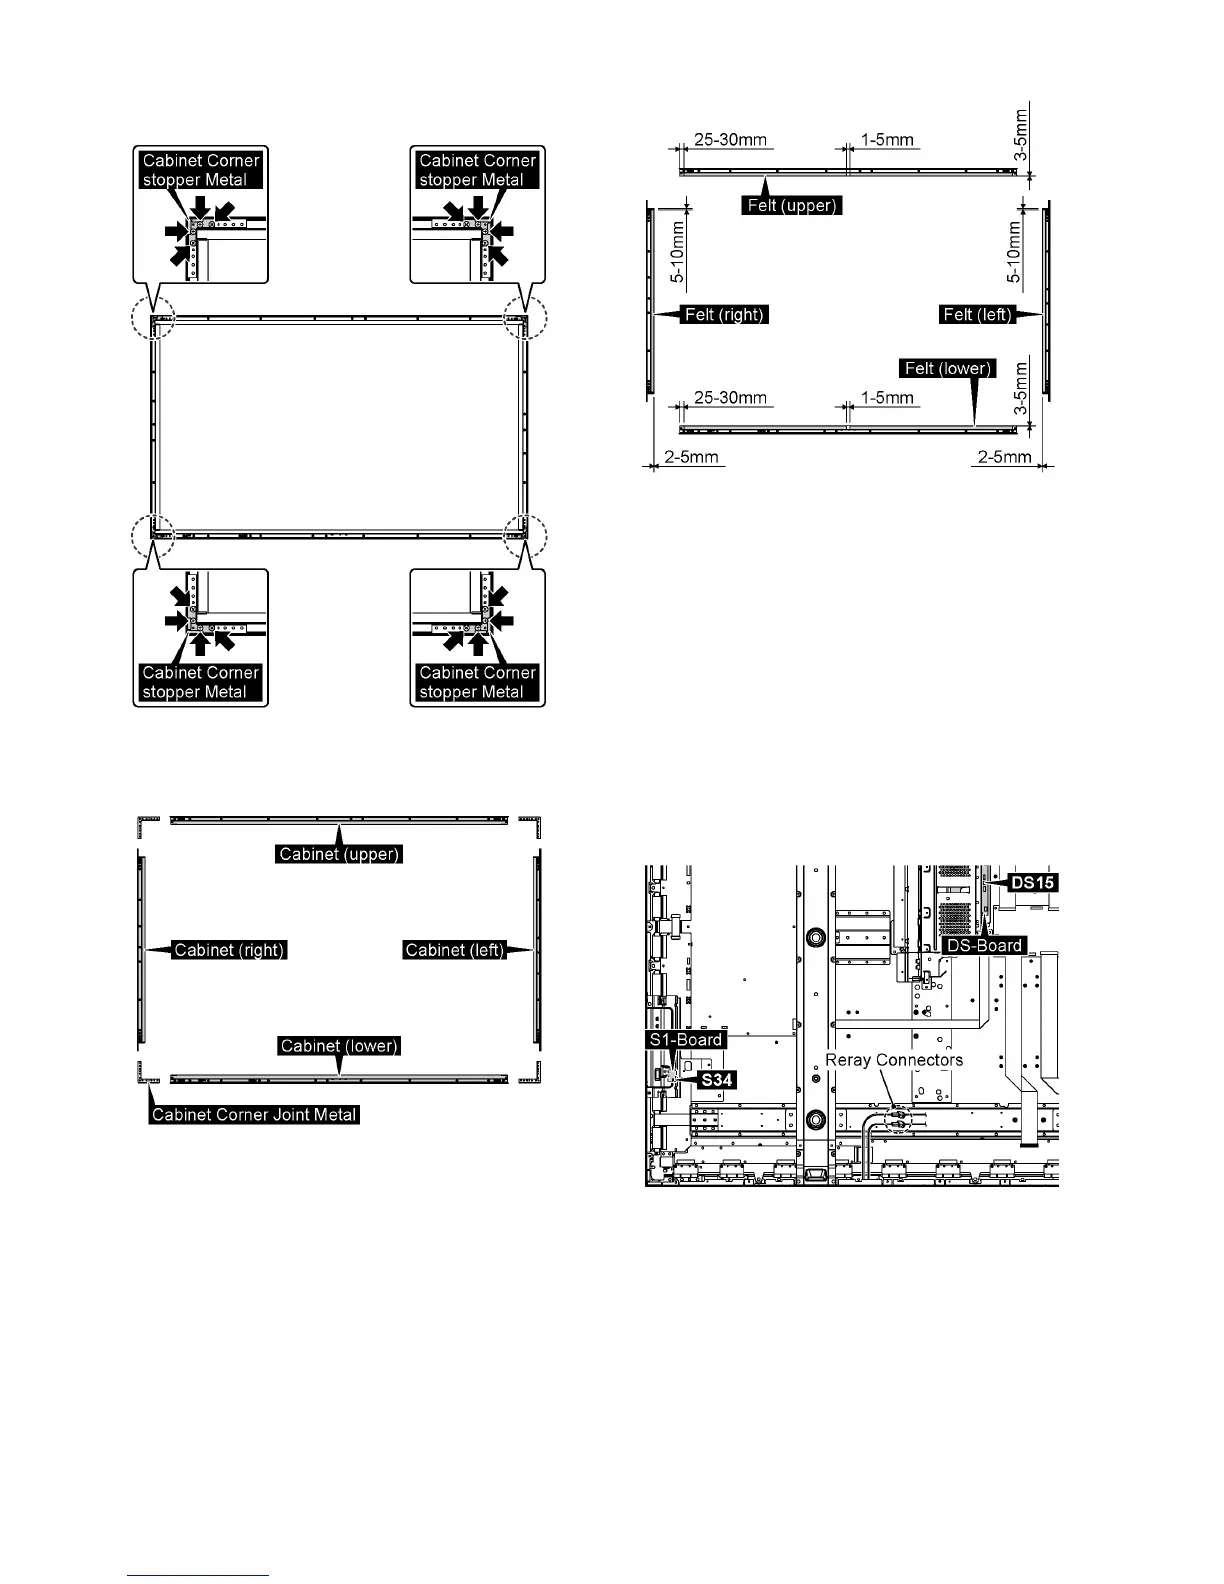
4. Remove 16 screws and then remove the Cabinet Corner
stopper Metals.
5. Remove the Cabinet Corner Joint Metals and Cabinet
(left, right, upper, lower)
Note: when Cabinet is exchanged
• Paste the felts in order along each Fixed Angles (left,
right, upper, lower).
• Make sure the felts do not protrude from the edge of the
cabinet.
Note
• The felts are parts which cannot be recycled. Please use
the new article when you exchange the Cabinet.
9.33. Removal of Plasma Display
Panel
The C1 (upper, lower), C2 (upper, lower), C3 (upper,
lower),C4 (upper, lower), SS, SS2, SS3, SC, SU, SD Boards
and, flexible cables between D-C Boards and D-SC Boards,
are connected with the Plasma Display Panel for the repair.
1. Remove the Rear Covers.
(Refer to Removal of Rear Cover)
2. Disconnect the connectors (DS15, S34).
3. Disconnect 2 Relay Connectors.
 Loading...