66
Gemini GT6 Hardware Installation Guide
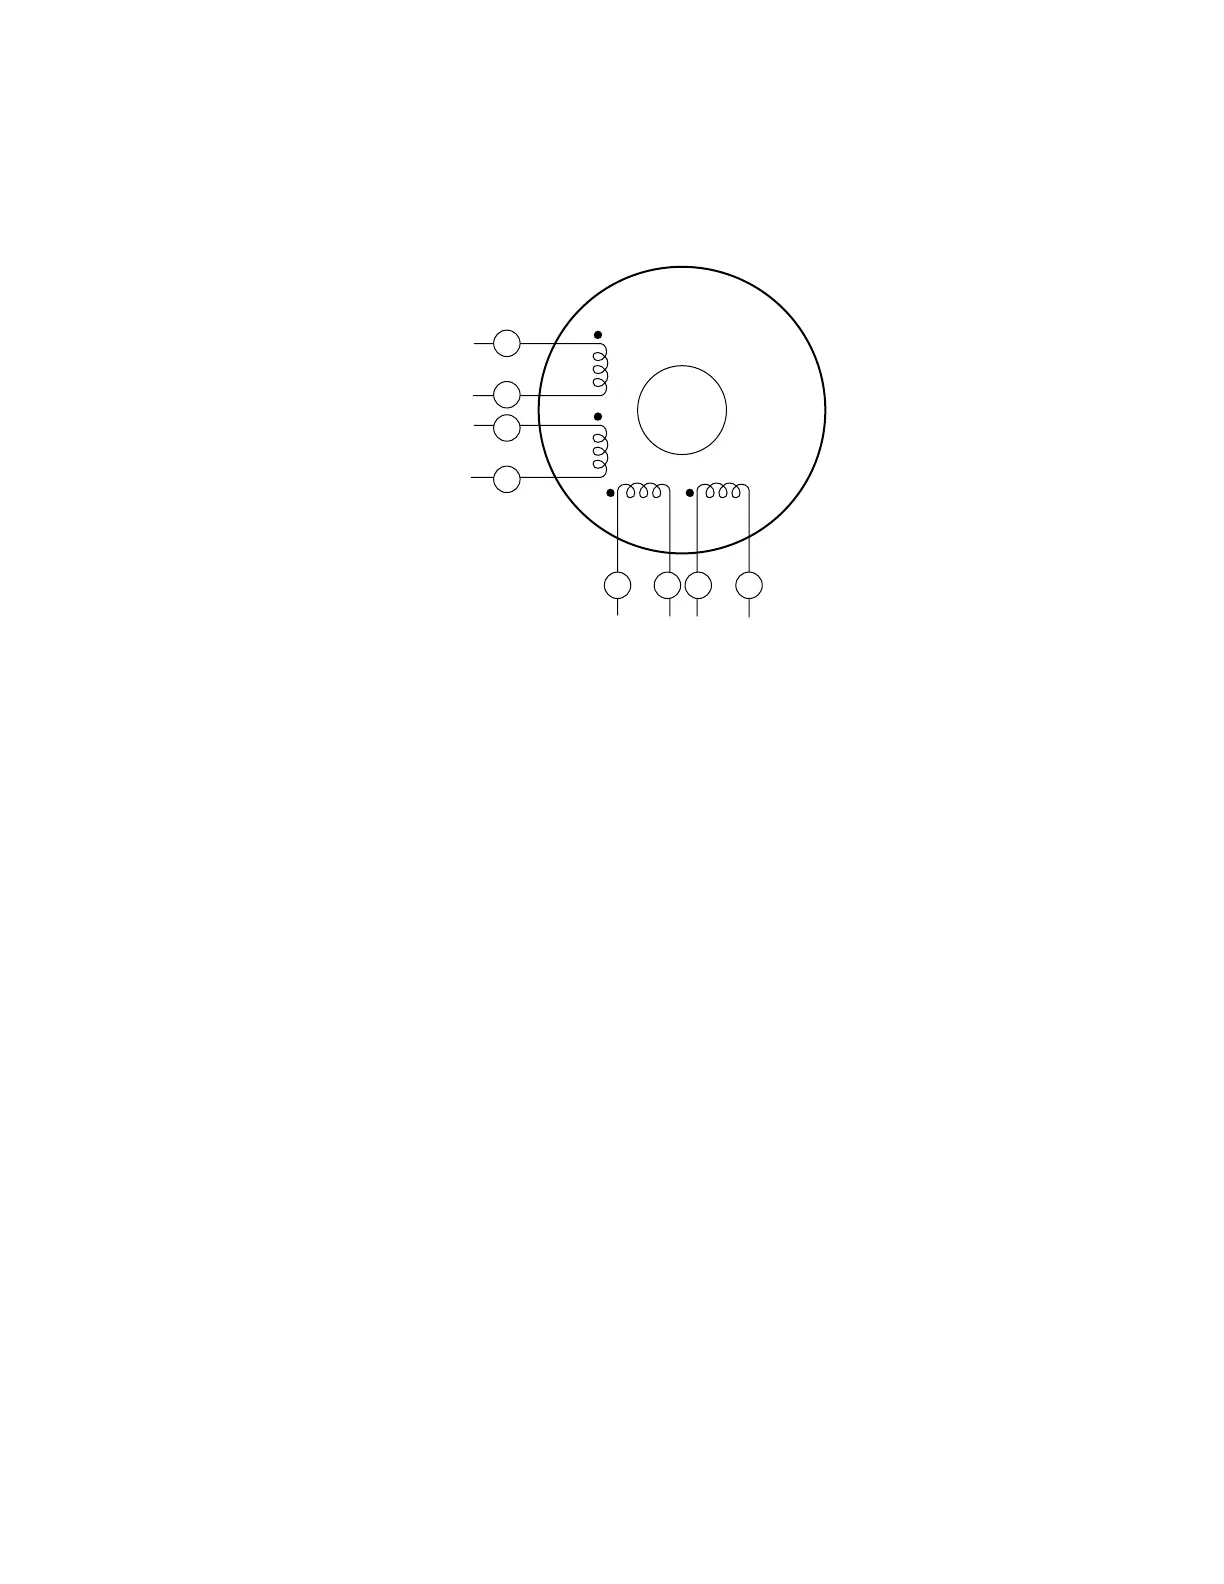
8-Lead Motor
Because of the complexity involved in phasing an 8-lead motor, you must refer to
the manufacturer’s motor specification document. Using the manufacturer’s
specifications, label the motor leads as shown in the next drawing.
PM
Phase A Windings
Phase B Windings
1
2
3
4
21 43
8-Lead Motor – Labeling the Leads
You can configure the 8-lead motor in series or parallel.
Series Configuration Use the following procedure for series configurations.
1. Connect A2 & A3 together and relabel this common point A CENTER TAP.
2. Connect B2 & B3 together and relabel this common point B CENTER TAP.
3. Relabel the A1 lead A+.
4. Relabel the A4 lead A–.
5. Relabel the B1 lead B+.
6. Relabel the B4 lead B–.
7. Proceed to the
Terminal Connections
section below.
Parallel Configuration Use the following procedure for parallel configurations.
1. Connect motor leads A1 & A3 together and relabel this common point A+.
2. Connect motor leads A2 & A4 together and relabel this common point A–.
3. Connect motor leads B1 & B3 together and relabel this common point B+.
4. Connect motor leads B2 & B4 together and relabel this common point B–.
5. Proceed to the
Terminal Connections
section below.

 Loading...


