18
Digital Pump Control Module
Series PQDXXA-Z10
Installation and Setup Manual
Bulletin HY30-3255-INST/UK
Parker Hannifin Manufacturing Germany GmbH & Co. KG
Pump & Motor Division Europe
Chemnitz, Germany
5. Programming
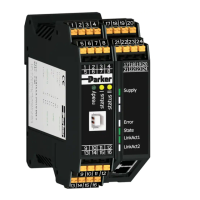
The Programming of the p/Q-module can be done
in an easy way. For programming the module must
be connected with the PC via a programming cable
(Ordering number PQDXXA-ZXX-Kabel).
The ProPVplus Software need to be installed
and started on the connected computer to get the
module parameterized. The program runs under
WINDOWS XP, WINDOWS VISTA, WINDOWS 7
and WINDOWS 8.
The latest version can be downloaded at:
http://www.parker.com/pmde Support
Customer Toolbox
The PQDXXA-Z10 module is compatible to
ProPVplus 3.5.0 upwards.
Please note that the data format has been
changed from since module generation
PQDXXA-Z01 .PAR to .WPC. Old .PAR pa-
rameter sets cannot be translated to the new
data format.
The software offers the following features:
The PARAMETER LIST displays all available
and changeable parameters. Two different input
levels are available (MODE = STD or EXP). An
input dialog opens after double clicking on the
parameter. Limits of the input are shown, faulty or
wronginputsareidentied.
All parameters are directly sent to the module, if
it is in active mode, which means ProPVplus is
connected with the module [CONNECT ]. The
command: Save, saves the parameter settings to
the modules memory. Default, resets the module
to factory settings. Load Back, resets the module
to the last saved parameter settings.
Parameter sets can also be edited offline without
any connection to the module.
The MONITOR window allows the numerically
display of various process parameters.
The OSCILLOSCOPE displays various pro-
cess parameters as graphs. Furthermore the oscil-
loscope offers a Start-Stop option and allows the
dataexportaswellasthestorageastextle(.txt).
The cursor function in the right mouse button menu
provides the option for amplitude and time meas-
urements. Screenshots can also be captured with
the right mouse button dialog.
Please see the documentation in the software
ProPVplus under MenuHelp for further
information about the handling of ProPVplus.
When starting ProPVPlus and an activated connection to the module, the screen shown below will be displayed:
 Loading...