44
open side of the guard cover faces the
tool.
2. If the recesses on the guard cover
match the grid (29) on the tool, then
you can remove the guard cover (7)
upwards.
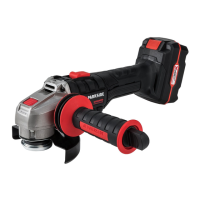
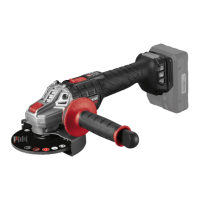
Attaching and removing the
attachment tool
Permissible attachment tool
WARNING! Risk of injury! Not any
accessory that can be attached to your
power tool assures safe operation. Do not
use accessories which are not specifically
designed and specified by the tool manu-
facturer.
WARNING! Risk of injury! Accessor-
ies running faster than their rated speed
can break and fly apart. The rated rota-
tional speed or circumferential speed of
the accessory must be at least equal to
that specified below.
All attachment tools
• Maximum speed: ≥8500 min
−1
• diameter: ≤125mm
Grinding disc
• Thickness: ≤ 6 mm
Cutting disc
• Thickness: ≤ 1.2 mm
• Cutting disk types: diamond studded,
bonded reinforced, segmented
Disc brush
• Thickness: ≤ 16.5 mm
Cup brush
• Thickness: ≤ 25 mm
Attaching and removing the disc
CAUTION! Risk of injury
when touching the attachment
tool. Wear protective gloves
when handling the attachment
tool.
Notes
• DANGER! Risk of injury! Only use
attachment tools recommended by the
manufacturer.
• Only use undamaged attachment tools.
• The disc is attached with a keyless
chuck (25) to the uptake spindle (27).
There are two ways to loosen or tighten
the keyless chuck:
• By hand: To do this, fold the bracket
(24) of the keyless chuck upwards.
• With the chuck key (16); kept in the
auxiliary handle (4)
Procedure (Fig.C)
1. Check the attachment tool. Do not use
the attachment tool if it is damaged.
2. Press and hold the spindle lock (8).
3. Turn the uptake spindle (27) until the
stop button holds the uptake spindle
in a fixed position. Keep pressing the
spindle lock (8).
4. Loosen the keyless chuck (25).
You can release the spindle lock (8).
5. Disassembly: Take the attachment
tool off the mounting flange (26).
Assembly: Place the attachment tool
on the mounting flange (26).
The label on the cutting/grinding disc
should always face the tool. If a direc-
tion of rotation is indicated on the disc,
this must match the direction of rotation
arrow (6) .
Ensure that the attachment flange (26)
is placed on the tool in such a way that
the recesses in the attachment flange
 Loading...