EasyManuals Logo

Parrot Asteroid Classic User Manual

Parrot Asteroid Classic
40 pages
To Next Page IconTo Next Page
To Previous Page IconTo Previous Page
Page #9 background imageLoading...
Page #9 background image
9Installation
Installing the GPS antenna
Install the GPS Antenna in an unobstructed area.
Clean the dashboard, then use the adhesive located on the back of the GPS
Antenna to attach it to the dashboard. Then wait for approximately 2 hours
without handling the dongle to ensure that it adheres properly.
Athermic windshields and windows with a built-in antenna can interfere with GPS
reception and reduce the reliability of information from navigation applications.
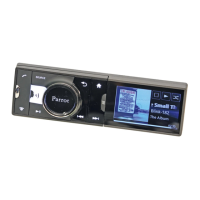
Basic operations
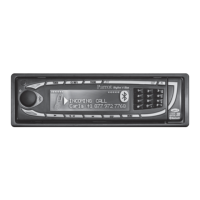
To remove the faceplate, press the eject button on its left. Place the faceplate into
the provided carrying case in order to protect it from scratches and dust.
To attach the faceplate, put it on the right side of the car stereo. Once the
faceplate and the car stereo magnets connect, press the left side.
To remove the car stereo from the dashboard, insert the provided extraction key
until they click into place.

Other manuals for Parrot Asteroid Classic

Questions and Answers:

Question and Answer IconNeed help?

Do you have a question about the Parrot Asteroid Classic and is the answer not in the manual?

Parrot Asteroid Classic Specifications

General IconGeneral
MP3 playbackYes
CD-R playbackNo
Supported radio bandsAM
Preset stations quantity6
Output power55 W
RDS featuresPS, PTY, RT, TP
Product colorBlack
Equalizer bands quantity7
Display typeTFT
Display diagonal3.2 \
Display number of colors262144 colors
Compatible memory cardsSD
Bluetooth version2.1+EDR
Bluetooth profilesA2DP, AVRCP, HFP, HSP, OPP, SPP
USB ports quantity4
Security featuresRemovable front

Related product manuals