_I 1:,.',_'_€,.][9_,'_€"1:=1,_]i:{*]llq_:
1. Remove crate top and sides. Remove any loose
cartons. Remove burner support pedestal and
nipple, if supplied.
2. Lift boiler off crate pallet. Move to location
determined in Chapter I: Preinstallation.
3. Remove lifting frame and hardware.
4. Re-install burner support pedestal and nipple if
necessary.
5. Proceed to Chapter 3: Piping the Boiler.
[,.)q 114i_[.I1,,][4mlmlh_lk'_li=(,,]l!_:
I:_N V;l.$'I_vJI:]l_.) :]I[.lN[4I:{o]II::i-"
i.
Move block to location determined in Chapter I:
Preinstallation.
2. Remove lifting frame and hardware.
3. Proceed to Section D: Install Coils or PLates
].
2.
3.
4.
Place channel rails as shown in Figure 4.
Open the Section Assembly Kit cartons. These
cartons contain the parts needed for assembly of the
sections.
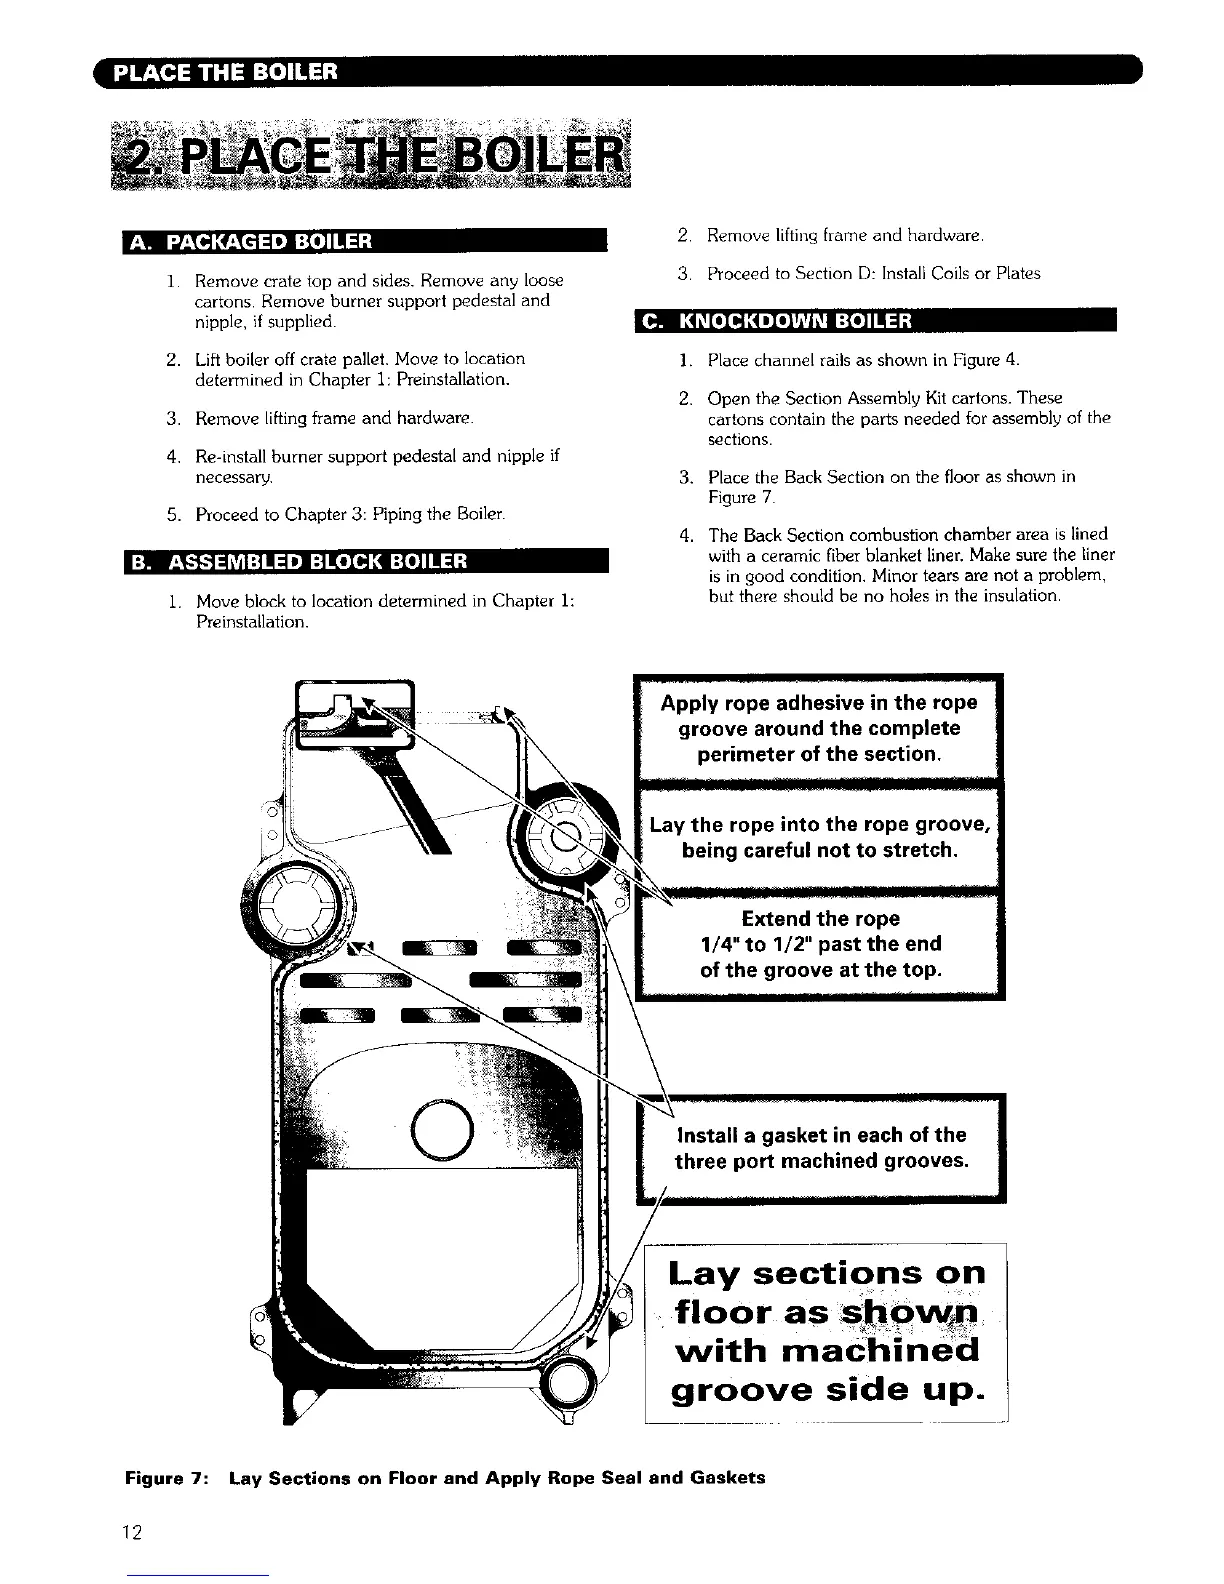
Place the Back Section on the floor as shown in
Figure 7.
The Back Section combustion chamber area is lined
with a ceramic fiber blanket liner. Make sure the liner
is in good condition. Minor tears are not a problem,
but there should be no holes in the insulation.
Lay sections on
floor as SohOw
with maChined
groove side up. i
Figure 7: Lay Sections on Floor and Apply Rope Seal and Gaskets
12