EVERPURE
®
PRO-Reverse Osmosis Water Filtration System Installation and Operating Instructions • 9
Connecting the Faucet to the System
1. Locate the red tubing (reject water line) from the drinking
water faucet. Place a mark on the red tubing 5/8 inch from
the end. Moisten the end of the tubing with water and insert
tubing into the red quick-connect fitting found behind the
membrane (middle) housing. Insert tubing until the mark is
flush with the quick-connect opening (Figure 18).
Red quick-connect fitting
Figure 18
2. If desired, use the 1/4-inch elbow included with the
installation kit. This elbow can be pressed in for installations
in situations where room is not available to bend the tubing.
This elbow fitting can also be swiveled. Locate the 1/4-inch
fitting with the blue quick-connect collar on the left hand
side of the RO system. Align the blue tubing from the faucet
with the quick-connect fitting on the RO system. Place a
mark on the blue tubing 5/8-inch from the end. Moisten the
end of the tubing with water and insert until the mark is
flush with the quick-connect opening (Figure 19).
If tubing is not firmly connected, leaking will occur. It is
important for the tubing to be inserted all the way until the
mark is flush with the outer edge of the quick-connect insert.
NOTE: Tubing may be quickly and easily removed from the
fitting if necessary by pressing the collar around the
fitting while pulling the tubing with your other hand.
With
elbow
Without
elbow
5/8"
5/8"
Figure 19
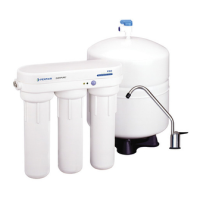
Connecting the Storage Tank to the System
When tank is full, it weighs approximately 40 lbs.
Provide ample support under the tank.
1. Remove the black protective cap to expose the 1/4-inch
threaded opening at the top of the tank (Figure 20).
2. Thread the tank valve onto the top of the tank opening by
turning it clockwise until snug.
3. Locate the green tubing. Place a mark on the green tubing
3/4 inch from each end. Moisten one end of the green
tubing with water and insert with a twisting motion into the
free port of the tank valve until the 3/4-inch mark is flush
with the quick-connect fitting (Figure 20).
Figure 20
4. Install free end of green tubing to green quick-connect
fitting or elbow as directed in Figure 21.
NOTE: Do not cut green tube. This line should be left at the
pre-cut length for future service.
Figure 21
5. Place entire system over mounting screws on wall and
slide down.
Make certain system is firmly attached to wall to
prevent it from falling and possibly
becoming damaged.
NOTE: Use caution not to bend or pinch the tubing behind
the system while attaching to mounting screws.
NOTE: The pressurized storage tank has a capacity of
1.9–3.2 gallons. The tank’s air pressure is factory set
at 5–7 psi when tank is empty.
 Loading...