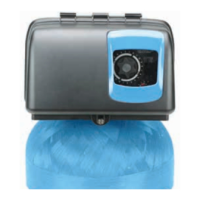
START-UP INSTRUCTIONS
The water softener should be installed with the inlet,
outlet, and drain connections made in accordance with the
manufacturer’s recommendations, and to meet applicable
plumbing codes.
1. Turn the manual regeneration knob slowly in a clockwise
direction until the program micro switch lifts on top of
the first set of pins. Allow the drive motor to move the
piston to the first regeneration step and stop. Each time
the program switch position changes, the valve will
advance to the next regeneration step. Always allow the
motor to stop before moving to the next set of pins or
spaces.
2. Position the valve to backwash. Ensure the drain line flow
remains steady for 10 minutes or until the water runs
clear (see above).
3. Position the valve to the brine / slow rinse position.
Ensure the unit is drawing water from the brine tank (this
step may need to be repeated).
4. Position the valve to the rapid rinse position. Check the
drain line flow, and run for 5 minutes or until the water
runs clear.
5. Position the valve to the start of the brine tank fill cycle.
Ensure water goes into the brine tank at the desired
rate. The brine valve drive cam will hold the valve in this
position to fill the brine tank for the first regeneration.
6. Put salt in the brine tank.
NOTE: Do not use granulated or rock salt.
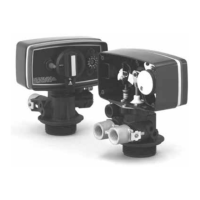
MODEL 5600 INSTALLATION AND
START-UP PROCEDURES
NOTE: Install the water softener with the inlet, outlet, and
drain connections made according to manufacturer's
recommendations and to meet applicable plumbing
codes.
1. Manually index the softener control into the In Service
position and let water flow into the resin tank. When the
water flow stops, open a softened water tap until all air is
released from the lines. Then close tap.
NOTE: Manually dial the various regeneration positions by
turning the knob on the front of the control until the
indicator shows that the softener is in the desired
position.
2. Manually index the control to the Backwash position and
allow water to flow at the drain for 3 or 4 minutes.
3. Remove back cover plate.
4. Make sure that the salt dosage is set as recommended by
the manufacturer. If necessary, set salt according to the
setting instruction sheet. Manually index the control to the
Brine Fill position and allow the brine tank to fill to the top
of the air check.
5. Manually index the control to the Brine Draw position and
allow the control to draw water from the brine tank until
it stops.
6. Plug in the electrical cord and look in the sight hole in the
back of the motor to see that it is running. Set the days
that regeneration is to occur by sliding tabs on skipper
wheel outward to expose trip fingers.
• Each tab is one day.
• Finger at red pointer is tonight.
• Moving clockwise from red pointer, extend or retract
fingers to obtain the desired generation schedule.
7. Manually advance the control to the beginning of the
Brine Fill position and allow the control to return to the In
Service position automatically.
8. Fill the brine tank with salt.
9. Replace back cover on the control.
10. Make sure that any bypass valving is left in the normal In
Service position.
Manual Regeneration Knob
24-Hour Gear
Red Time
Set Button
Time of Day Arrow Red Pointer
Skipper Wheel
(shows every
other day
backwash)
4 • FLECK 5600 Service Manual
 Loading...