2013-06
14
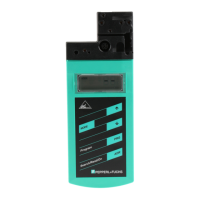
VBP-HH1-V3.0*
Commissioning
5 Commissioning
5.1 Preparation
The addressing device battery is delivered fully charged. Nevertheless, as a result
of self-discharge, the charge may not be sufficient to operate the addressing
device. Therefore, we recommend that you charge the battery for at least 24 hours
prior to commissioning.
Charging battery
1. Connect the plug of the plug-in power-supply unit cable to the device connect-
ing jack.
2. Connect the plug-in power-supply unit to the mains power supply.
The battery is charged.
Connecting the AS-Interface nodes
Proceed as follows to connect an AS-Interface node:
1. In ser t d evices with an M1 2 plug or VariKont, VariKon t M ser ie s devices as w ell
as FP model devices and *-G1 and *-G4 series interface modules directly into
the designated location on the connecting adapter and ensure that they are
firmly seated.
2. For devices with an addressing jack, connect the optionally available adapter
cable to the device and plug the other end of the cable into the addressing
device.
3. If necessary, connect an external power supply.
Connecting an external power supply
1. Connect the T-splitter to the M12 socket of the AS-Interface connection adapt-
er.
2. Connect the M12 socket of the power cable to the M12 plug of the T-splitter.
3. Connect the power supply with the power cable.
4. Connect the AS-Interface node to the T-splitter using the adapter cable.
Note!
The battery cannot be overcharged.
Warning!
No reverse polarity protection
The device can be damaged or destroyed if the polarity is reversed.
■ Connect the brown strand to AS-i + (pin 1), the blue to AS-i - (pin 3).
■ Do not connect voltage to pin 2 or pin 4.
■ Connection socket layout see chapter 4.4.5
 Loading...