PAL-AT Installation Manual
58
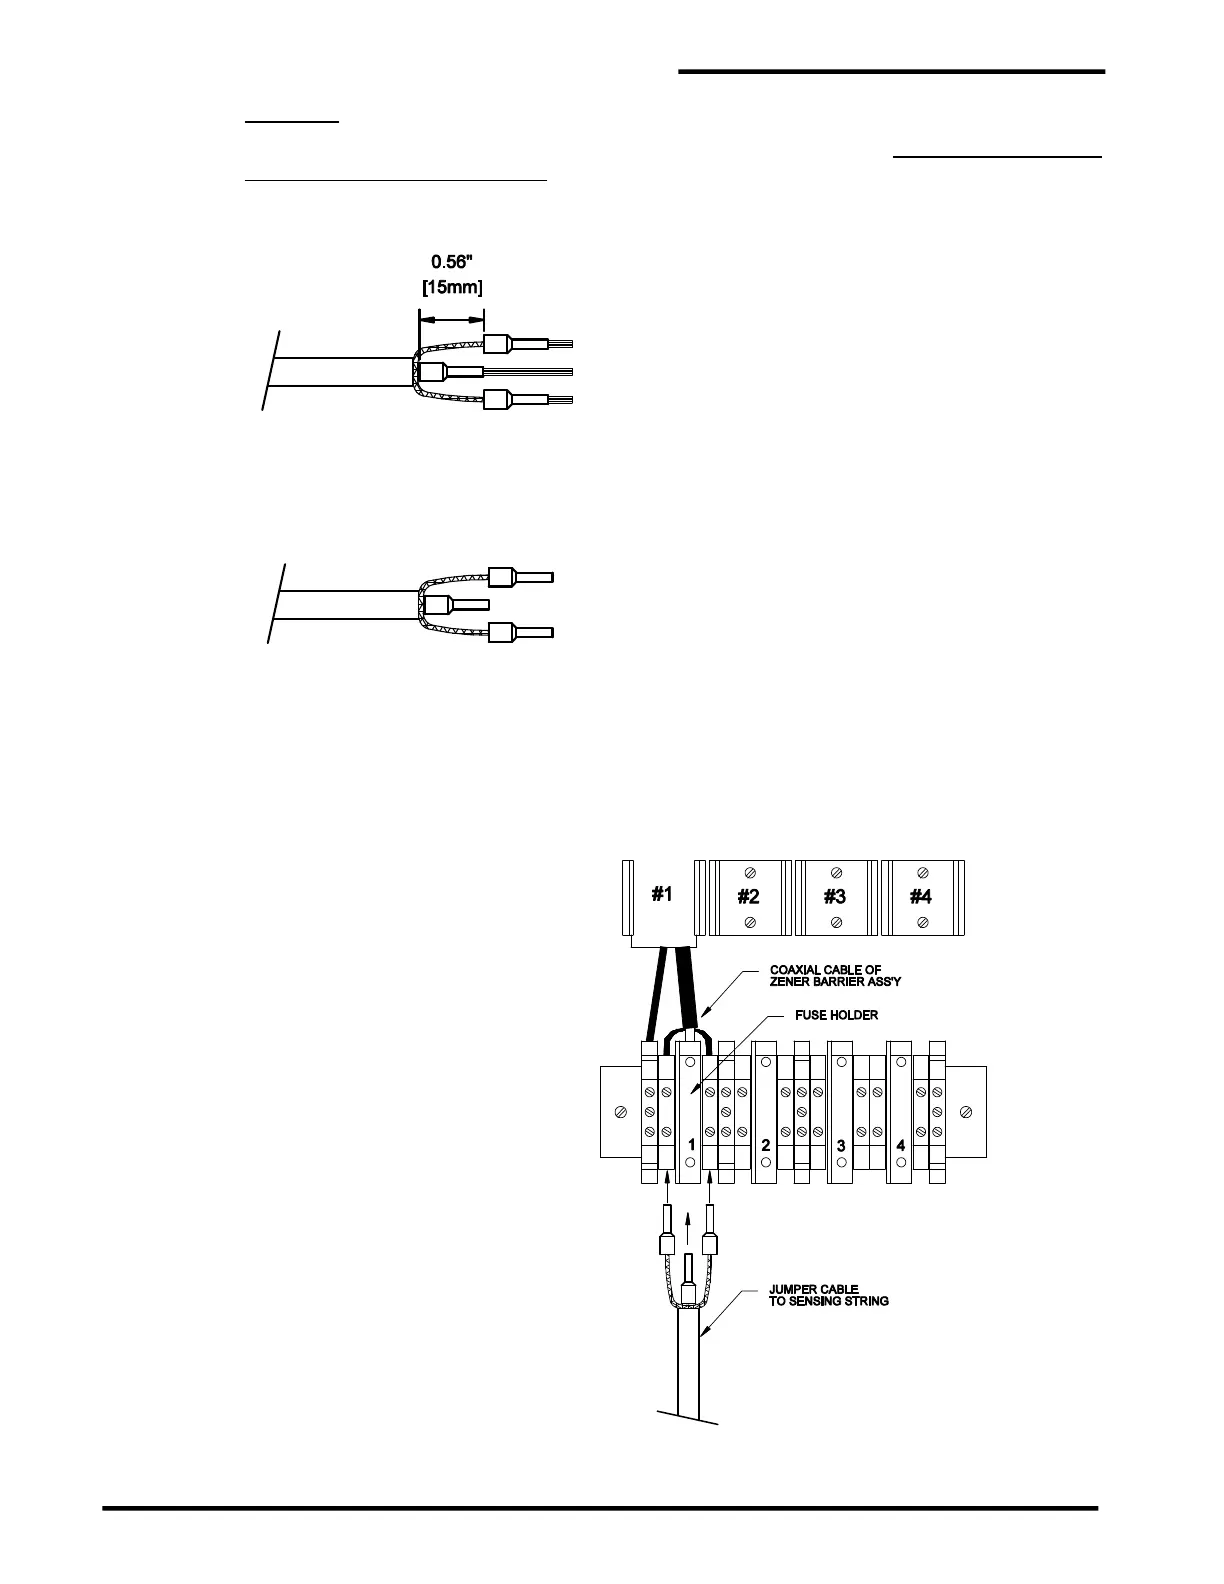
JPP Cable
Slide an 18 AWG (1.0mm²) insulated ferrule onto the center wire until the ferrule insulation is
completely over the wire insulation. Crimp the ferrule using a 0.50 mm crimp die. Slide an 18 AWG
(1.0mm²) insulated ferrule over each group of braid wire twisted strands. Align the ferrule ends as
shown while minimizing slack in the braid wire. Crimp the ferrules using a 0.50 mm crimp die.
Step D Trim excess wire from the end of the ferrules.
Step E Before connecting the cable, route the excess cable in the enclosure so there will not be
excessive strain or twisting at the terminals. Insert the center wire into the fuse holder terminal
and tighten the screw. Then insert one of the braid ferrules in the adjacent braid terminal and
fasten it. Repeat with the remaining braid ferrule. If the ferrules were installed properly, there
should be very little slack braid wire.
 Loading...
