ADJUSTMENT OF SETTING POSITION FOR EN-SENSOR &
SLIT-PLATE
22a
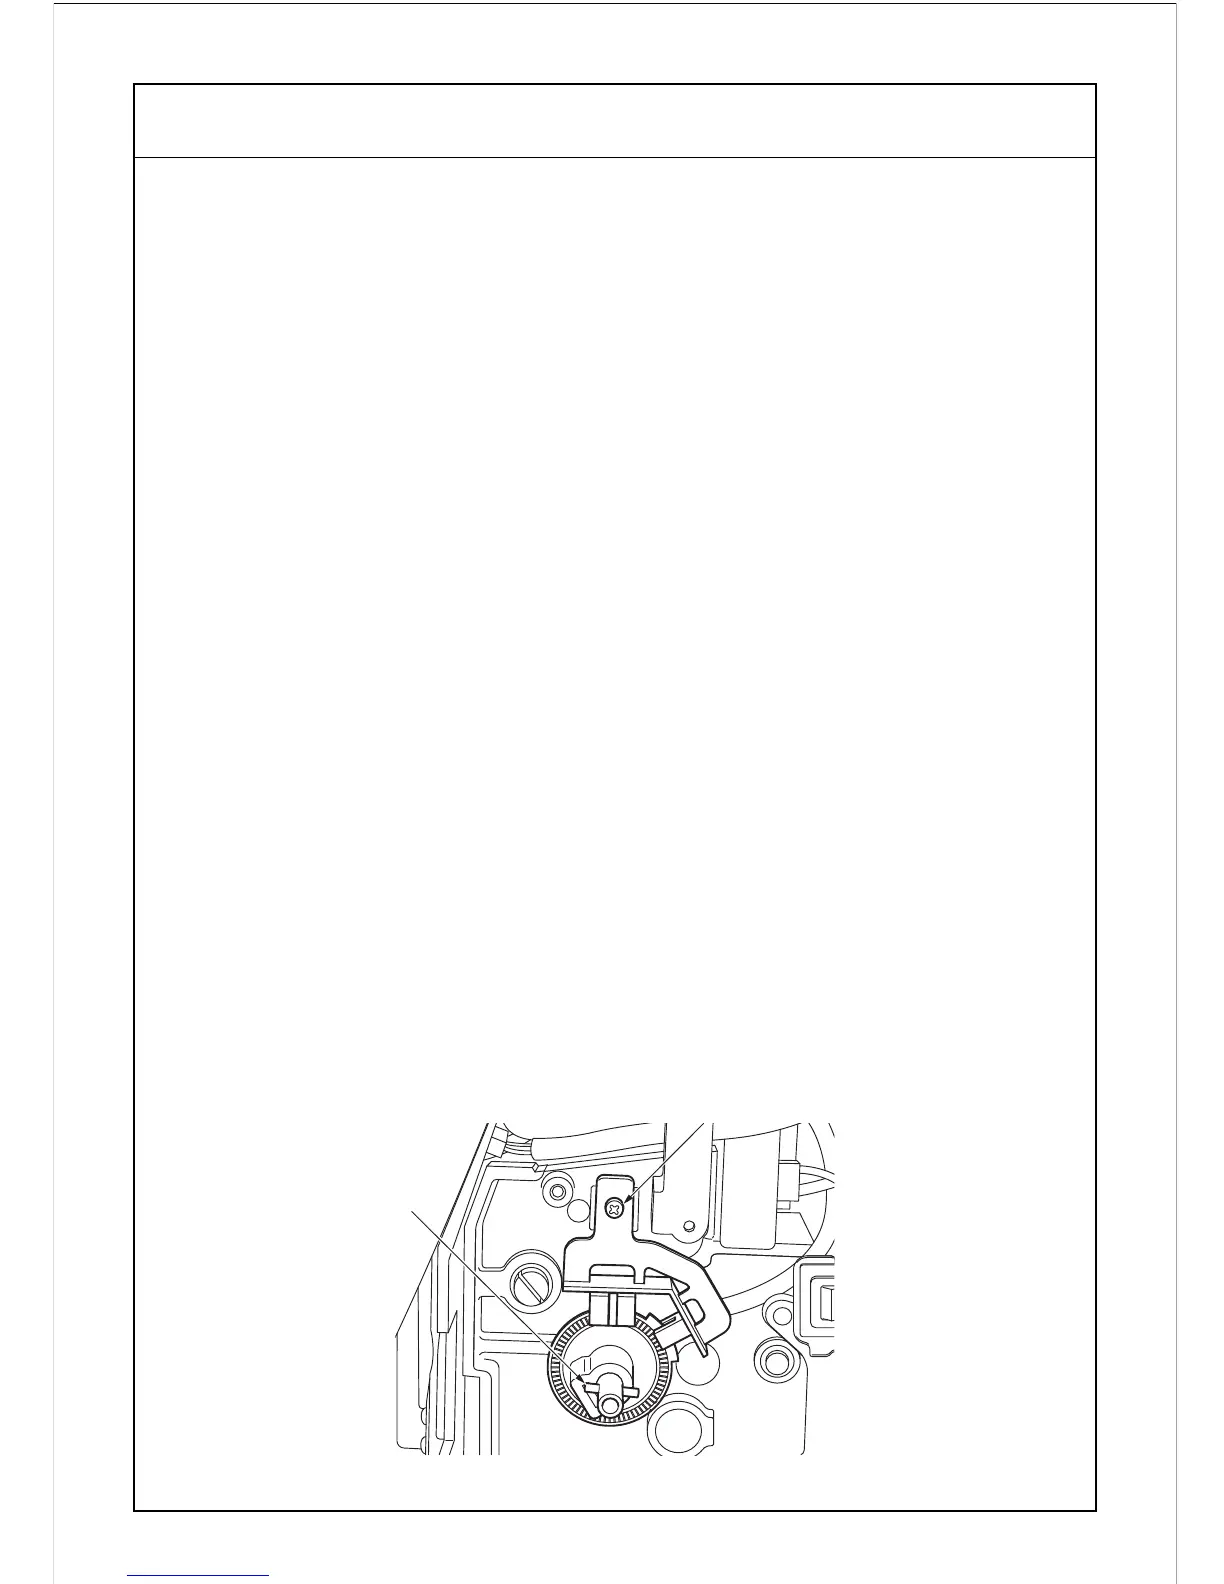
In order to secure the proper position of EN-Sensor (Fig.2, "f",Page22b) and the related Slit-
plate (Fig.2, "d", Page22b), take a following manner for this adjustment :
1. Adjustment of setting position for EN-Sensor
1-1. Remove Main lead, lateral cover and a hand wheel.
1-2. Loosen the set screw (Fig.2, "a" ) for EN-Sensor (Fig.2, "f") and Needle positioning
sensor.(Fig.2, "g")
1-3. Measure the clearance 0.2mm at "c" with thickness gauge No.11691. Please refer to
drawing in the balloon, Page22b.
1-4. After making sure the clearance, tighten the set screw "a".
2. Adjustment of setting position of Slit-plate(Fig.2, "d")
2-1. Loosen the set screw "e" of Slit-plate(Fig.2) and set the hand-wheel temporarily.
2-2. Turn the hand-wheel in the normal direction until the needle eye is positioned in
accordance with Fig.3.
2-3. Remove hand wheel again and put Gauge No.11692 on to Main shaft until touching with
Roll pin(Part No.800703) on the Main shaft as shown in Fig.2.(drawing is located at the
center of Page 22b) and the Gauge No.11692 should be applied as follows:
a) Right side of the Gauge formed a right angle should touch, its inner side, with outside
of right part of EN-Sensor.(Fig.2, "h")
b) Turn the slit-plate in the normal direction until the slit plate stops after left end of
projected part of slit-plate touches with left side(inner side) of the gauge formed a right
angle as shown in the drawing Fig.2. "i".
2-4. Adjust the position of slit-plate in the parallel direction with the Main shaft, as slit-plate
should lightly push and touch to the tip marked "j" of the gauge.
2-5. Hold the above position and tighten the set screw "e" for the slit-plate. Remove the
gauge No.11692 from the Main shaft.
Note: Do not tighten the screw "e" too tightly, because the plastic disc (slit-plate) could
break.
Fig.1
a
No.800703(PIN)