e If you want to switch ’VPS/PDC’ on or off, select the entry
field ’START’ using the buttons QSr or
SqP . Switch ’VPS/PDC’ on or off using the button
SELECT .If’]’ appears on the screen, ’VPS/PDC’ has
been switched on.
DPlease check the start time. The section ’VPS (Video
Programming System) / PDC (Programme Delivery
Control)’ contains further information regarding
’VPS/PDC’.
f If all information is correct, press the OK button.
DThe programming information has been stored in a
TIMER block.
g Insert a cassette that is not erase protected.
h Switch off using the STANDBY m button.
The programmed recording will only function properly, if
the TV-Video Combi has been switched off using the
button STANDBY m .
DIf the TV-Video Combi is turned on a few minutes
before beginning a programmed recording or if is
being used for playback, ’PRESS OK TO START
RECORDING’ will appear on the screen.
Change cassettes if necessary.
Confirm this message with the button OK ,to
continue the programmed recording session. The
TV-Video Combi switches off during this operation.
DWhile a programmed recording is being made, you
cannot operate your video recorder manually. If you
would like to stop a programmed recording session,
press the button STANDBY m for more than 3
seconds.
DDuring recording, the red recording light at the front
of the machine (RECORD 5) will be alight.
DIf the end of the cassette is reached during a
recording, the TV-Video Combi will automatically
eject the cassette.
DIf you forgot to insert a cassette, ’NO CASSETTE’
will appear.
DIf you have inserted a cassette with erase protection
when you want to start a recording, the cassette will
be ejected automatically.
DIf ’ALL TIMERS OCCUPIED’ appears on the TV
screen when you press the TIMER k button, you
have used up all the available TIMER blocks. If you
want to clear or check a programmed recording
(TIMER block), select it with ;P q or =P r .
DProgramme number ’E1’ is provided for recording
from external sources (via the EXT scart socket).
Programming a recording
(without ’VIDEO Plus+’)
a Press the TIMER k button on the remote control twice.
The free TIMER block will be highlighted.
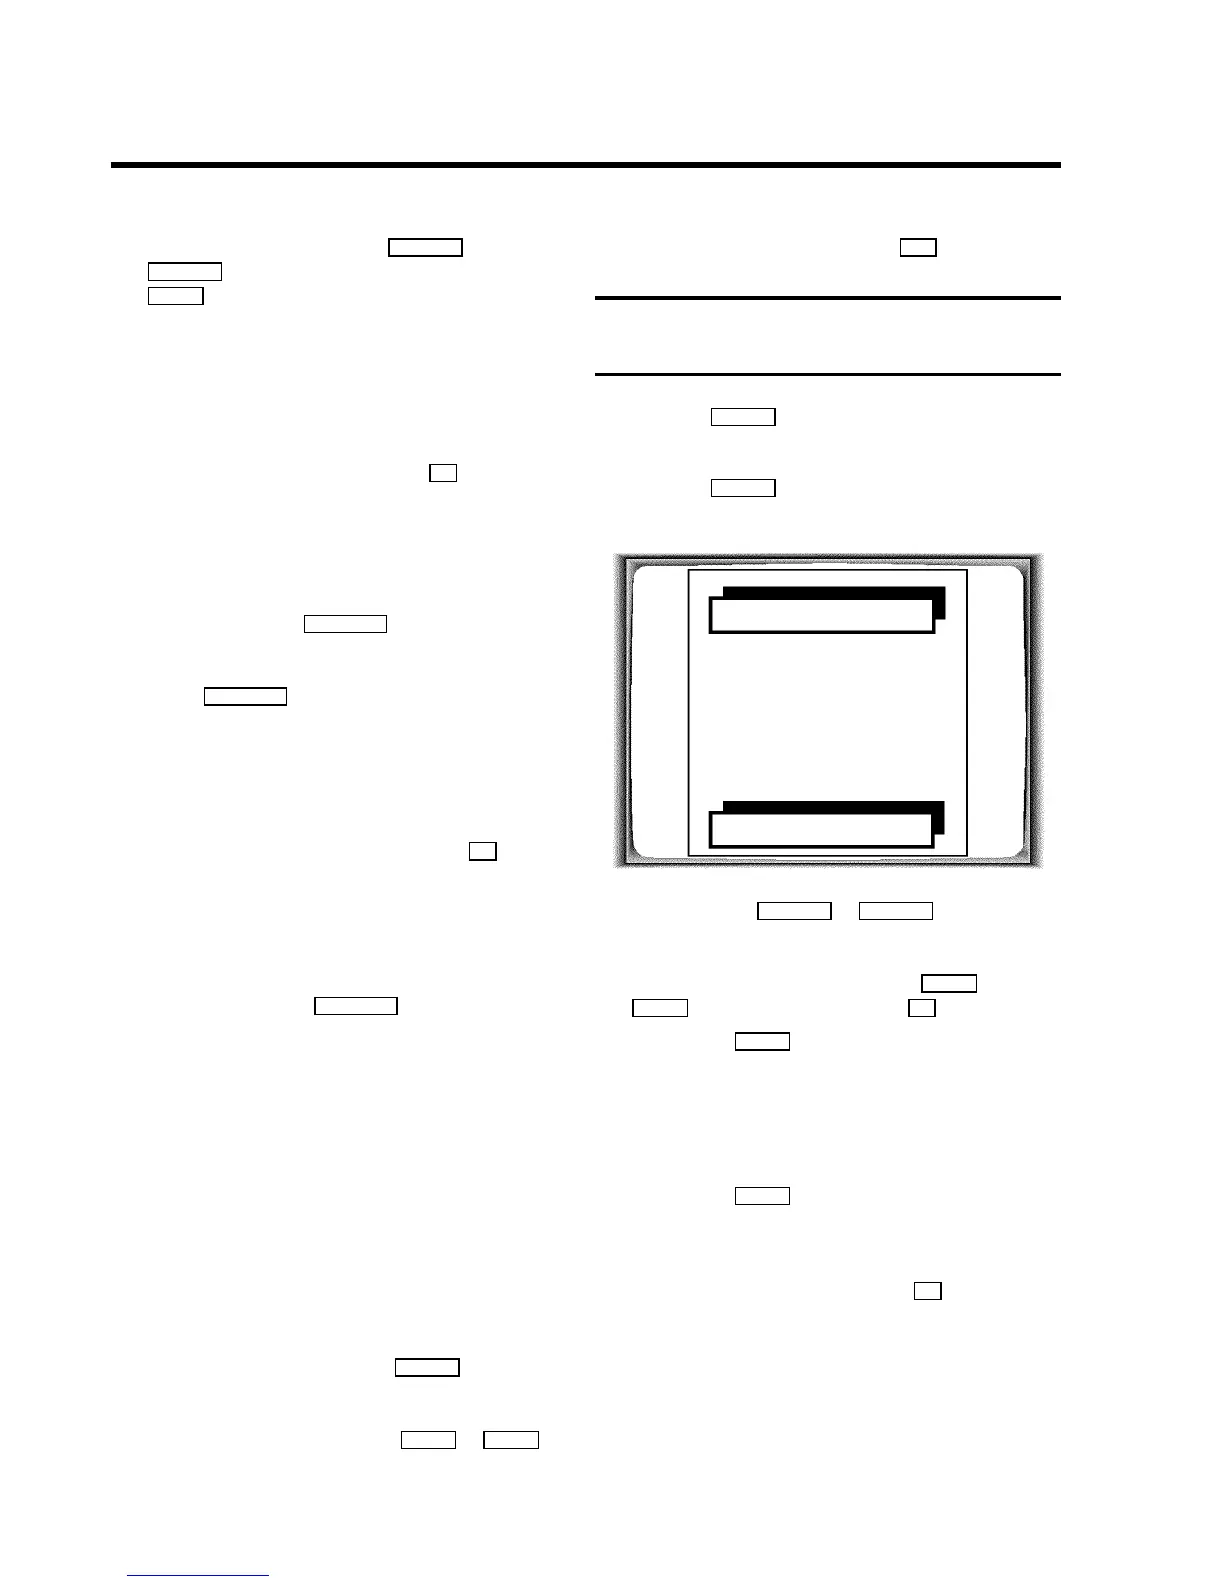
b Press the TIMER k button. The current information will
appear on the screen.
TIMER PROGRAMMING
VPS
DATE REP. PROG. START PDC END
01 ONCE 01 20:15 ] 21:30
REP.: SELECT STORE: OK
c Use the buttons SqP or QSr to select
different entry fields: ’DATE’ (Date), ’PROG.’ (Programme
number), ’START’ (Start time), ’END’ (End time).
Enter or change your information with ;P q or
=P r , or with the number buttons 0..9 .
DUse the SELECT button in the entry field ’DATE’to
select repetitive daily or weekly programming.
’ONCE’: One-time recording
’MO-FR’: Daily recordings from Monday through
Friday.
’WEEK.’: Recordings on the same day every week.
DUse the SELECT button in the entry field ’START’to
switch ’VPS/PDC’ on or off. If ’]’ appears on the
screen, the function has been switched on.
d If all information is correct, press the OK button.
DThe information has been stored in a TIMER block.
e Insert a cassette that is not erase protected.
20