32BDL4050D
41
Color control
Thecolorlevelsofred,green,andblueareadjustedbythecolorbars.
R:Redgain,G:Greengain,B:Bluegain.
Smart picture
PQsetting
PCmode:{Standard}/{Highbright}/{sRGB}.
Videomode:{Standard}/{Highbright}/{Cinema}.
Smart Contrast
Autodetectblackdataandwhitedataoncontentandsetsuitable
backlight.
Surface Ratio Backlight Setting
5%-90% (MaxBacklight-MinBacklight)*SurfaceRatio/100
<5% MinBacklight
>90% MaxBacklight
Smart power
SmartPowercontrolisnotrelativetobrightnesscontrol:
1. InitialsettingBrigthness
70(intherangefrom0-100)
Powerconsumption70%ofmaximumpowerconsumption
2. SmartPower
OFF:noadaptation
MEDIUM:80%ofpowerconsumptionrelativetocurrentsettings
HIGH:65%ofpowerconsumptionrelativetocurrentsettings
3. Panelsaving/BrightnessON:40%ofmaximumpowerconsumption
Thecontrolssettingsshouldonlybevisibleonitsowncontrols.It
shouldnothavesecondaryeffectsonothercontrols
(eabrightnesssettingchangeswhensmartpowersettinghas
changed).
Overscan
Changethedisplayareaoftheimage.
ON:Settodisplayareaabout95%.
OFF:Settodisplayareaabout100%.
Picture reset
ResetallsettingsinthePicturemenu.
Select“Yes”andpress“SET”buttontorestoretofactorypresetdata.
Press“EXIT”buttontocancelandthenreturntothepreviousmenu.
6.2.2. Screen menu
P
Screen
Picture
Auto adjust
Screen reset
Action
Action
H position
ControlHorizontalImagepositionwithinthedisplayareaoftheLCD.
Press+buttontomovescreentoright.
Press-buttontomovescreentoleft.
V position
ControlVerticalImagepositionwithinthedisplayareaoftheLCD.
Press+buttontomovescreentoup.
Press-buttontomovescreentodown.
Clock
Press+buttontoexpandthewidthoftheimageonthescreenthe
right.
Press-buttontonarrowthewidthoftheimageonthescreentheleft.
NOTE:VGAinputonly.
Clock phase
Improvesfocus,clarityandimagestabilitybyincreasingordecreasing
thissetting.
NOTE:VGAinputonly
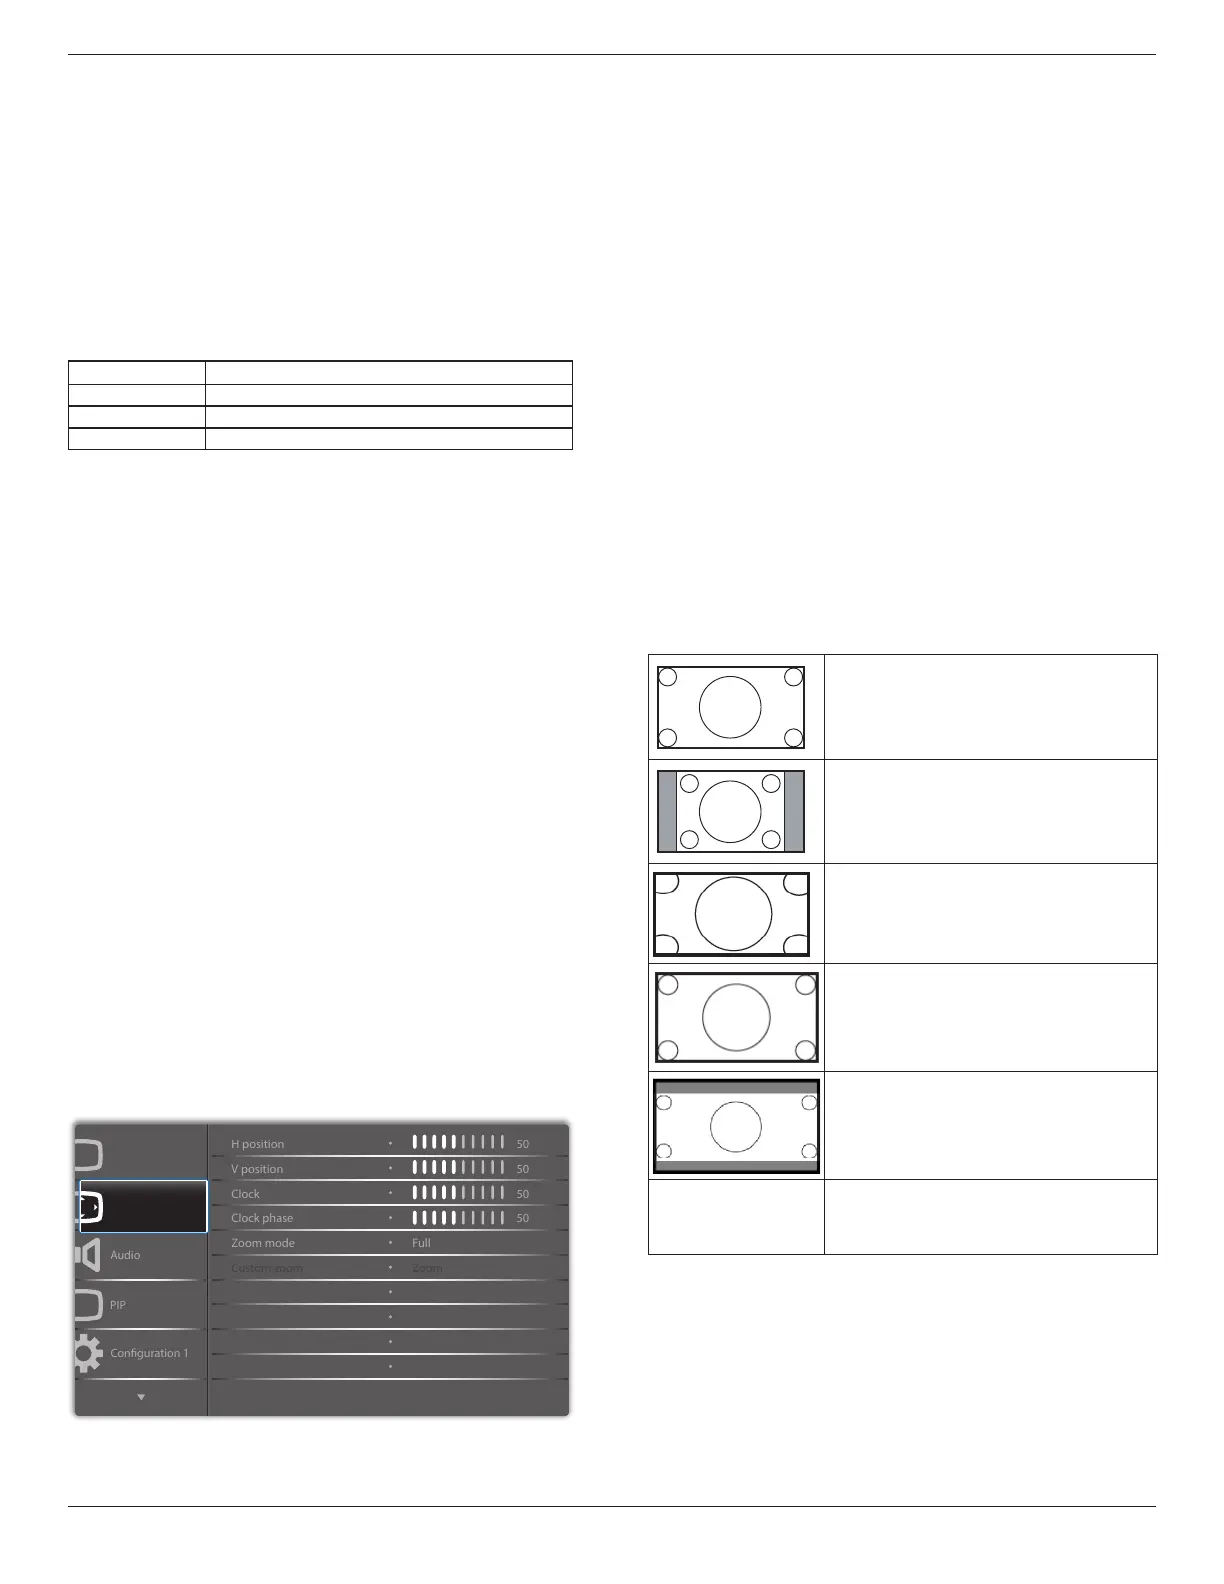
Zoom mode
PCmode:{Full}/{4:3}/{1:1}/{16:9}/{21:9}/{Custom}.
Videomode:{Full}/{4:3}/{1:1}/{16:9}/{21:9}/{Custom}.
*Zoom mode setting is by input. If input in multi-windows, the setting
will apply for windows with the same input.
And the INFO OSD will show the latest setting.
Full
Thismoderestoresthecorrectproportions
ofpicturestransmittedin16:9usingthefull
screendisplay.
4:3
Thepictureisreproducedin4:3formatand
ablackbandisdisplayedoneithersideofthe
picture..
1:1
Thismodedisplaystheimagepixel-by-pixel
onscreenwithoutscalingtheoriginalimage
size.
16:9
Thepictureisreproducedin16:9formatand
ablackbandatthetopandbottom.
21:9
Thepictureisreproducedin21:9formatand
ablackbandatthetopandbottom.
Custom
Choosetoapplythecustomzoomsettingsin
theCustomZoomsubmenu.
Custom zoom
Youcanusethisfunctiontofurthercustomizethezoomsettingstosuit
theimageyouwanttodisplay.
NOTE: Thisitemisfunctionalonlywhenthe{Zoom mode}issetto
{Custom}.