Mechanical Instructions
EN 10 BJ3.1E LA4.
4.2 Service Positions
For easy servicing of this set, there are a few possibilities
created:
• The buffers from the packaging.
• Foam bars (created for service).
• Aluminium service stands (created for Service).
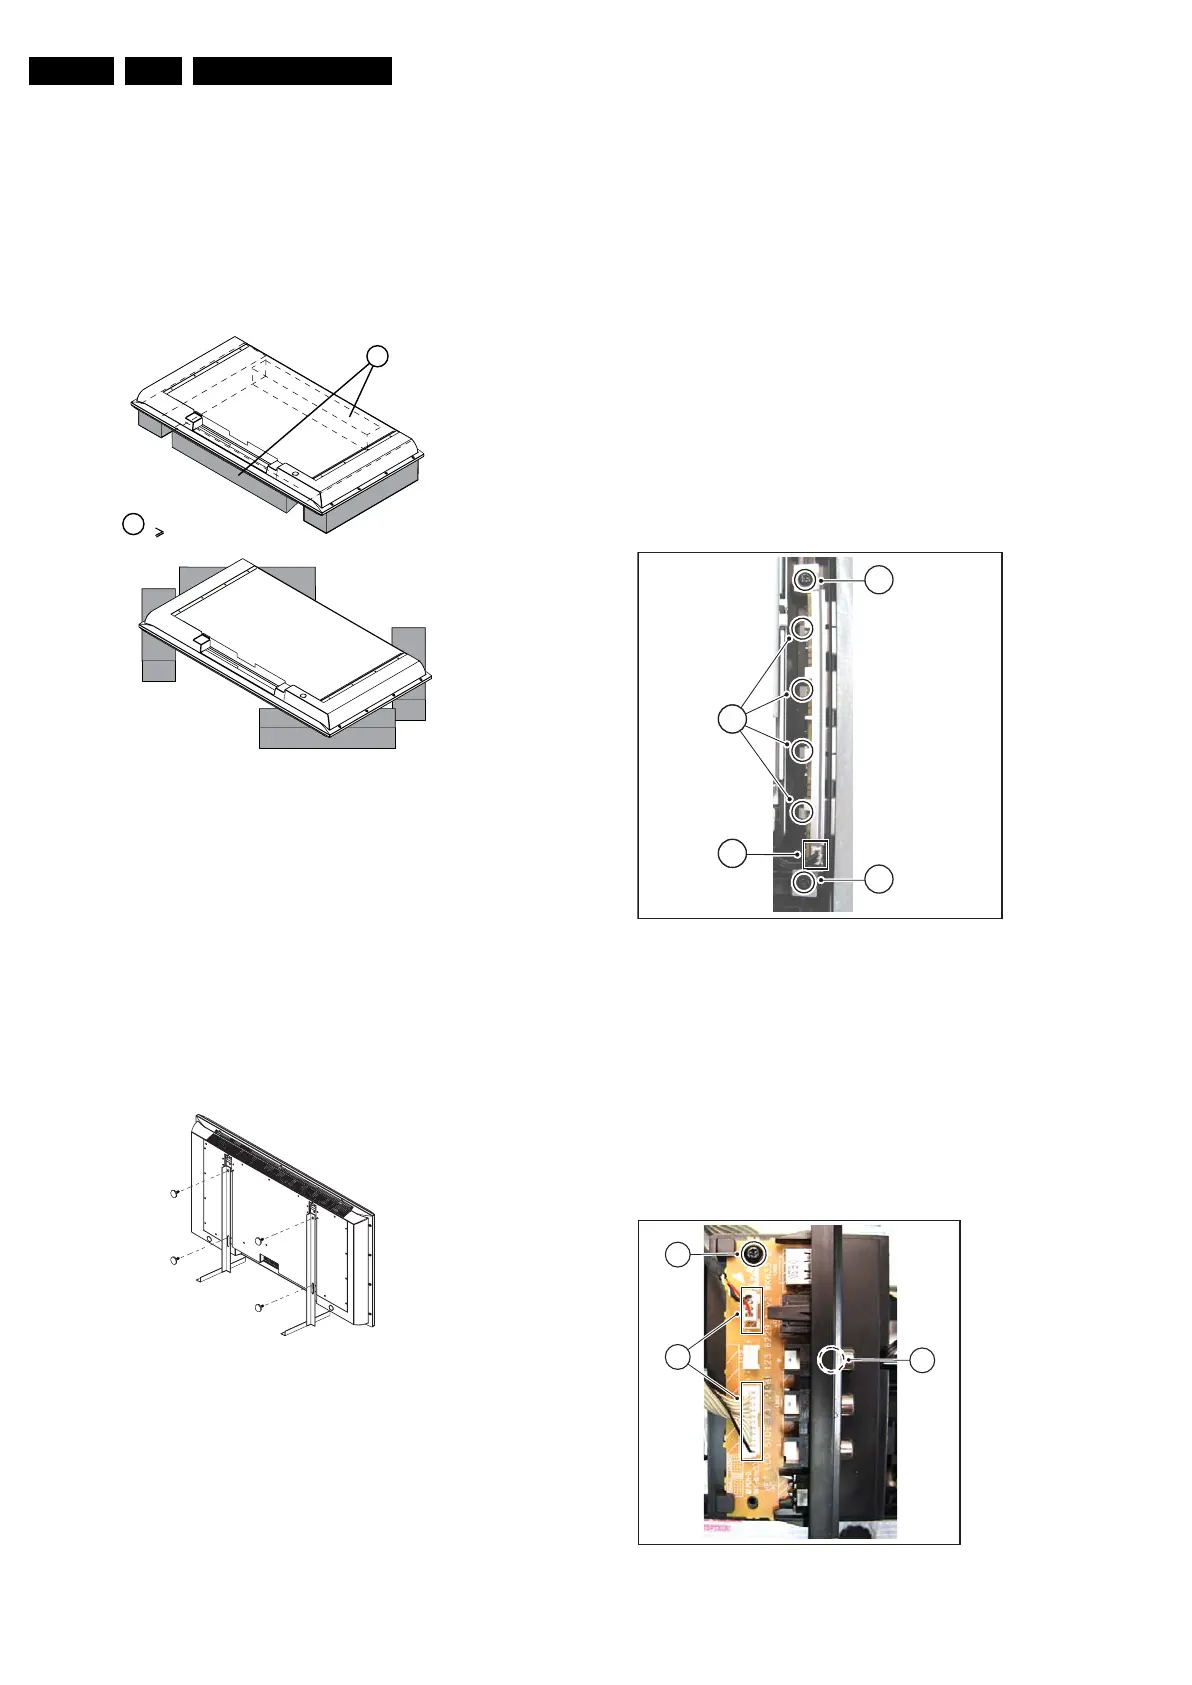
4.2.1 Foam Bars
Figure 4-4 Foam bars
The foam bars (order code 3122 785 90580 for two pieces) can
be used for all types and sizes of Flat TVs. See figure “Foam
bars” for details. Sets with a display of 42” and larger, require
four foam bars [1].
Caution: Ensure that the foam bars are always supporting the
cabinet and never only the display.
By laying the TV face down on the (ESD protective) foam bars,
a stable situation is created to perform measurements and
alignments. By placing a mirror under the TV, you can monitor
the screen.
4.2.2 Aluminium Stands
Figure 4-5 Aluminium stands (drawing of MkI)
The new MkII aluminium stands (not on drawing) with order
code 3122 785 90690, can also be used to do measurements,
alignments, and duration tests. The stands can be
(dis)mounted quick and easy by means of sliding them in/out
the "mushrooms". The new stands are backwards compatible
with the earlier models.
Important: For (older) FTV sets without these "mushrooms", it
is obligatory to use the provided screws, otherwise it is possible
to damage the monitor inside!
4.3 Assy/Panel Removal
4.3.1 Rear Cover
Warning: Disconnect the mains power cord before you remove
the rear cover.
1. Place the TV set upside down on a table top, using the
foam bars (see part "Service Position").
2. Remove rear cover screws and the stand.
3. Remove rear cover.
4.3.2 Keyboard Control Board
1. Refer to next figure.
2. Remove the screws [1].
3. Unplug connector [2].
4. Remove the unit.
5. Release clips [3] and remove the board.
When defective, replace the whole unit.
Figure 4-6 Keyboard Control board
4.3.3 Side I/O Board
1. Refer to next figure.
2. Unplug connectors [1].
3. Remove screw [2].
4. Push catch [3] and slide the unit to the right from its
bracket.
When defective, replace the whole unit.
Figure 4-7 Side I/O board
E_06532_018.eps
171106
1
Required for sets
42”
1
E_06532_019.eps
170504
G_16850_007.eps
090207
1
1
2
3
G_16850_008.eps
110107
1
2
3



 To Next Page