14 15Your recorder First steps
Table of contents
Table of contents
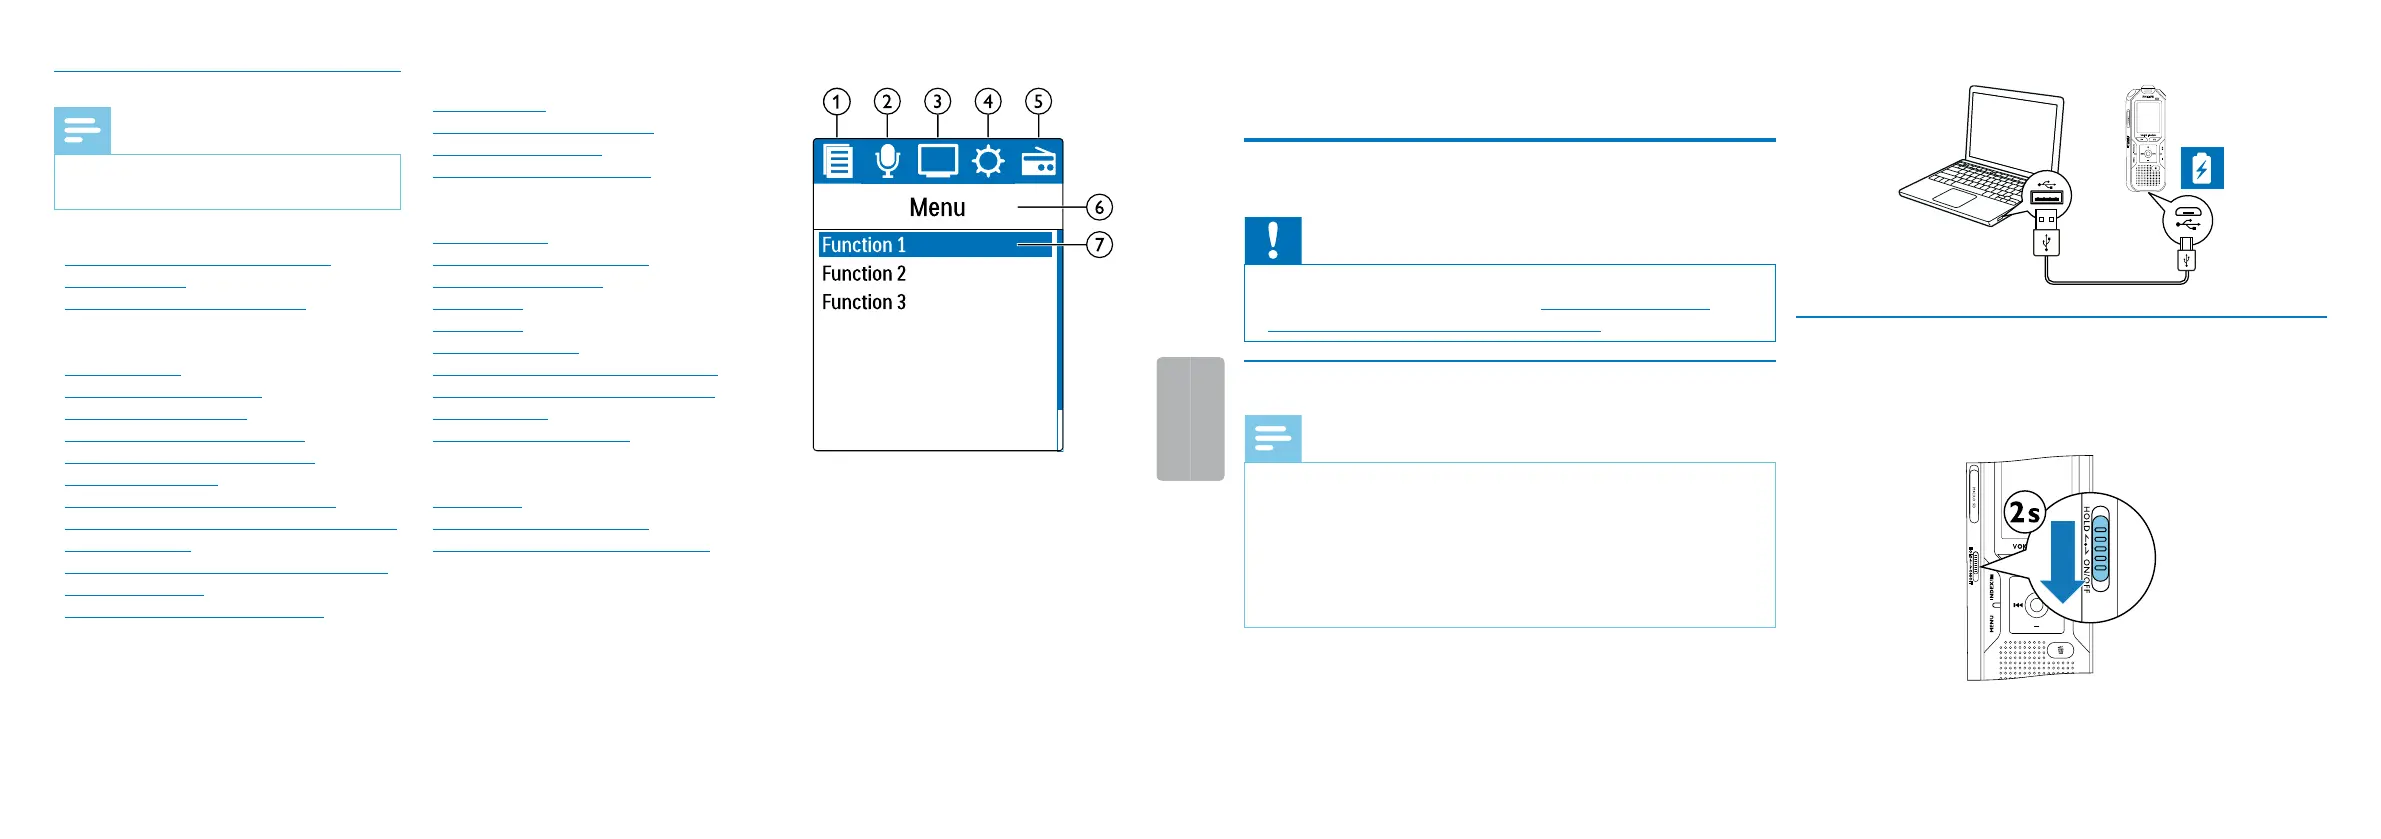
3.4.1 Menu overview
Note
• The symbol of the selected menu tab is
highlighted in blue.
a Ø Folder and file menu:
Find recording with calendar search
Split a recording
Repeat a file / repeat a sequence
b Ó Recording settings:
Record settings
Set microphone sensitivity
Setting recording quality
Enabling/disabling the wind filter
Enabling/disabling noise reduction
Setting editing mode
Switching silent recording on and o
Enabling/disabling the pre-recording function
Setting the timer
Enabling/disabling voice-activated recording
Setting auto divide
Selecting an external sound source
c Ô Display settings:
Select language
Adjusting the display contrast
Adjusting the backlight
Setting Demonstration mode
d × Device settings:
Set date & time
Enabling/disabling ClearVoice
Adjusting the equalizer
AUTO-OFF
Alarm clock
Memory formatting
Enabling/disabling the record indicator
Enabling/disabling key and signal tones
Set file location
Display device information
e Ö Radio settings:
Radio mode
Saving a radio station pre-set
Set output devices for radio playback
f Title of the selected menu tab
g List of available menu functions
4 First steps
Use the installation guide on the following pages to start using your
device quickly and easily.
Caution
• Follow the instructions on handling the device, especially the
batteries and rechargeable batteries (see also chapter 1.1.1
Batteries and rechargeable batteries, page 5).
4.1 Charge device
Note
• Connect the device to a computer or use an external battery
charger.
• Fully charge the device before first use.
• A complete charging cycle takes about 3.5 hours. The computer
must be turned on when charging the batteries. If the USB port
of the computer does not supply enough power, use an external
battery charger.
1
Plug the USB connector into a USB port on your computer.
2
Insert the micro USB plug into the USB port on the bottom of the
device.
4.2 Power on/o
1
Slide the on/o switch on the side of the device downwards for
approximately two seconds.
X The device turns on and the start-up screen is displayed.
2
To power o, pull down the power switch on the side of the device
again and hold for about two seconds.