Preparations
Setting up Progressive Scan feature (for
Progressive Scan TV only)
The progressive scan display twice the number
of frames per seconds than interlaced scanning
(ordinary normal TV system). With nearly double
the number of lines, progressive scan offers
higher picture resolution and quality.
IMPORTANT!
Before enabling the progressive scan
feature, you must ensure:
1) Your TV can accept progressive signals, a
progressive scan TV is required.
2) You have connected the DVD player to your
TV using Y Pb Pr (see “Installation-Step 3:
Connecting TV- Using Component Video jacks”.)
1
Tu rn on your TV.
2
Tu rn off your TV progressive scan mode or turn
on interlaced mode (refer to your TV user
manual).
3
Press STANDBY-ON B (STANDBY B on
the remote) to turn on the DVD player.
4
Select the correct Video Input channel.
The DVD background screen appears on the
TV.
5
Press SYSTEM MENU.
6
Press 1 2 repeatedly to select "VIDEO
SETUP".
7
Select "TV MODE" to "P-SCAN", then OK to
confirm.
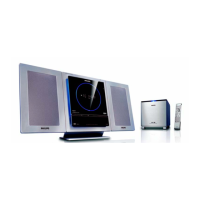
The instruction menu appears on the TV.
8
Press 1 2 to highlight OK in the menu and
press OK to confirm.
There will be a distorted picture on your
TV at this state until you turn on the
progressive scan mode on your TV.
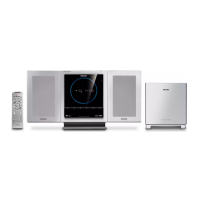
9
Tu rn on your TV progressive scan mode (refer to
your TV user manual).
The below menu appears on the TV.
0
Press 1 2 to highlight OK in the menu and
press OK to confirm.
The setup is complete now and you can start
enjoy the high quality picture.
To deactivate Progressive manually
When the distorted sign still appears on
the TV, it may be due to the connected TV
does not accept progressive signals, and
progressive is set by mistake. You must reset the
unit to interlace format.
1
Tu rn off your TV progressive scan mode or turn
on to interlaced mode (refer to your TV user
manual).
2
Press SYSTEM MENU on the remote to exit
the system menu and then DISC to exit
progressive scan.
The DVD blue background screen will appear.
Preparations
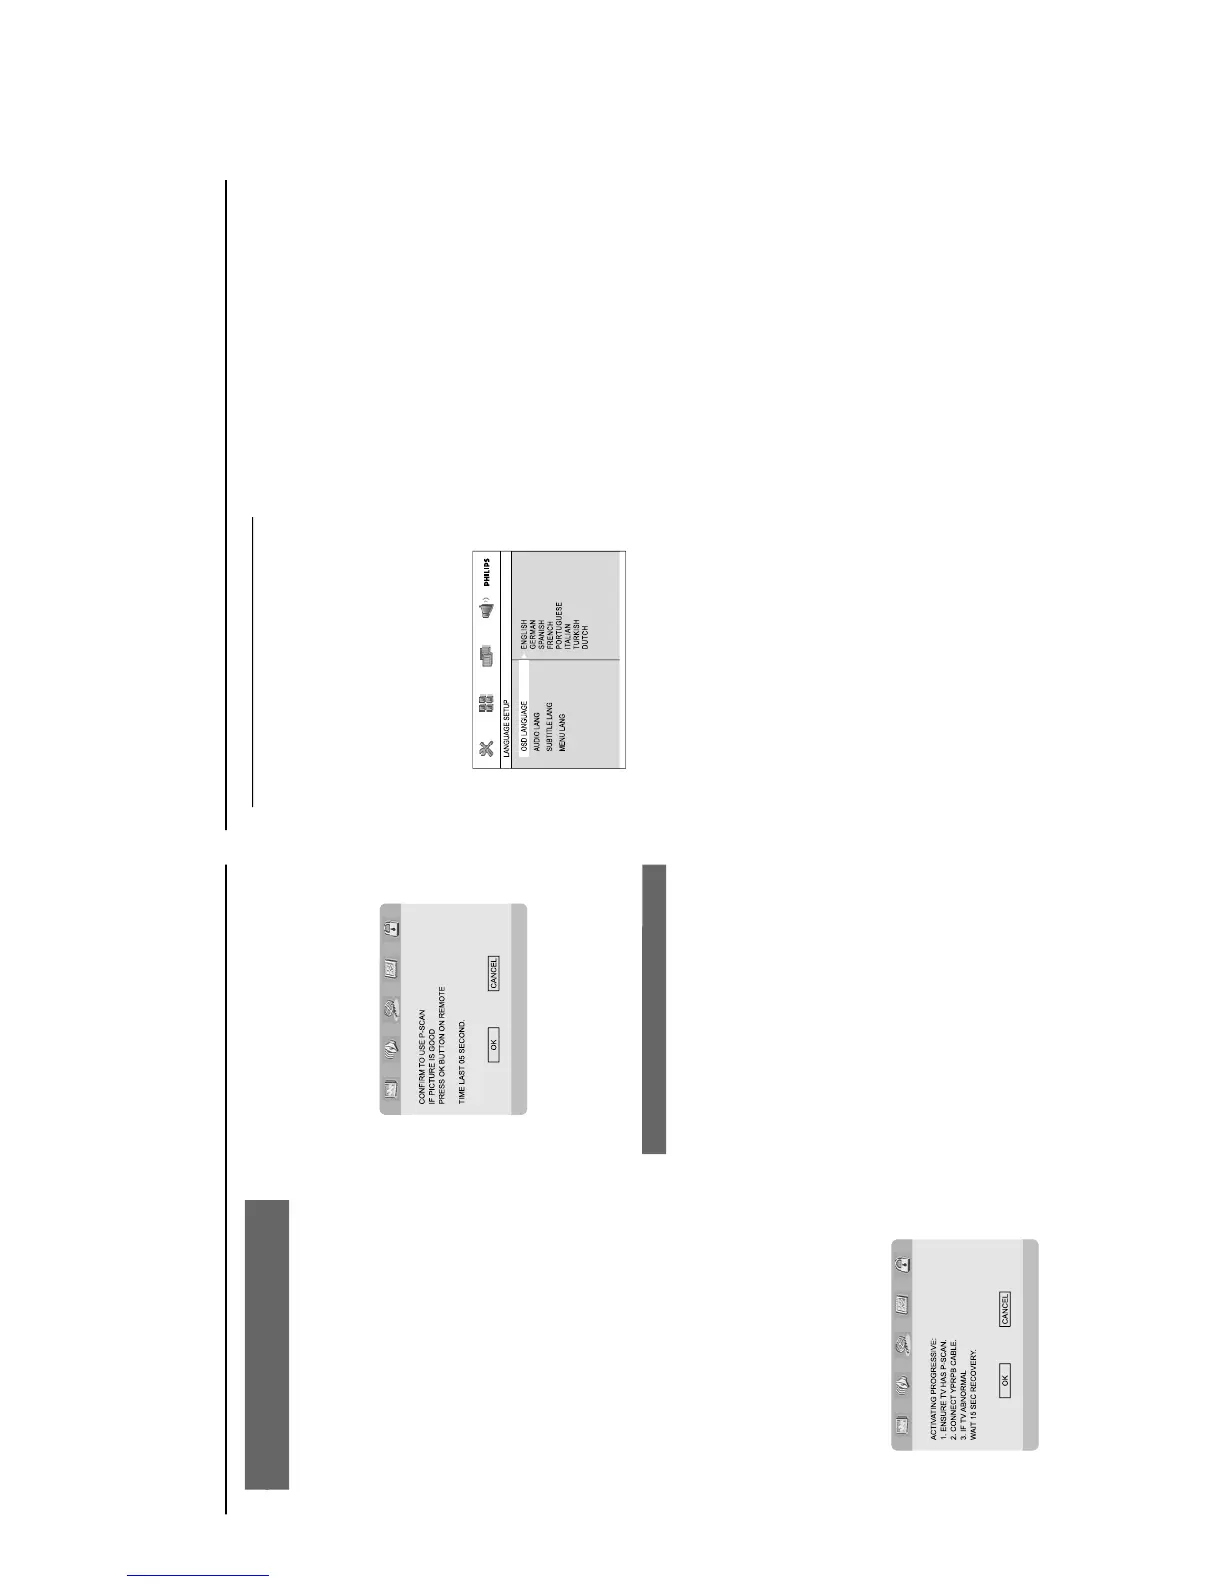
OSD LANGUAGE (On-Screen Display)
Switches the display language on the TV screen.
Select the language from the displayed list.
AUDIO LANG (DVD only)
Switches the display language of the sound track.
Select the language from the displayed list.
SUBTITLE LANG (DVD only)
Switches the display language of the subtitle.
Select the language from the displayed list.
MENU LANG (DVD only)
Select the language for the DVD menu.
When the selected language is not recorded in
the DVD, one of the recorded languages will be
selected automatically (except for OSD).
You can reset all the DVD settings except for
Rating.
If the language selected is not available on the
disc, the original language designated by each
disc will be selected.
3
Press 5/4 to select a language and press OK.
4
Repeat steps 2~3 for other settings.
To exit the menu
Press SYSTEM MENU again.
Step 4: Setting language
preference
You can select your preferred language settings
so that this DVD Micro System will automatically
switch to the language for you whenever you
load a disc. If the language selected is not
available on the disc, the language set by default
will be used instead. But the menu language of
the DVD Micro System cannot be changed once
selected.
1
In stop mode or during playback, press
SYSTEM MENU.
2
Press 2/3/5/4 on the remote control to select
your preferred option.
Move to LANGUAGE SETUP and press
4.
Move to one of the following and press 3.