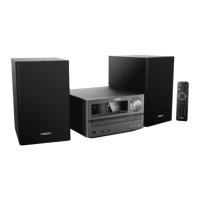
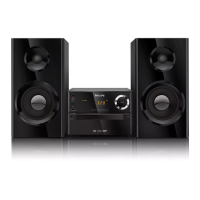
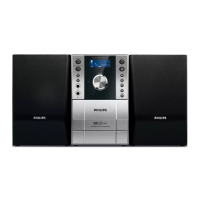
English
Preparations
IMPORTANT!
– Make sure to complete the
preparation procedures before operating
the system.
Step 1: Inserting batteries into
the Remote Control
1
3
2
1
Open the battery compar tment.
2
Insert two AAA batteries following the
indications (+/-) inside the compartment.
3
Close the cover.
Using the Remote Control to operate
the Player
1
Aim the Remote Control
directly at the remote sensor
(IR) on the front panel.
2
Do not put any objects between
the Remote Control and the
DVD Player while operating the
DVD Player.
CAUTION!
– Remove batteries if they are
exhausted or if the Remote Control is
not being used for a long time.
– Do not use old and new or different
types of batteries in combination.
– Batteries contain chemical substances,
so they should be disposed of properly.
Step 2: Setting the clock
1
Go to Standby mode.
2
Press and hold CLOCK/RDS on the remote.
“CLOCK SET” is displayed briefly. Then, the
hour digits flash on the display screen.
3
Press VOLUME -/+ (VOL +/- on the remote)
to set the hours.
4
Press CLOCK/RDS again.
The minute digits flash on the display screen.
5
Press VOLUME -/+ (VOL +/- on the remote)
to set the minutes.
6
Press CLOCK/RDS to confirm the clock
setting.
Notes:
– This system only supports 24-hour mode.
– The clock setting will be erased when the system
is disconnected from the power supply.
– The system will exit clock setting mode if no
button is pressed within 30 seconds.
Preparations
– Setting TV TYPE
Select the aspect ratio of the TV to be
connected.
4:3 PS (Pan and Scan mode )
– If you have a conventional TV set and your
DVD is not formatted for widescreen viewing,
use this setting. A wide picture is displayed on
the whole TV screen with a por tion
automatically cut off.
4:3 LB (Letterbox mode )
– If you have a conventional TV set and your
DVD is formatted for widescreen viewing, use
this setting. A wide picture with bands displayed
on the upper and lower portions of the TV
screen.
16:9 (Wide screen mode)
– If you have a widescreen TV set, use this
setting (you must also set your widescreen TV to
“full size”) available on a disc, then the disc’s own
preference will be used.
Note:
The format you select must be available on the
disc. If it is not, the setting for TV Type will not affect
the picture during playback.
To exit the menu
Press SYSTEM MENU again.
Step 3: Setting video
preference
IMPORTANT!
– Make sure you have completed all the
necessary connections. (See
"Connections-Connecting TV".)
Tu rn on the TV set and set it to the correct
Video-In channel.
You may go to channel 1 on your TV set, then
press the channel button repeatedly until you
see the Video In channel.
Or, you can use the TV remote control to
select different video modes.
Or, set TV to channel 3 or 4 if you are using
an RF modulator.
1
In stop mode or during playback, press
SYSTEM MENU.
2
Press 2/3/5/4 on the remote control to
toggle through the functions and select your
preferential option.
Move to SYSTEM SETUP and press 4.
Move to one of the following and press 3.
– Setting TV SYSTEM
Allows you to select the colour system matching
the connected TV set.
NTSC
– If the connected TV is NTSC system, select
this mode. It will change the video signal of a PAL
disc and output in NTSC format.
PAL
– If the connected TV is PAL system, select this
mode. It will change the video signal of a NTSC
disc and output in PAL format.
AUTO
–If the connected TV is multi system, select this
mode.The output format will be in accordance
with the video signal of the disc.