11
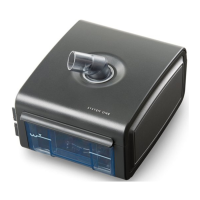
5. Reassemble the tank by placing the hinges on the tank lid over the 2 tabs on the back of the
tank base. Close the lid until the tab on the lid snaps back under the lip in the tank base. Inspect
the tank. When it is closed correctly, the lid should be seated completely on the middle seal and
it should sit snugly on the tank base so the tab can easily snap back in place.
Hinges
Ta b
Middle Seal
Ta nk Lid
Note: If the lid does not close easily onto the base, separate the two parts, reassemble the tank,
and inspect it again.
CAUTION: Do not ll the water tank above the maximum ll line. Damage to the humidier or
therapy device may occur. If the water tank is overlled, water may leak out of the tank inlet
(located on the back of the tank) when installing the tank lid.
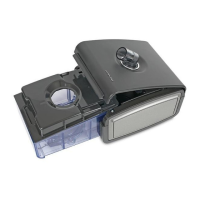
6. Slide the water tank back into the humidier.
WARNING: When installing the tank, do not allow any water to spill into the humidier or
therapy device.
CAUTION: Do not move the humidier while the water tank has water in it.
7. Plug the power supply cord into the back of the therapy device.
8. Plug the AC power cord into the power supply provided with your therapy device, and then plug
the AC power cord into an electrical outlet that is not controlled by a wall switch.
IMPORTANT: You must use the 80W power supply when using the heated tube humidier with
your therapy device. The appropriate power supply can be identied by the symbol.
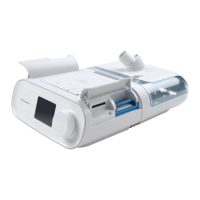
9. Attach the exible tubing from the patient circuit to the humidier’s air outlet port. (If using
the optional heated tubing, Refer to “Connecting the Optional Heated Tubing” section of this
manual.)
IMPORTANT: Before each use, examine the exible tubing for any kinks, damage, or debris. If
necessary, clean the tubing to remove the debris. Replace any damaged tubing.
10. Turn on the airow on your device and begin therapy.
Note: For complete instructions on how to turn on the airow, refer to the manual included with your
therapy device.
11. Put on your mask assembly when the air starts to ow.
Note: If you are having trouble with your mask, refer to the instructions included with the mask.
12. Refer to your therapy device manual for complete instructions on how to adjust both the Heat-
ed Humidier and the optional Heated Tubing settings to achieve the desired humidity.
CAUTION: Do not turn the humidier on without the water tank installed. The Humidier setting
must remain “o” if there is no water in the water tank.
13. Refer to the manual included with your therapy device for instructions to turn o therapy.
 Loading...