BL2 ...1000/2000/7000
10/36
PHOENIX CONTACT 3799_en_D
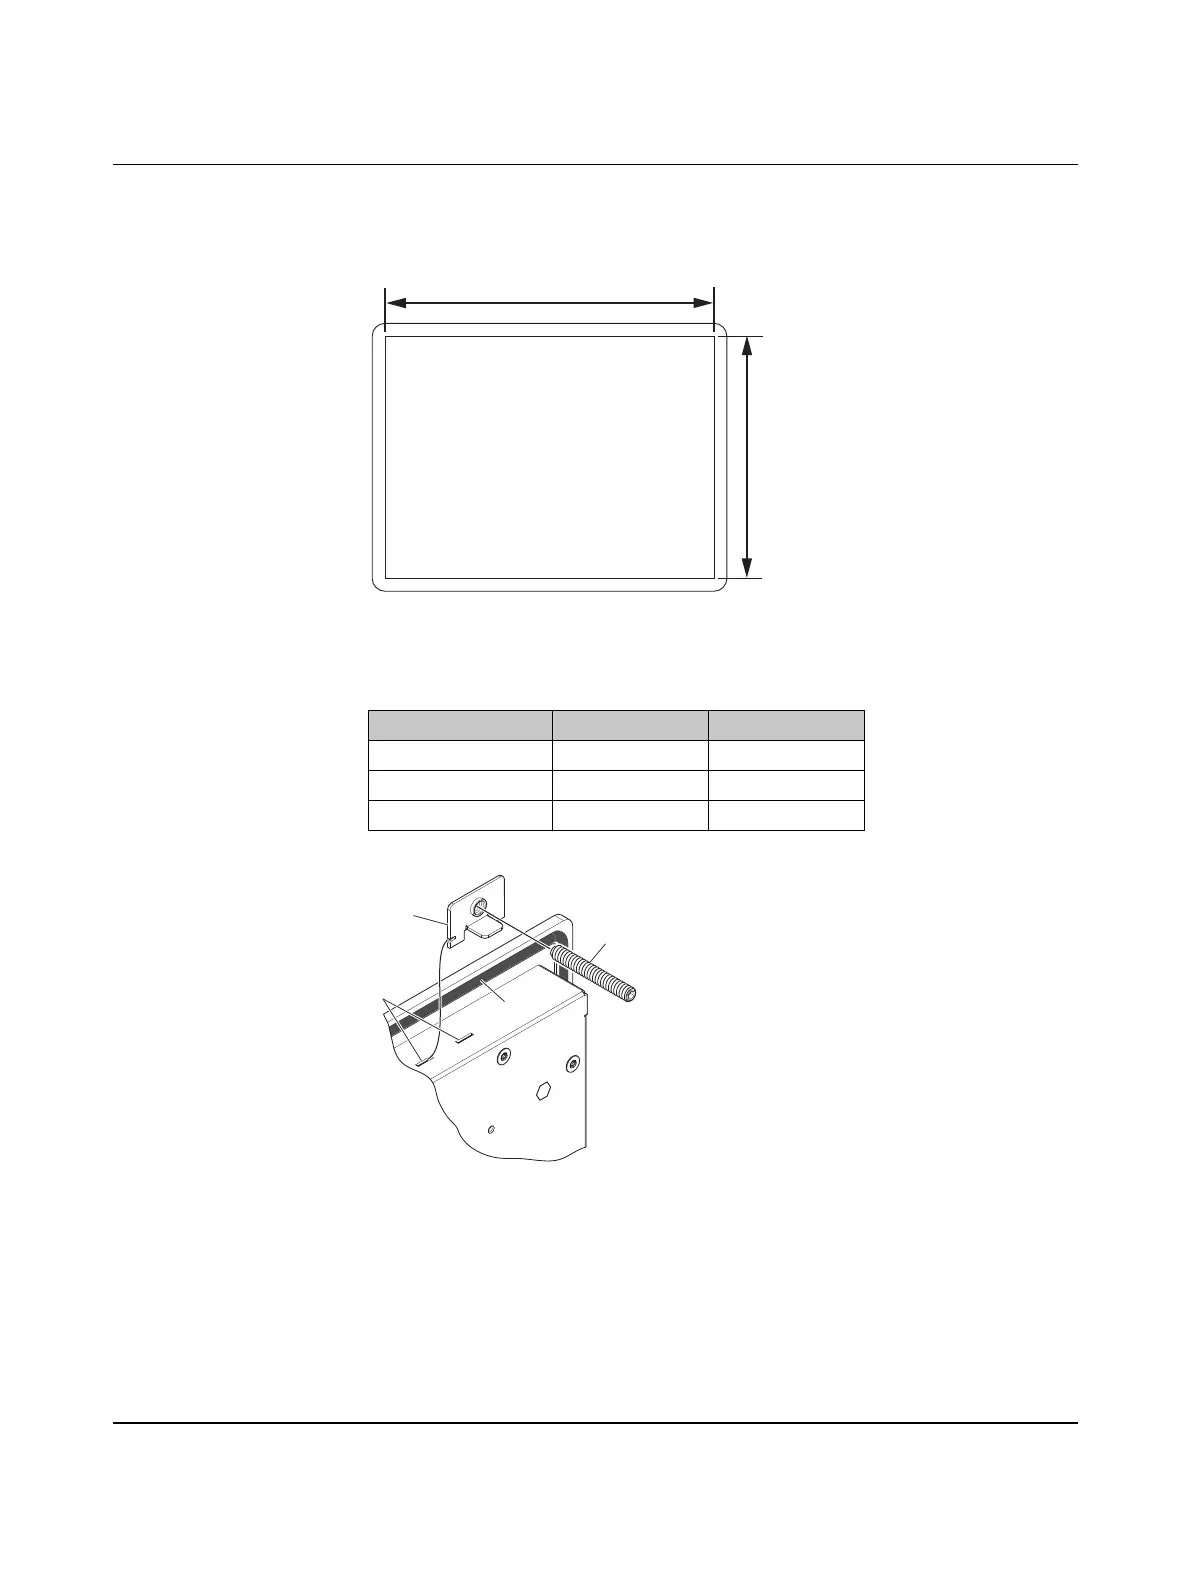
3.1.3 Panel mount (BL2 PPC ...)
1. Cut a hole in the enclosure according to the dimensions for the selected display.
Figure 3-4 Panel cutout dimensions
Figure 3-5 Panel-mounting clamps
2. From the front, push the BL2 PPC ... through the opening, making sure the gasket (1)
is properly positioned in the groove and against the panel.
3. From the rear, place the clamps (2) in the slots (3) on the display and slide the clamp to
the left to lock it into the slot. Clamps must be installed in every slot.
4. Thread a screw (4) into every clamp. Tighten the screw on each clamp, alternating from
one side to the other until the front bezel is secure against the mounting panel. Torque
the screws to 0.88 Nm.
Table 3-1 Display cutout dimensions
Display size X (mm) Y (mm)
12 in. 334.0 253.0
15 in. 386.6 285.6
17 in. 424.0 329.5
X
Y
3
1
2
4