5
DMX15012501
INSTALLATION
MOUNTING
The DMX power ampliers can be installed in a stan-
dard 19” equipment rack. This requires a total of 2
units of free vertical rack space, and the device must
be secured to the rack cabinet with 4 rack mount
screws and cup washers. In any one rack, it is best to
mount power ampliers one above the other, with at
least one unit of space between two ampliers. This
provides more efcient airow and support.
COOLING
A single thermo-sensitive variable-speed fan starts
running as soon as the DMX1501 or DMX2501 is
turned on. Before mounting your amplier, you should
familiarize yourself with its cooling requirements.
Airow restrictions are the most common cause of
inadequate cooling. They may result from improper
mounting, bundles of power cords, clogged dust l-
ters and closed rack doors. Air ows from the rear
of the unit to the front, so it is important not to block
the amplier’s rear air vents. Ensure you leave some
space at the front and rear of the rack to prevent heat-
ed air being drawn back into the airow.
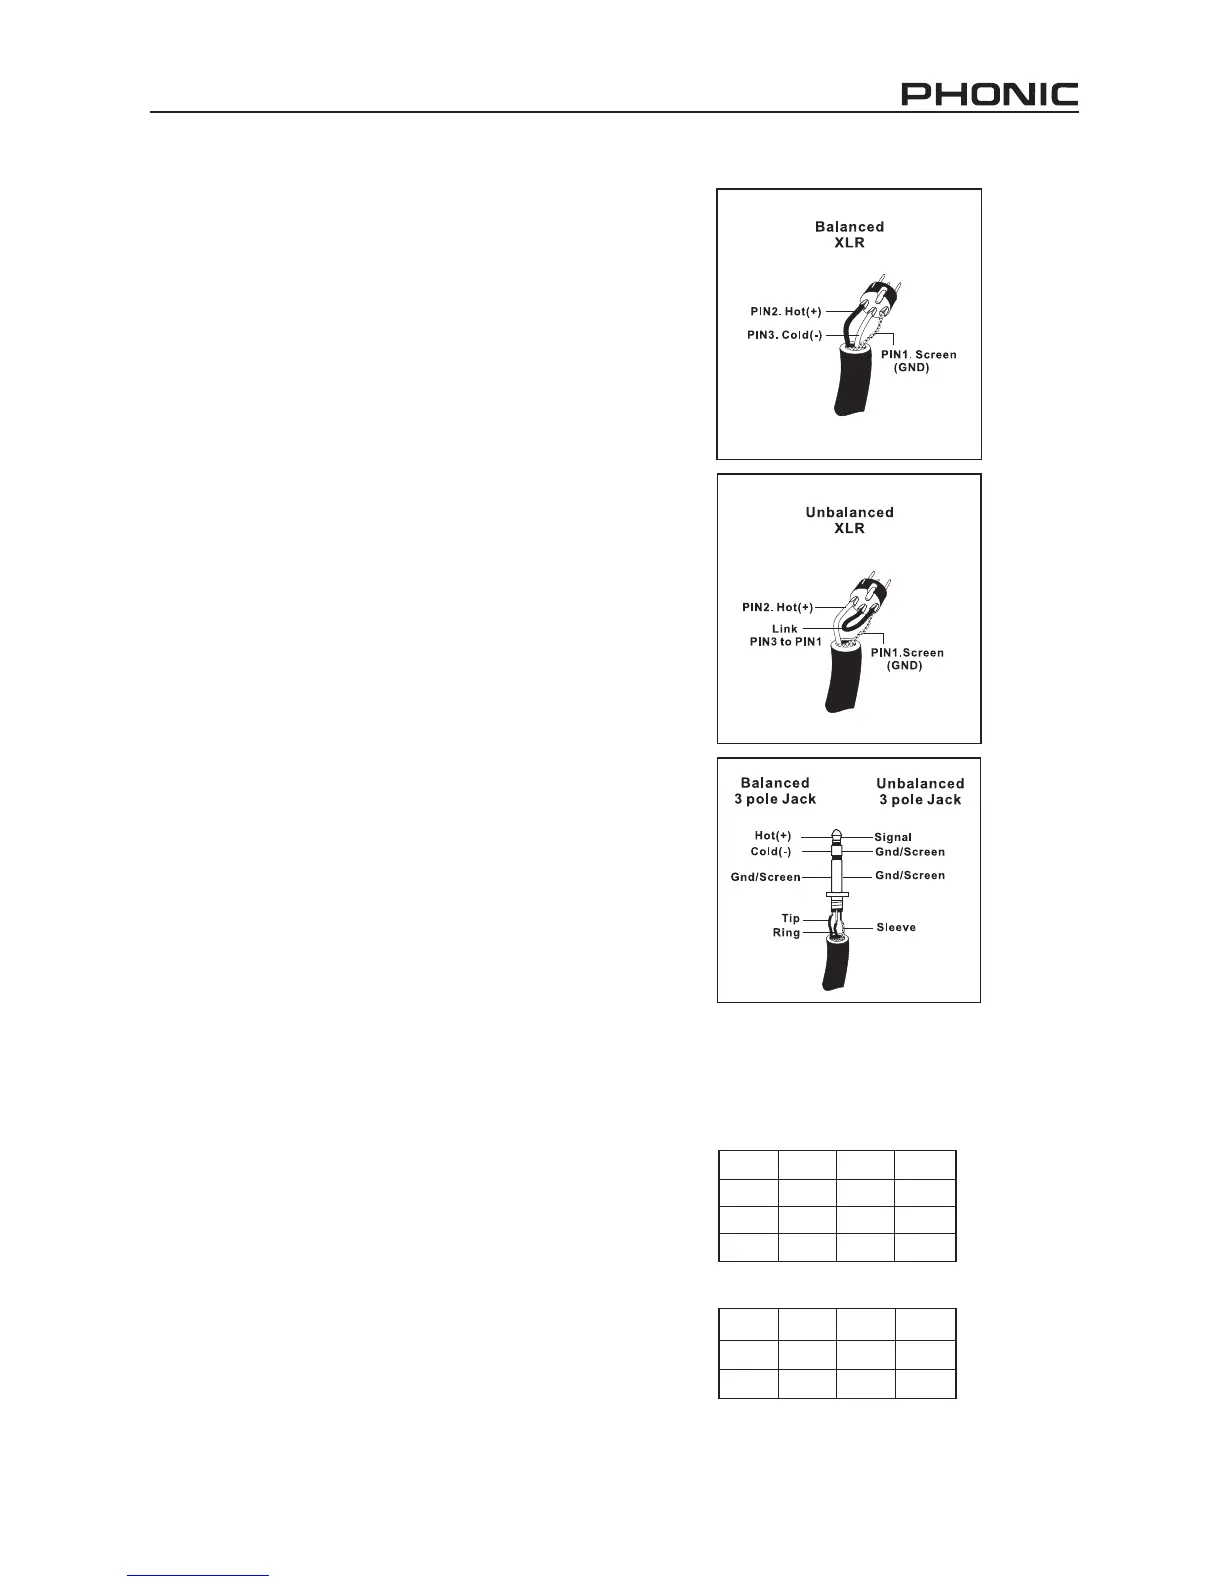
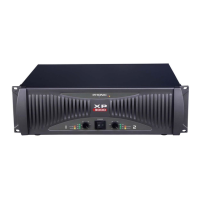
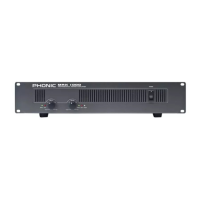
WIRING
The DMX1501 / 2501’s balanced XLR and TRS input
connectors will accept the line-level output of most
devices. The amplier’s built-in connectors can be
wired similarly for balanced or unbalanced, oating
or ground-referenced sources. The output connec-
tors include binding post, which provide an easy
connection when using banana plugs, spade lugs,
and Speakon connectors.
SPEAKON PIN OUT
PIN PIN
PIN PIN
1+ 1
1
1+
1+
1-
1-
BRG+ BRG-
2
2
2
2
2-
2-
2+
2+
2+
NA
NA
CH2
CH
CH
CH
CH
CH1
INPUT WIRING
OUTPUT WIRING