PDP-434PU
70
1234
1234
C
D
F
A
B
E
1
3
2
1
3
4
4
8
5
7
• Notes when reassembling the rear case (43P)
2
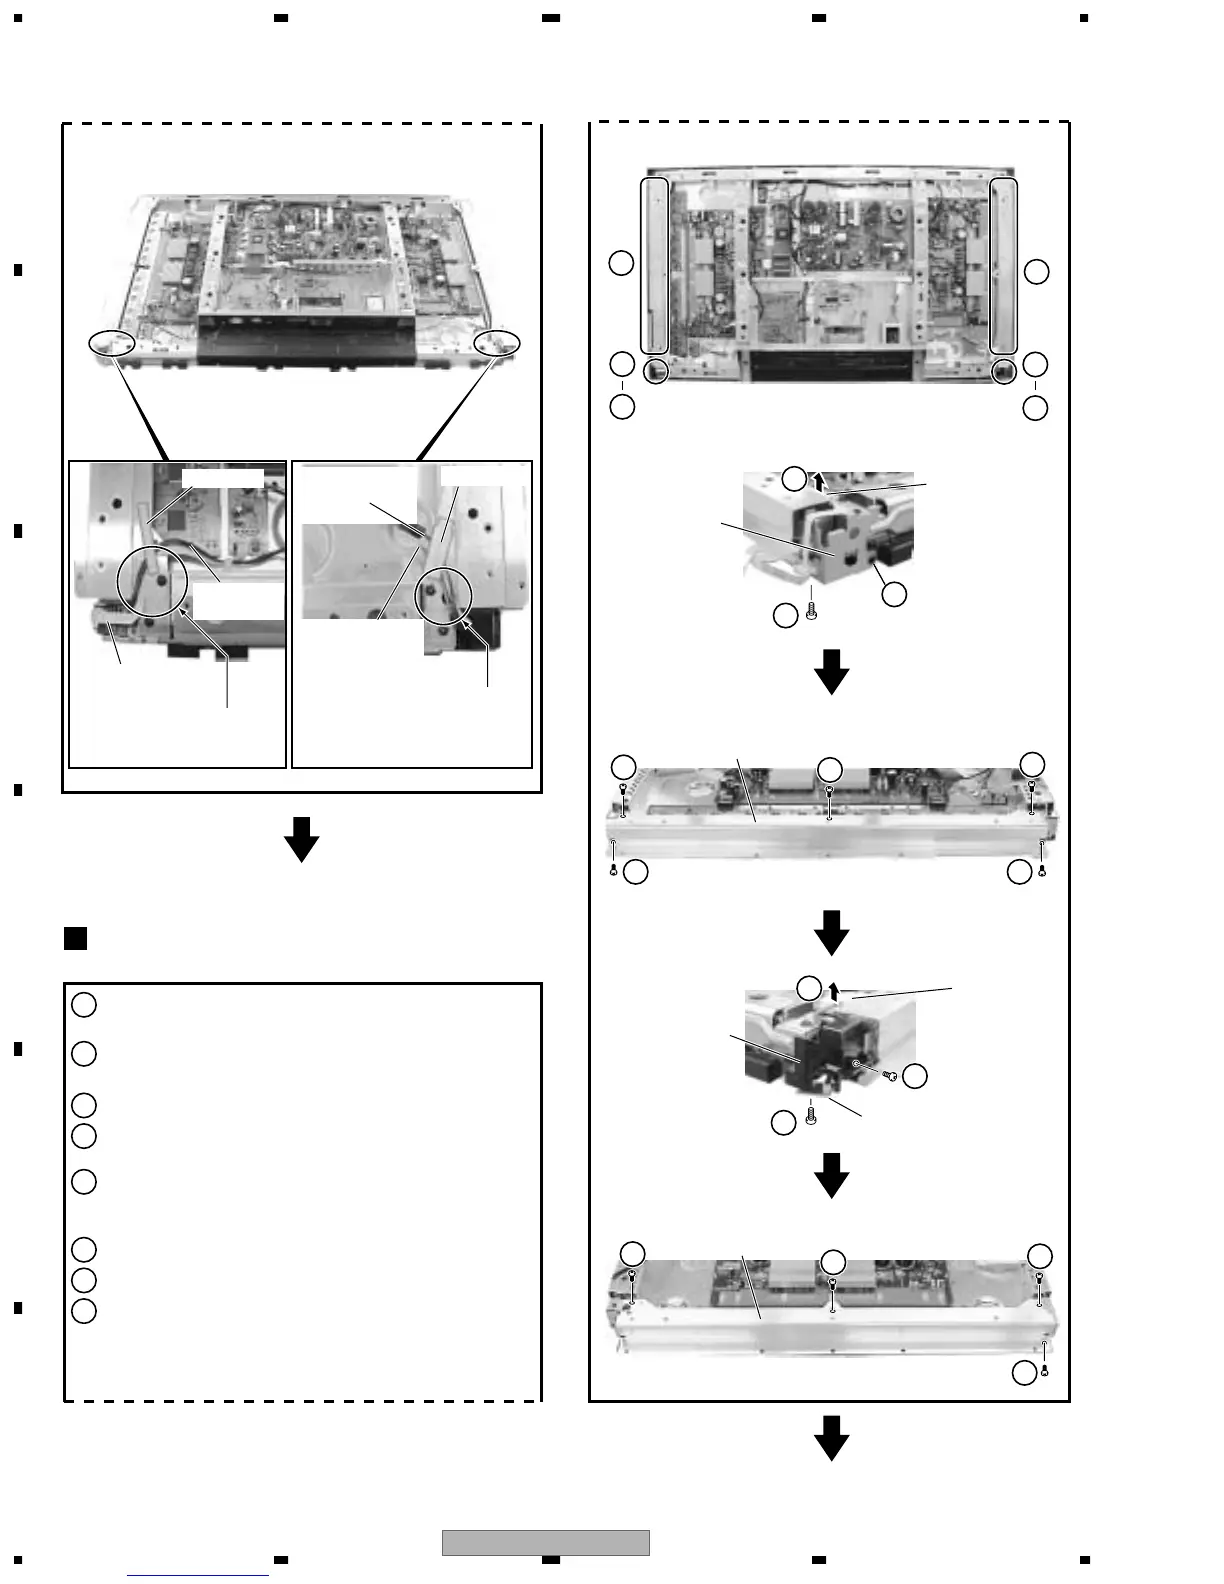
Remove the nylon rivet, then remove the IR holder.
1
Remove the front case, then remove the screw that secures
the IR holder.
3
Remove the flat clamp, then remove the wires.
4
Remove the front chassis VL Assy (43), by removing the 5
screws (M screws).
5
Remove the PANEL LED Assy, by removing the screw
(B tight). If the screw is not removed, the connectors on the
PANEL LED Assy may be damaged.
6
Remove the switch holder, by removing the screw (M screw).
7
Remove the thin clamp, then remove the wires.
8
Remove the front chassis VR Assy (43), by removing the
4 screws (M screws).
Front chassis VL Assy (43),
Front chassis VR Assy (43)
2
Flat clamp
Flat clamp
Flexible cable
(J211)
Wire B
(J106)
3P Housing wire
with housing
(J108)
Housing wire (43)
with power (J110)
IR holder
Flat clamp
Front chassis
VL Assy (43)
PANEL LED Assy
Nyron rivet
Care must be taken that the
wires do not protrude from
the front chassis.
7
Flat clamp
Front chassis
VR Assy (43)
Switch holder
Pass J108 through under J110.
Care must be taken that the
wires do not protrude from the
front chassis.
8
8
8
4
4
4 4
6
5
8
 Loading...