2
3
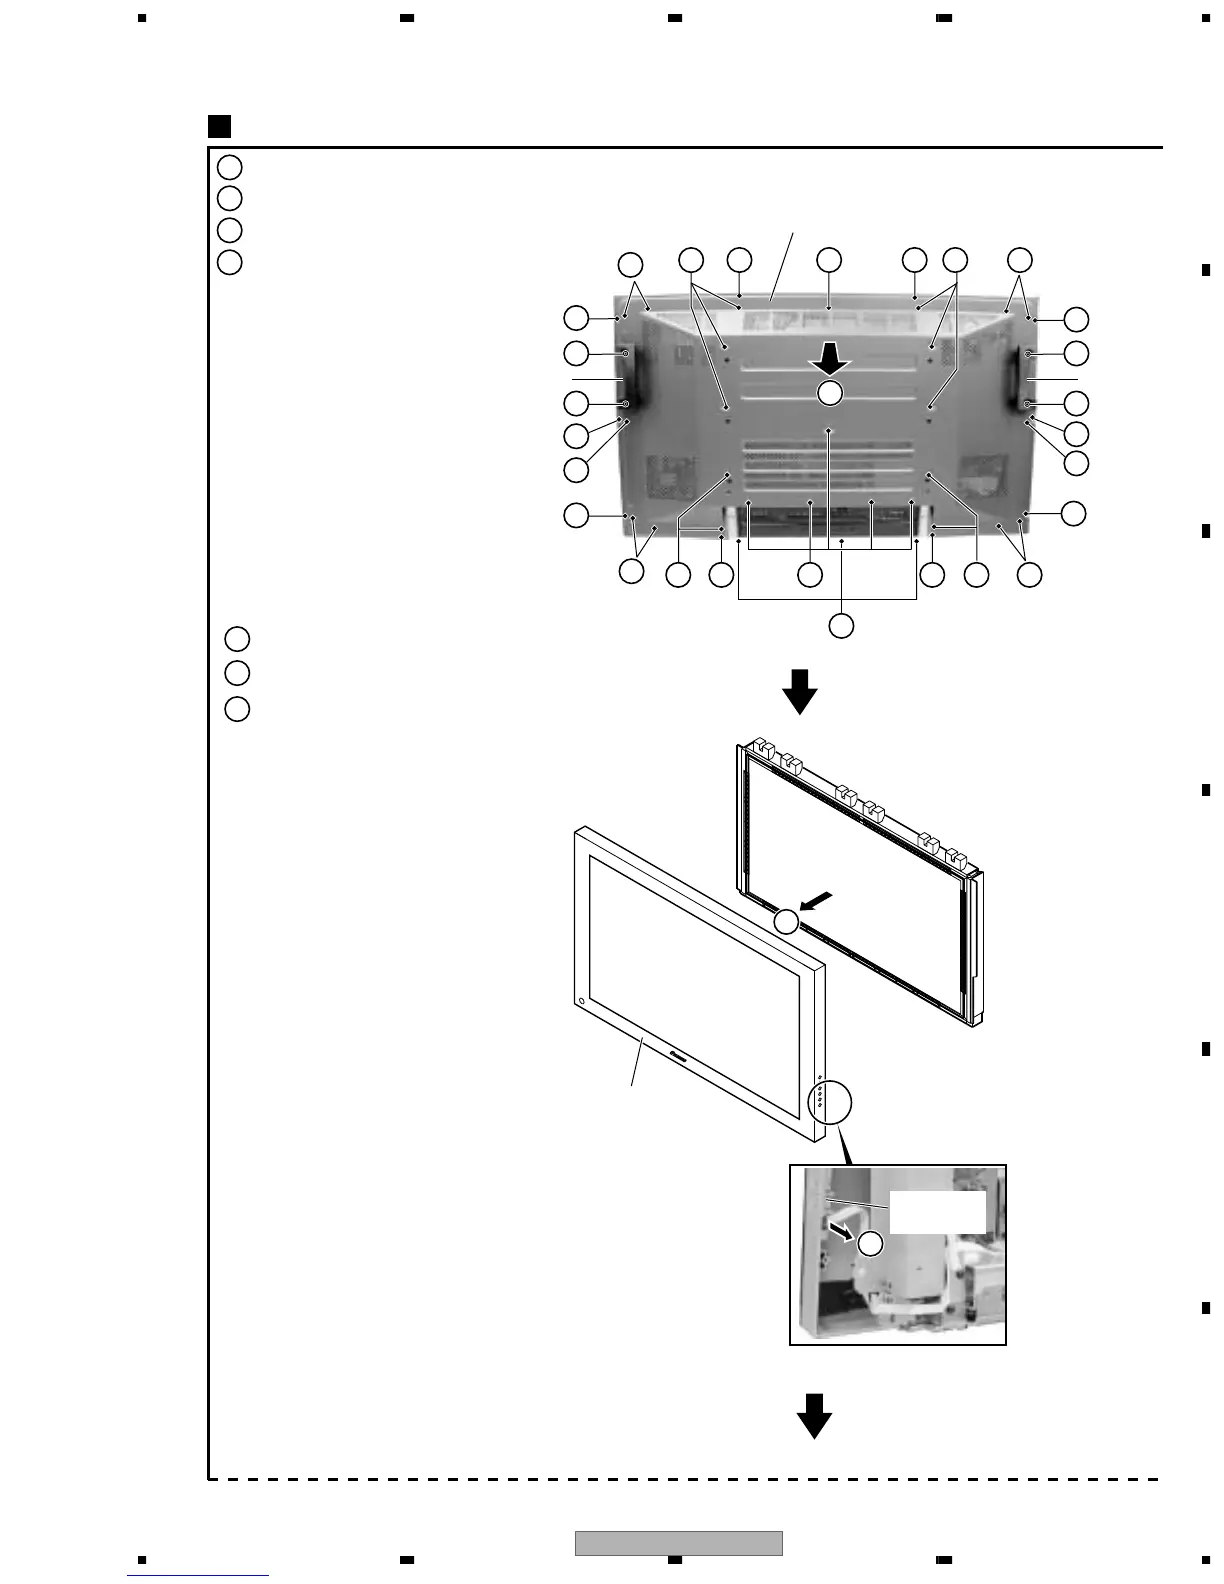
Remove the ten screws (B tight).
1
Remove the grip by removing the four screws.
3
Remove the twenty six screws (M screws).
4
Remove the rear case (43P).
Rear case (43P)
Grip
Rear case (43P), Front case Assy (43P)
3
4
2 32
×2
3
×2
×5
6
×3
32
×2
3
×2
5
3
×2
3
×3 ×3
3
×2
1
6
Remove the three screws (B tight).
5
Remove the flexible cable (J211) from the PANEL KEY Assy.
7
Remove the front case (43P).
Front case (43P)
PANEL KEY
Assy
7
1
2
2
2
3
1
Grip
1
1
2
3
2
2 3
2
Note:
As the screws used for the front case are B tight (ABZ30P100FZK)
and other screws used are M screws (AMZ30P060FZK), care must
be taken not to use the screws in the wrong places.
 Loading...