EasyManua.ls Logo

Pitco SSHLV14 Series - User Manual

Pitco SSHLV14 Series
38 pages
Print Icon
To Next Page IconTo Next Page
Loading...
IMPORTANT FOR FUTURE REFERENCE
Please complete this information and retain this manual
for the life of the equipment:
Model #: ___________________________
Serial #: ___________________________
Date Purchased: ____________________
ENGLISH
Installation & Operation Manual
REDUCED OIL VOLUME
FRYING SYSTEM
Covering
Models
SSHLV14, SSHLV184 SERIES
D
E
I
F
I
T
R
E
C
D
E
S
I
G
N
C IRE T IF E D
L20-407 rev. 2 (12/14)

Table of Contents

Questions and Answers

  • E
    Elizabeth WagnerAug 14, 2025
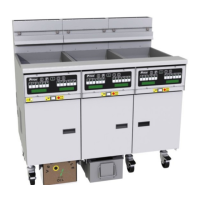
    What to do if controller does not activate on Pitco SSHLV14?
    • J
      Jane MeyerAug 14, 2025
      If the controller on your Pitco Fryer doesn't activate, there could be several reasons: * **No power to appliance:** Check the main building power supply. * **Controller not turned on:** Ensure the controller is turned on. * **Power cord loose:** Connect the power cord securely. * **Circuit breaker tripped:** Reset the circuit breaker. If the appliance fuse has blown, contact an authorized service company.
  • H
    Hayden WellsAug 17, 2025
    What to do if Pitco SSHLV14 appliance will not heat up?
    • W
      walkergregoryAug 17, 2025
      If your Pitco Fryer isn't heating up, it could be due to: * **High temperature limit tripped:** Allow the appliance to cool down and then reset the high temperature limit. * **SCBS thermal limit switch tripped:** Depress the button on the thermal limit switch to reset it. If the problem continues, contact an authorized service company.
  • S
    swansondavidAug 21, 2025
    What to do if Pitco SSHLV14 Fryer filter pump does not activate?
    • R
      Regina VegaAug 21, 2025
      If the filter pump on your Pitco Fryer does not activate, reset the circuit breaker or allow the motor to cool, then press the RED reset button on the motor.
  • D
    Dawn FitzgeraldAug 25, 2025
    Why is oil returning slowly to the Pitco Fryer tank?
    • T
      Tamara WilliamsAug 25, 2025
      If oil or shortening is returning to the tank slowly or not at all in your Pitco Fryer, consider these possible causes: * **Dirty filter paper:** Change the filter paper. * **Dirty strainer cap:** Remove and clean the strainer cap. * **Filter pan not fully pushed in:** Ensure the filter pan is completely pushed in.
  • S
    stephencordovaAug 27, 2025
    Why are there excessive air bubbles in Pitco SSHLV14 Fryer oil?
    • D
      Dustin DanielAug 27, 2025
      Excessive air bubbles in the oil being returned to the tank of your Pitco Fryer can be caused by: * **Loose pickup tube screen:** Tighten the pickup tube screen cap. * **Missing pickup tube screen cap:** Locate and install the pickup tube screen cap. * **Filter pan not fully pushed in:** Push the filter pan in completely to ensure a proper connection.
  • Q
    qbrownAug 31, 2025
    What to do if Pitco SSHLV14 shows 'DRAINING' when valve is closed?
    • D
      Douglas MillerAug 31, 2025
      If your Pitco Fryer's computer controller still displays 'DRAINING' even when the drain valve is closed, it could be due to: * **Drain valve handle not completely closed:** Verify that the drain valve handle is completely closed. * **Improperly adjusted drain switch:** Contact an authorized service company.
  • S
    Susan DanielSep 3, 2025
    What to do if Pitco SSHLV14 Fryer computer display is off?
    • I
      Ian SimsSep 3, 2025
      If the computer display on your Pitco Fryer is off and cannot be turned on, contact an authorized service company, as this could indicate a faulty computer.
  • B
    Bryan GarciaSep 6, 2025
    What to do if Pitco Fryer has drain valve interlock?
    • L
      Lisa NealSep 6, 2025
      If your Pitco Fryer shows a drain valve interlock: * Turn the computer OFF (if it's not already OFF). * Close the tank drain valve and fill the tank with oil or shortening. * Turn the computer ON.
  • M
    Mrs. Joann FergusonSep 9, 2025
    What to do for Pitco SSHLV14 power failure?
    • R
      Roy VillarrealSep 10, 2025
      In case of a power failure with your Pitco Fryer: * Wait five minutes after the power is restored before attempting to restart the appliance. * To restart the appliance, follow the start up procedure.

Summary

Theory of Operation

Installation

Checking and Unpacking Your New Appliance

Inspect and unpack the new Pitco appliance for damage and verify all parts are present.

Installation Clearances

Specifies required clearances for combustible and non-combustible installations for safe operation.

Leveling the Fryer - Legs;Casters

Procedure for leveling the fryer using its legs or casters to ensure stability.

Gas Connection

Guidelines for connecting the gas supply to ensure correct pressure and safe operation.

Quick Disconnect Connection

Requirements for quick disconnect devices for gas appliances equipped with casters.

Fuel Supply Line Leak and Pressure Testing

Procedures for testing the fuel supply system for leaks and correct pressure.

Installation Setup

Conforming installation to local codes and national standards like ANSI Z223.1.

Electrical Connections

Proper electrical connection procedures, voltage, and compliance with codes.

Ventilation and Fire Safety Systems

Importance of proper ventilation and fire safety systems for appliance operation.

Inspection

Visual checks before filling and adjusting, including levelness and probe security.

Initial Adjustments

Essential adjustments after installation for proper performance.

Initial Cleaning

Removing protective coatings and cleaning the appliance before first use.

Operation

Operational Features

Overview of key operational components of the fryer.

Basic Operational Features

Explains core components like basket hanger, oil top off, drain valve, and computer.

Filling the Fry Pot

Instructions for filling the fry pot with liquid shortening for operation.

Filling the Tank with Liquid Shortening

Detailed procedure for filling the tank with liquid shortening, including capacity.

Appliance Start Up

Cooking

Guidance on following food manufacturer instructions for quality cooking.

Cooking Tips

Tips for optimizing cooking time, preventing overfilling, and maintaining oil quality.

Computer Controller Operation

To Turn the Appliance On

Steps to power on the appliance using the I/O key.

To Turn the Appliance Off

Procedure to power off the appliance using the I/O key.

To Start a Cook

How to initiate a cooking cycle once the appliance is ready.

To Cancel a Cook

Method to cancel an active cooking cycle.

To View Actual and Set Temperatures

How to check current and target oil temperatures on the controller.

To View Current Settings for Cook, Shake, and Hold Times

Accessing and viewing programmed cook, shake, and hold times for products.

To Perform a Boil Out Operation

Procedure for tank cleaning using a boil out method.

To Enter Programming Level 1 (For the Store Manager)

Accessing the first level of programming for store managers.

To Set Cook Temperature

Adjusting the target cooking temperature for the fryer.

To Change a Product Key-Cook, Shake, Hold, and Hold Pre-Alarm Times

Customizing cook, shake, hold, and pre-alarm times for specific products.

To Exit Level 1 Programming

Exiting the programming level 1 menu.

To Enter Programming Level 2 (For the Store Manager)

Accessing the second level of programming for store managers.

Fahrenheit or Celsius Display

Switching the temperature display between Fahrenheit and Celsius.

Password Change or Required?

Activating or changing the operator password for programming levels.

Beeper Volume and Tone

Adjusting the volume and tone of the appliance's beeper alarms.

Language Selection

Changing the display language to English, Spanish, French, etc.

Melt Cycle Type

Selecting melt cycle type or disabling it for cold starts.

Recovery Test Value

Displays stored heat-up and recovery times for appliance performance.

Control or Timer: (Left Side of Dual or Single Vat)

Selecting between control and timer modes for the left vat.

Control or Timer: (Right Side of Dual Vat)

Selecting between control and timer modes for the right vat.

Other Displays

Explains various display messages and their meanings.

Computer Shutdown

Procedure to shut down the computer control for the fryer.

Flush Hose Operation (If Equipped)

Using the flush hose for rinsing and cleaning the cooker tank.

Basket Lift Operation

Push Button Oil Top Off System

Automatic Oil Top System (Option)

Quick Strain Filtering Filter Soon Light Flashing

Cook Counter Adjustment

Appliance Shutdown

Standby Mode

Puts the appliance in a low-power state, disabling main burners.

Complete Shutdown

Turns off the gas supply and completely shuts down the appliance.

Preventative Maintenance

Daily Preventative Maintenance

Daily tasks to keep the equipment safe and performing optimally.

Weekly Preventative Maintenance

Additional weekly tasks for equipment maintenance and safety.

Monthly Preventative Maintenance

Monthly procedures to ensure peak performance and safety.

Annual;Periodic Preventative Maintenance and Inspection

Yearly inspection by a qualified technician for comprehensive checks.

Ventilation Hood

Importance of proper ventilation hood operation and inspection.

Troubleshooting

Power Failure

Steps to take after an electrical power interruption and restart procedure.

High Temperature Limit Switch

How to identify and reset the high temperature limit switch.

Drain Valve Interlock

Resuming operation after the drain valve interlock is tripped.

Self Cleaning Burner System (Not on All Models)

Behavior and troubleshooting of the self-cleaning burner system.

Resetting the Self Cleaning Burner System Temperature Limit Switch

Procedure to reset the temperature limit switch for the SCBS.

Troubleshooting Charts

Tables listing problems, causes, and corrective actions for common issues.

Pitco SSHLV14 Series Specifications

General IconGeneral
Model SeriesSSHLV14 Series
Number of Fry Pots1
Heating MethodGas
Frypot Dimensions (W x D)14" x 14"
Voltage120V
CategoryCommercial Deep Fryer
Electrical Requirements120V, 60 Hz, 1 Phase (for controls)
ConstructionStainless Steel
FeaturesCold Zone

Related product manuals