Chapter 2 Hardware Installation
Before you proceed with the installation, it is necessary that you have enough information about the
WRT-414.
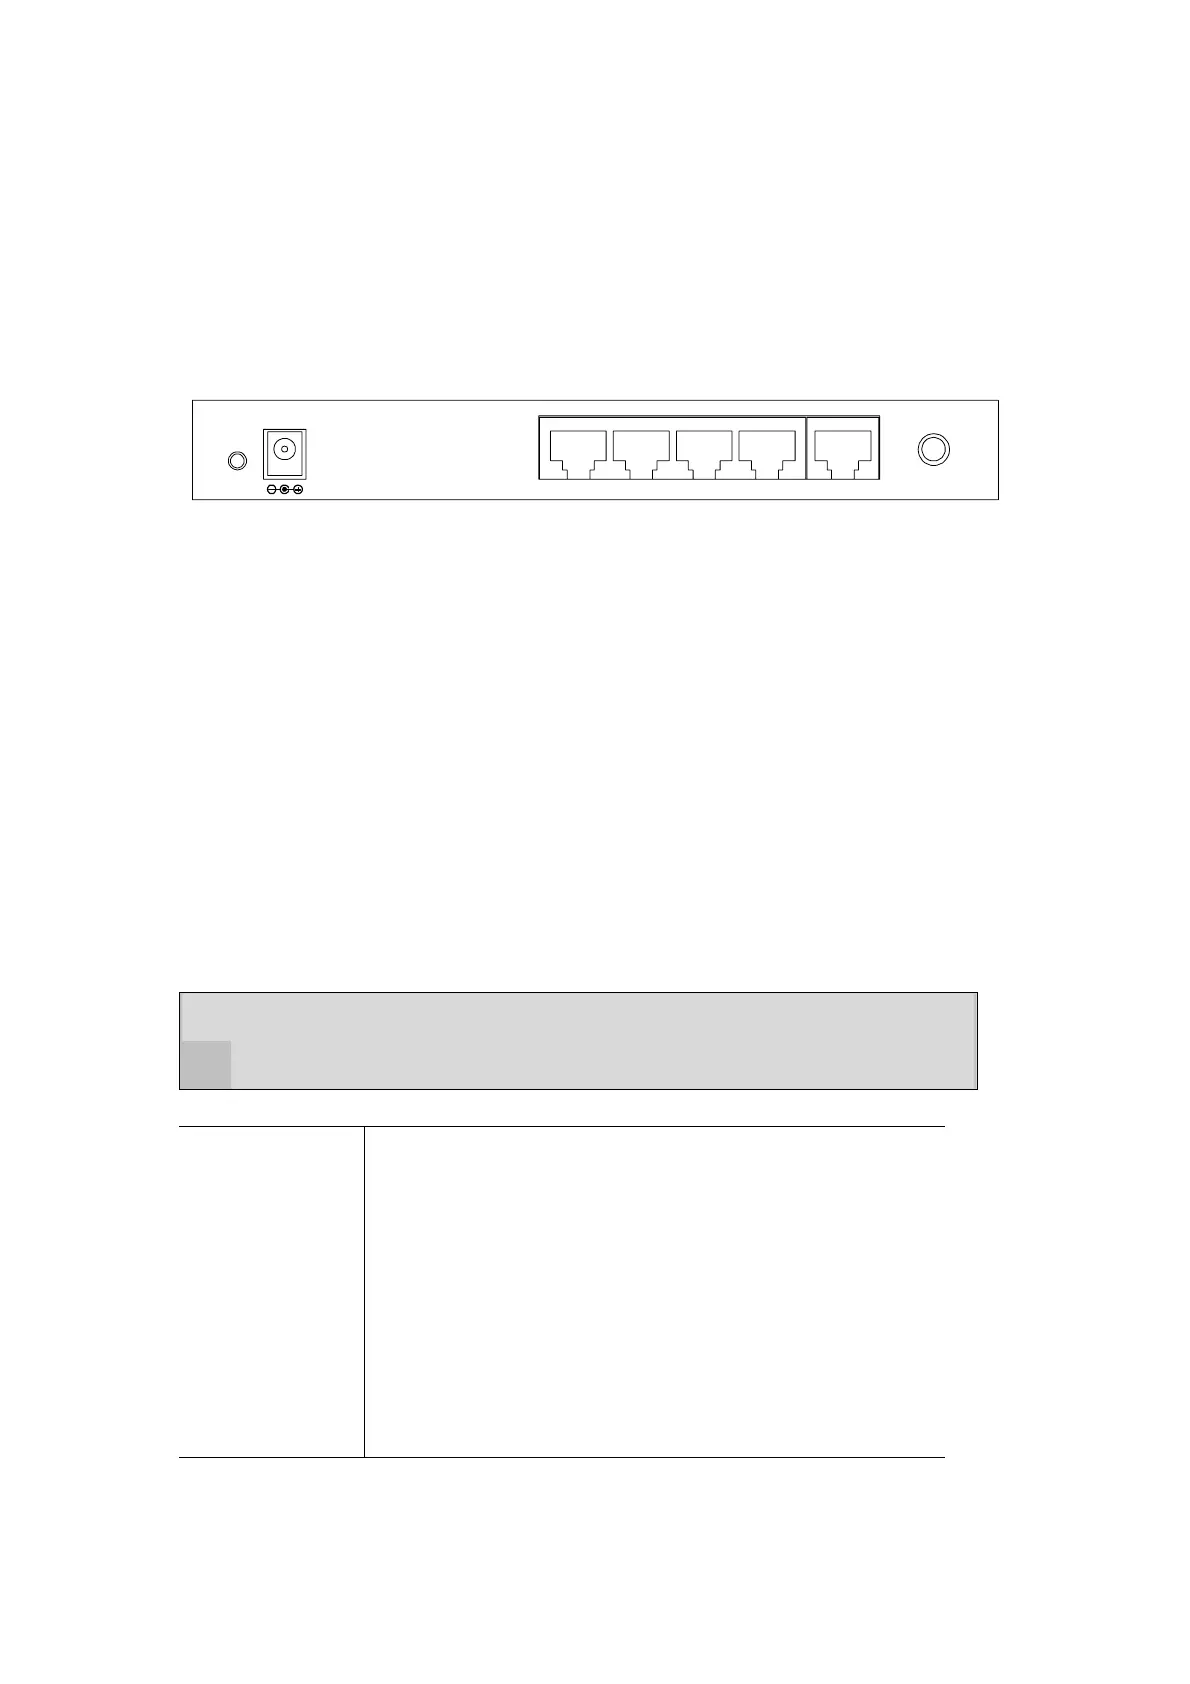
2.1 Hardware Connection
12V DC
RESET
ANT
WAN1234
+
1. Locate an optimum location for the WRT-414. The best place for your WRT-414 is usually at
the center of your wireless network, with line of sight to all of your mobile stations.
2. Adjust the antennas of WRT-414. Try to adjust them to a position that can best cover your
wireless network. The antenna’s position will enhance the receiving sensitivity.
3. Connect RJ-45 cable to WRT-414 LAN port. Connect one of the LAN ports on WRT-414 to your
LAN switch/hub or a computer with a RJ-45 cable.
4. Connect RJ-45 cable to WRT-414 WAN port. Connect xDSL/Cable Modem to the WAN port on
WRT-414. Usually, this cable would be provided with your modem. If no cable was supplied with
your modem, please use a RJ-45 Ethernet cable
5. Plug in power adapter and connect to power source. After power on, WRT-414 will start to
operate.
Note: ONLY use the power adapter supplied with the WRT-414. Otherwise, the product may be
damaged.
If you want to reset WRT-414 to default settings, press and hold the Reset button over 5
seconds and release. And then wait for WRT-414 restart.
Reset Button
This button has two functions:
To Reboot machine without Clearing Existing Configurations:
Press the reset button with a pencil tip (for less than 5 seconds),
machine will re-boot itself, the existing configurations will be kept.
To Clear All Data and restore the factory default values:
Press the reset button for longer than 5 seconds and the router will
reset itself to the factory default settings (warning: your original
configurations will be replaced with the factory default settings)
- 3 -