PH/PHX-2 Manual
49
Material Heater
WARNING! Before performing any maintenance, make sure the
Main Power Switch is OFF and incoming power is locked OFF.
NEVER access the inside of the Control Panel with the
Proportioner power supply ON. The Heaters are components
that reach high temperatures; you must wait until they have
cooled before handling and bleed all material pressure to
zero.
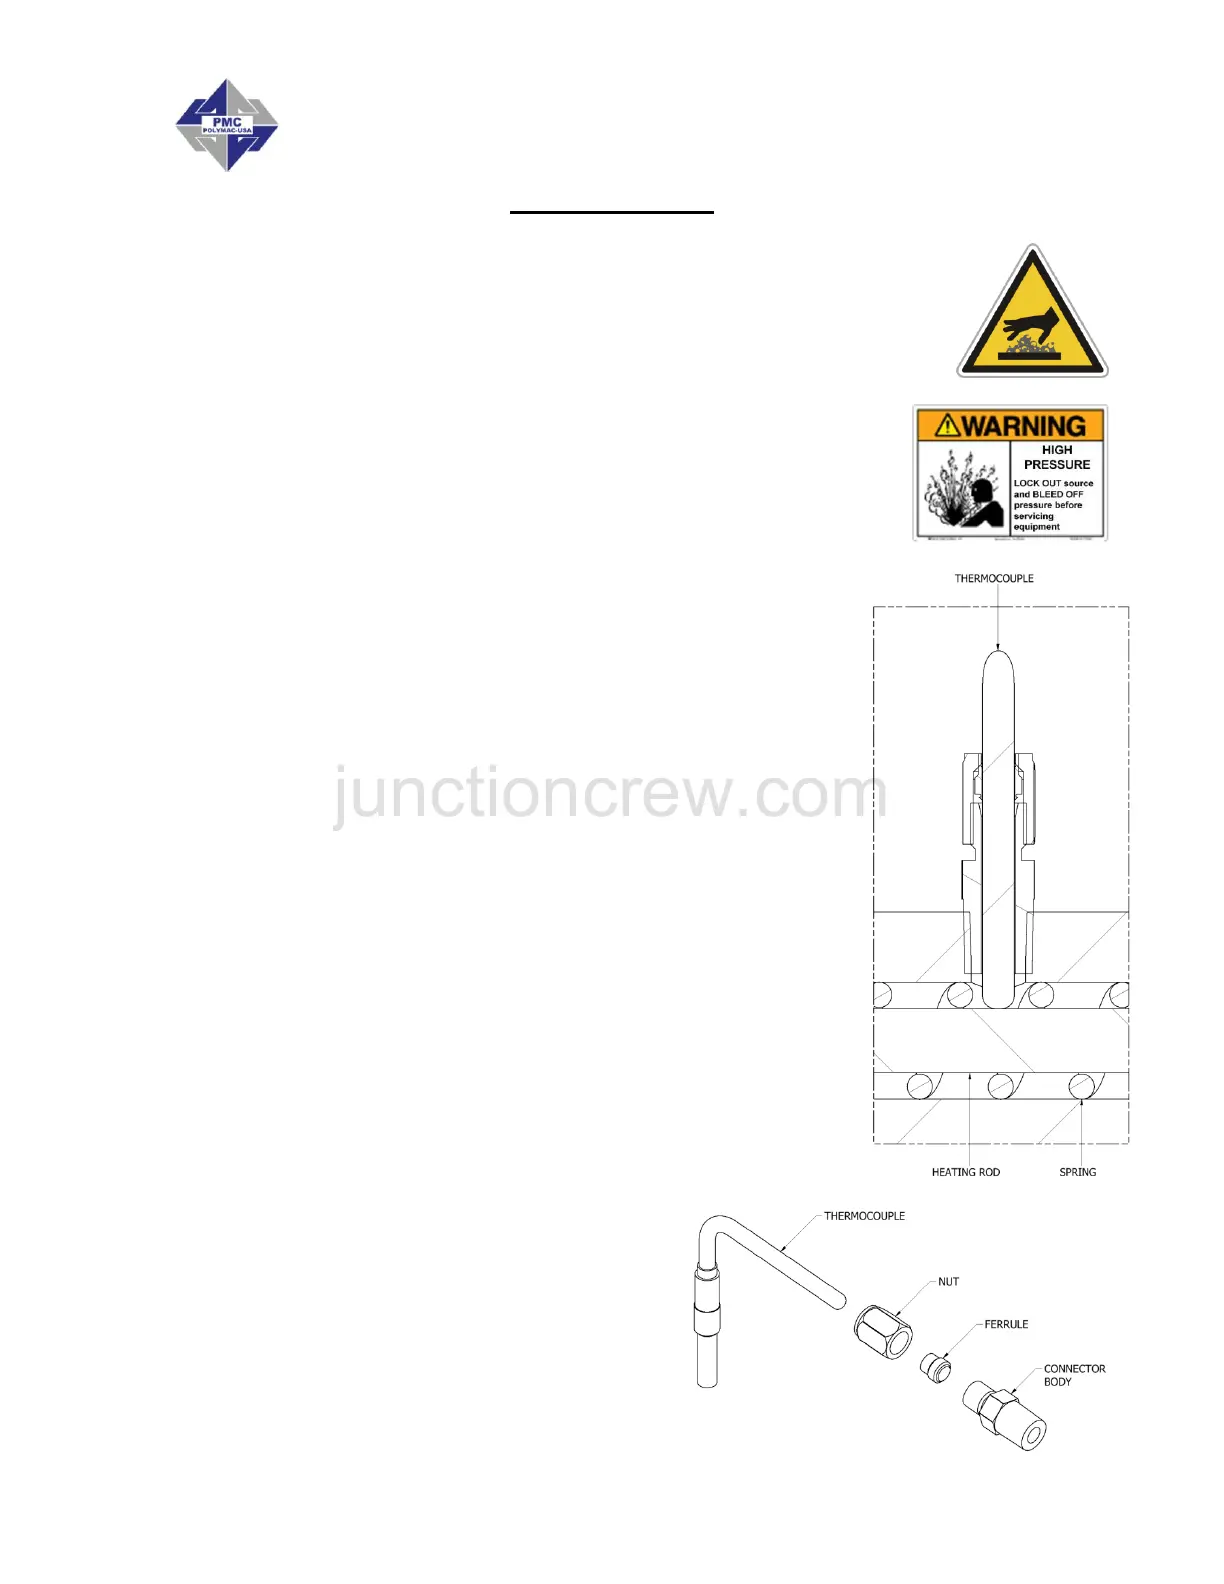
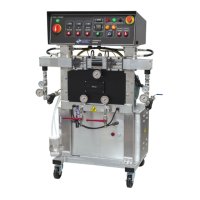
Thermocouple Replacement
NOTE! The Thermocouple is assembled into the
Connector Body with a Ferrule and Nut. Once
inserted into the Body and the Nut is tightened, the
Ferrule locks to the Thermocouple and does not allow
it to be relocated or moved. The location of the
Thermocouple is very important and must be done
correctly before tightening the Nut.
1. Unscrew the Nut that holds the defective Thermocouple
and remove from the Body. Disconnect Thermocouple
wiring located under the Top Cover of the Heater.
Remove Body and discard.
2. Install Heating Element and Spring if also removed.
3. Install Connector Body into Heater using an open-end
wrench and tighten to prevent leakage. Teflon Tape or
appropriate Thread Sealant should be used.
4. Slide the Nut and the Ferrule over the Thermocouple and
insert this assembly into the Connector Body until it
comes into positive physical contact with the Heating
Rod. Make sure the Spring does not prevent the
Thermocouple from making contact with the Heating Rod.
5. Slowly tighten the Nut using an open-end
wrench, ensuring the Thermocouple
maintains positive physical contact with
the Heating Rod.
6. Reinstall the Thermocouple wires.