3.78
9929422 R02 - 2017-2019 ACE 900 Service Manual
© Copyright Polaris Industries Inc.
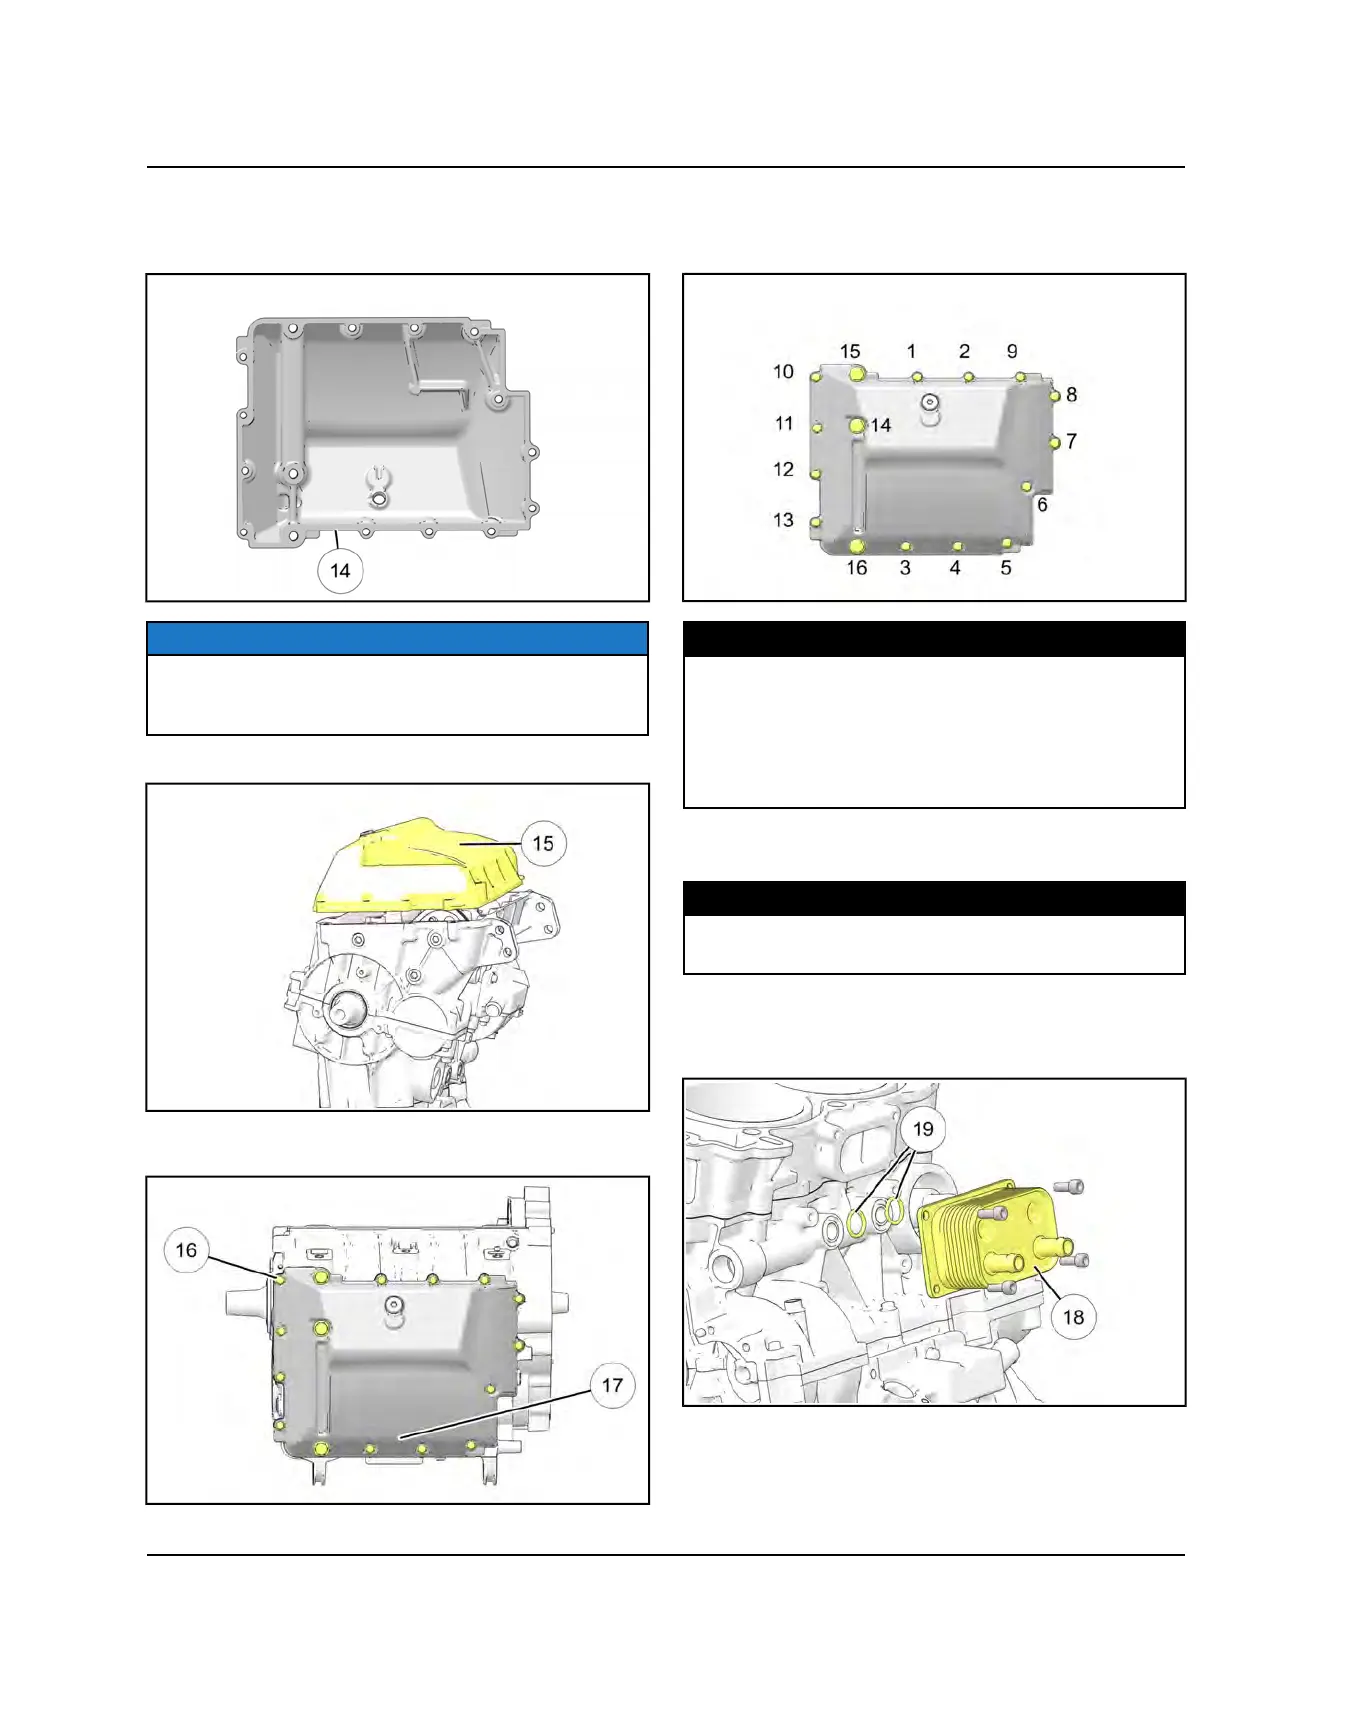
21. Apply a thin, continuous film of Crankcase Sealant
(PN 2871557) to sump cover mating surface
g
. Do
not allow sealant to dry before assembly.
NOTICE
Dipstick must be removed before oil pan is assembled
to the engine. Failure to do this will damage the
dipstick.
22. Install the oil sump cover
h
onto the crankcase.
23. Install the thirteen M6
j
and three M8 bolts that
retain the oil sump cover
k
to the crankcase.
24. Torque the oil sump cover bolts in sequence to
specification. Repeat the sequence to verify final
torque.
TORQUE
Oil Sump Cover Bolts:
M6 Bolts:
9 ft-lb (12 Nm)
M8 Bolts:
26 ft-lb (35 Nm)
25. Reinstall the crankcase drain plug if previously
removed. Torque drain plug to specification.
TORQUE
Crankcase Drain Plug:
22 ft-lbs (30 Nm)
26. Rotate the engine so the cylinder is facing up.
27. Reinstall the oil cooler
l
, if previously removed. Use
new O-rings upon installation
1(
.
ENGINE / COOLING SYSTEM
 Loading...