SUSPENSION AND STEERING 2 - 15
November 2007 GEM Service Manual
STEERING COLUMN
ASSEMBLY
DESCRIPTION
The steering column consists of the steering
column and steering shaft. It is bolted to the dash
frame and supports the upper end of the steering
shaft and steering wheel. The steering shaft is
connected to the steering gear by a pinch bolt.
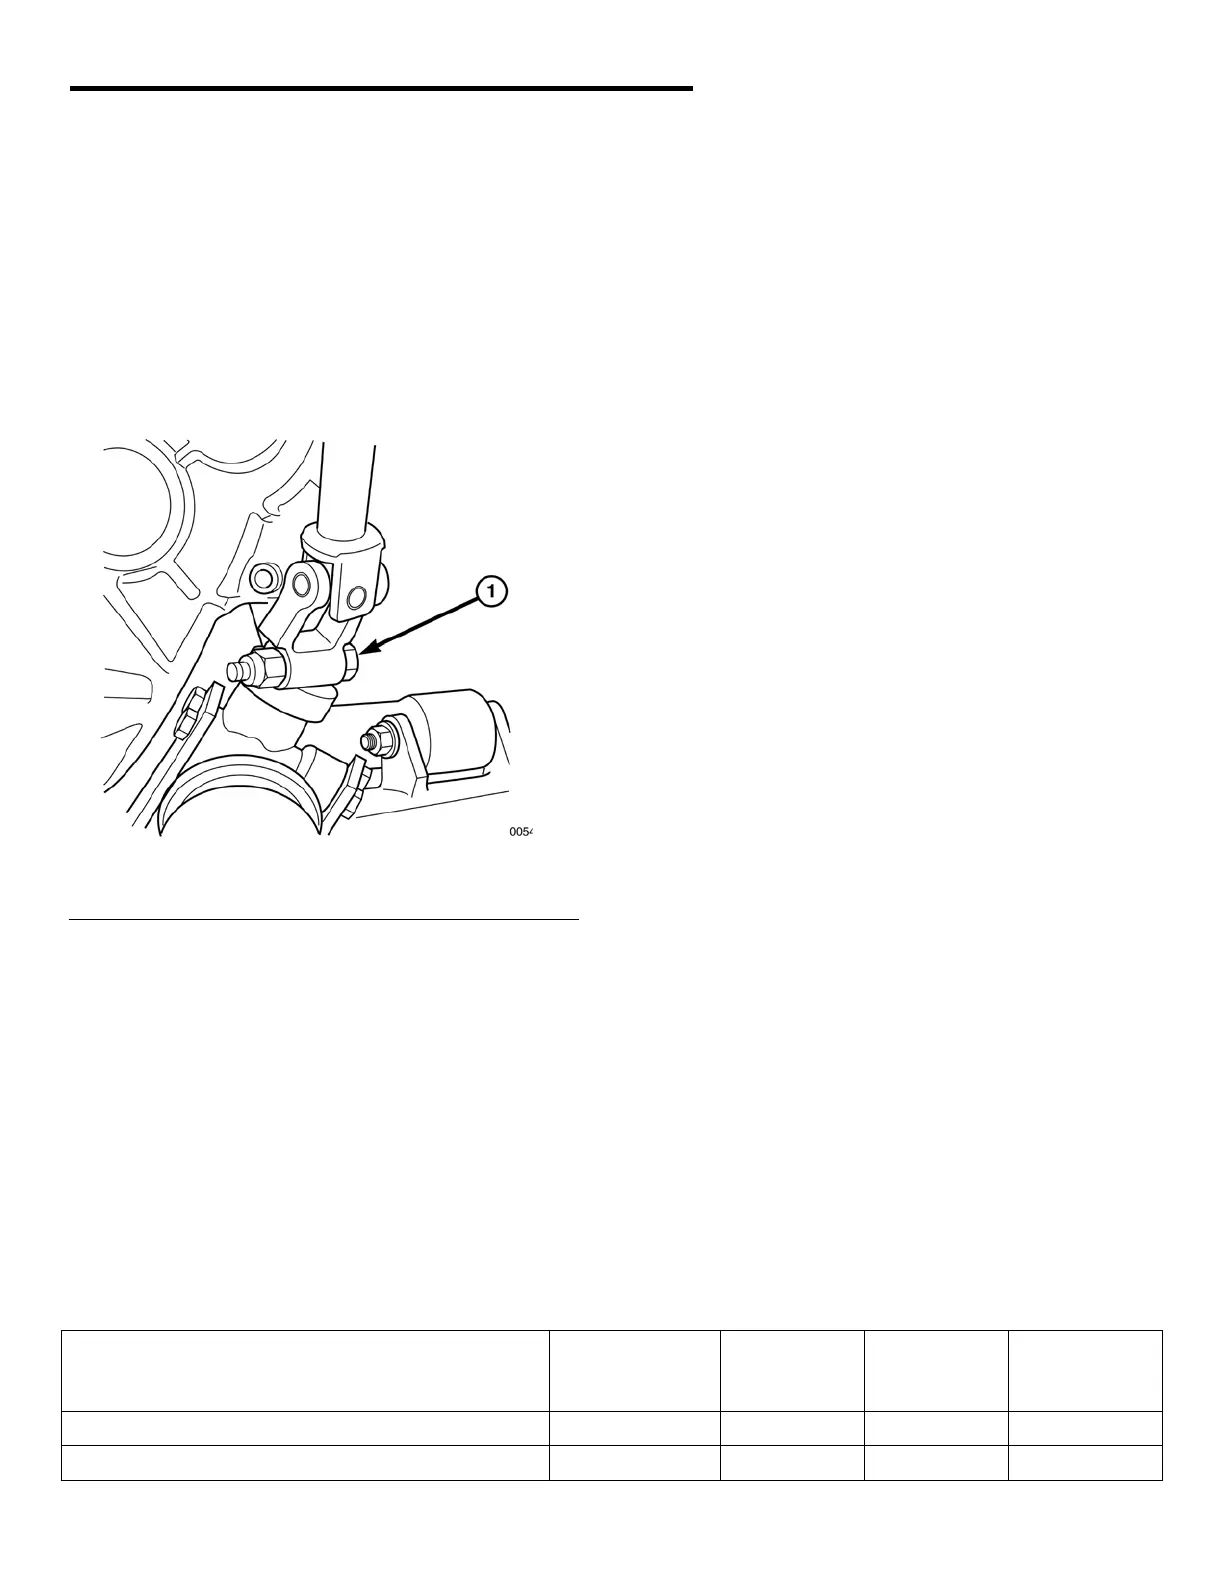
Fig. 13 Steering Shaft Pinch Bolt
1 - Pinch Bolt
REMOVAL
1. Make sure the front wheels are in the straight-
ahead position and the steering wheel is
centered.
2. Remove upper dash assembly. See Upper
Dash in Body section.
3. Remove lower dash assembly. See Lower
Dash in Body section.
4. Remove steering column/instrument pod
covers. See Pod Covers in Body section.
5. Remove steering wheel with wheel puller or
appropriate method. See Steering Wheel in this
section.
6. Remove the pinch bolt attaching steering shaft
to steering gear.
7. Pull shaft free of steering gear.
8. Position aside the instrument pod.
9. Remove bolts attaching steering column to
dash frame.
10. Remove steering column.
CLEANING AND INSPECTION
Rotate steering shaft in bearing, feeling for
roughness of action. If roughness is detected,
replace steering shaft.
Inspect steering shaft u-joints and pinion mating
surface for wear or damage. Replace shaft if
necessary.
INSTALLATION
1. Position the steering column assembly in dash
and install the mounting bolts.
2. Tighten the steering column to dash support
mounting bolts to 225 in-lbs.
3. Make sure the front wheels are straight, and
that steering wheel is centered, then insert
steering shaft over pinion gear stud on steering
gear.
4. Tighten the pinch bolt to 30 ft-lbs.
5. Install the instrument pod.
6. Install the steering wheel. See Steering Wheel
in this section.
7. Install the instrument pod covers. See
Instrument Pod in Electrical section.
8. Install the lower dash panel. See Lower Dash
Panel in Body section.
9. Install the upper dash panel. See Upper Dash
Panel in Body section.
TORQUE SPECIFICATIONS
Description Thread Size Use
Loctite®
242
Inch-
Pounds
Foot -
Pounds
Steering wheel to steering shaft
3/8 - 16 NO --- 20
Steering column to dash frame
5/16 – 18 NO 225 ---
 Loading...