12
2 INSTALLATION AND SETUP continued
Step 4: Disable and enable EPO function
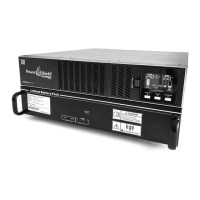
This UPS is equipped with an EPO function (NC). By default, the UPS is delivered from
factory with Pin 1 and pin 2 closed. To enable a remote EPO button, remove the two
screws on the EPO port and remove plate and then wire up the EPO button.
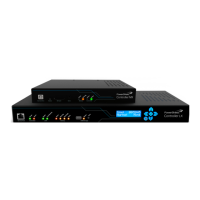
Step 5: Turn on the UPS
Press the ON/Mute button on the front panel for two seconds to power on the UPS.
Note: The battery typically takes five hours to achieve full charge. Do not expect full battery run
capability during this initial charge period.
Step 6: Install software
If you wish to use NetGuard monitoring Software please follow the instructions below:
1 Please download the latest NetGuard Monitoring software from www.powershield.
com.au/index.php/downloads
2 When the installation is completed, the NetGuard agent icon will appear in the Task
bar. Click the plug icon found on the Task bar to start the program
If using USB then the usb driver is required to be installed from the following link:
powershield.com.au/download/usb-driver-installation-for-lifepo4-centurion-long-run-
ups-pslcert1-3kl/
2.8 Battery Replacement
When the icons of and are flashing in LCD display and alarm is sounding
every 3 seconds, the batteries are required to be replaced. Contact your service representative to
replace batteries.
CAUTION: Consider all warnings, cautions, and notes before replacing batteries.
NOTE: Be aware of EBMs with mixed dates of Manufacture
EPO is normally
closed by default.
To activate EPO
function, remove
these two screws.