INDEX
15
X4 | SERVICE MANUAL
(Fig. 10)
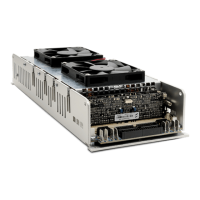
7.6 Removing the Varistors
In order to replace the Varistors, remove the two screws
highlighted on (Fig 10), and lift the varistor bank from its
original position.
(Fig. 11)
(Fig. 13)
(Fig. 12)
By means of a T10 Torx Screwdriver, unscrew the 2
screws highlighted on (Fig. 11)
Proceed by removing the magnet by means of a Phillips
Head screwdriver highlighted on (Fig. 12)
Lastly, by means of a M7 socketed screwdriver,remove
the nut bonding the earth to the chassis.
Carefully lift the EMI Filter Module by fulling it upwards,
whilst lightly rocking it side to side in order to release the
connector that becomes visible once the Varistors have
been removed.
In order to replace the EMI Filter Module’s fuses, unscrew
the ve Phillips head screws highlighted in the picture.
Subsequently, unscrew the 3 screws marked in the
picture and extract the board from its casing.
Check the viability of the fuses with a multi-meter.
Replace the blown fuses with same rated ones if needed,
by de-soldering their casings from the board. (Fig. 13)
7.7 Removing the EMI Filter