3
4
5
Left
7
2
6
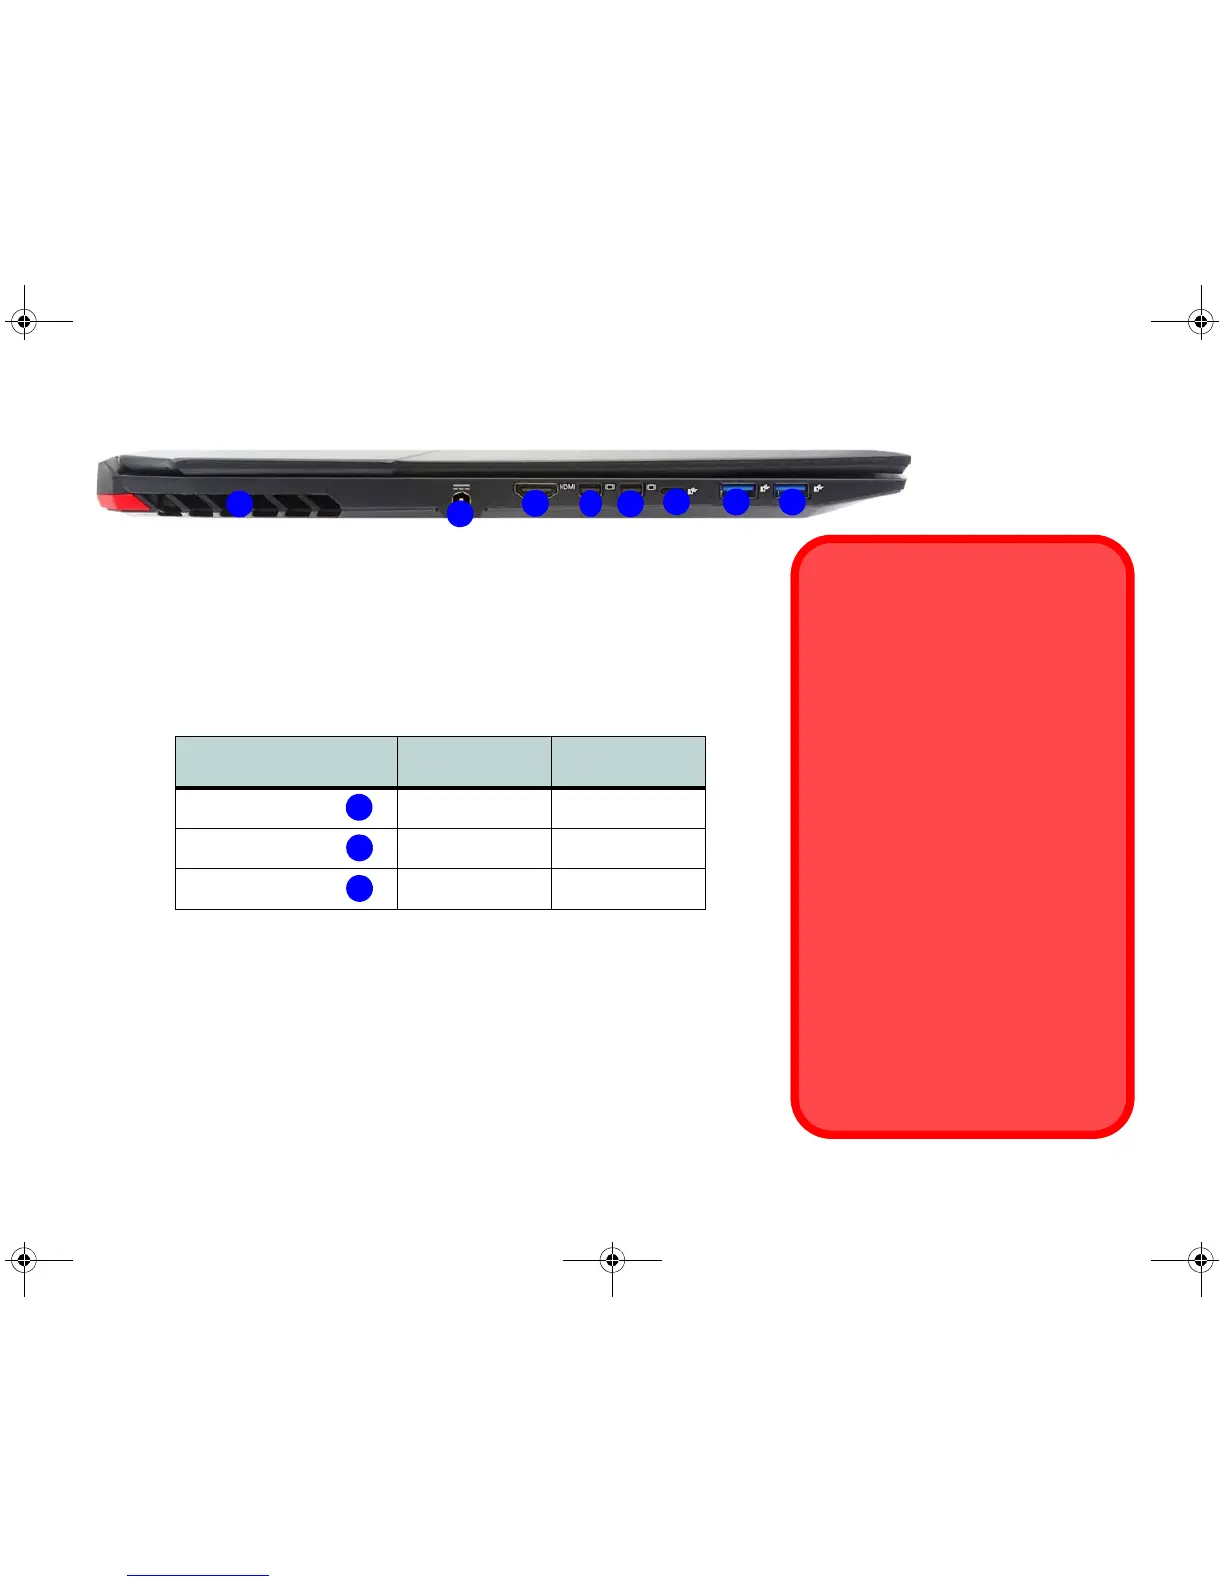
Figure 9 - Left View
1. Vent
2. DC-In Jack
3. HDMI-Out Port
4. Mini DisplayPort 1
5. Mini DisplayPort 2
6. Thunderbolt 3 Port
7. USB 3.0 (USB 3.1 Gen 1) Ports
1
7
Thunderbolt Port for Display
The display configuration for the Thunderbolt port and Mini DisplayPorts can
be set up in the BIOS (Advanced menu > Advanced Chipset Control > DDI
Control). Restart your notebook computer and press F2 to enter the BIOS.
The table below outlines which ports will be enabled/disabled when the Thun-
derbolt port is set for display only.
Setting
DDI to mDP
(Default Setting)
DDI to TBT
Thunderbolt 3 Port
Disabled Enabled
Mini DisplayPort #1
Enabled Disabled
Mini DisplayPort #2
Enabled Enabled
Thunderbolt Devices
When plugging a device into a Thun-
derbolt port alllow 30 seconds for the
system to scan and recognize the con-
nected device.
Ejecting Thunderbolt Devices
In order to prevent system problems
make sure you do not simply pull the
cable out from the Thunderbolt port.
The hardware must be ejected safely:
1. Go to the notification area of the
taskbar and click on the Safely Re-
move Hardware and Eject Media
icon.
2. Click on Eject “Thunderbolt Device
Name”.
3. When you see the “Safe to Remove
Hardware” message you can re-
move the cable after about 20 sec-
onds, to make sure that it is safe to
eject the device.