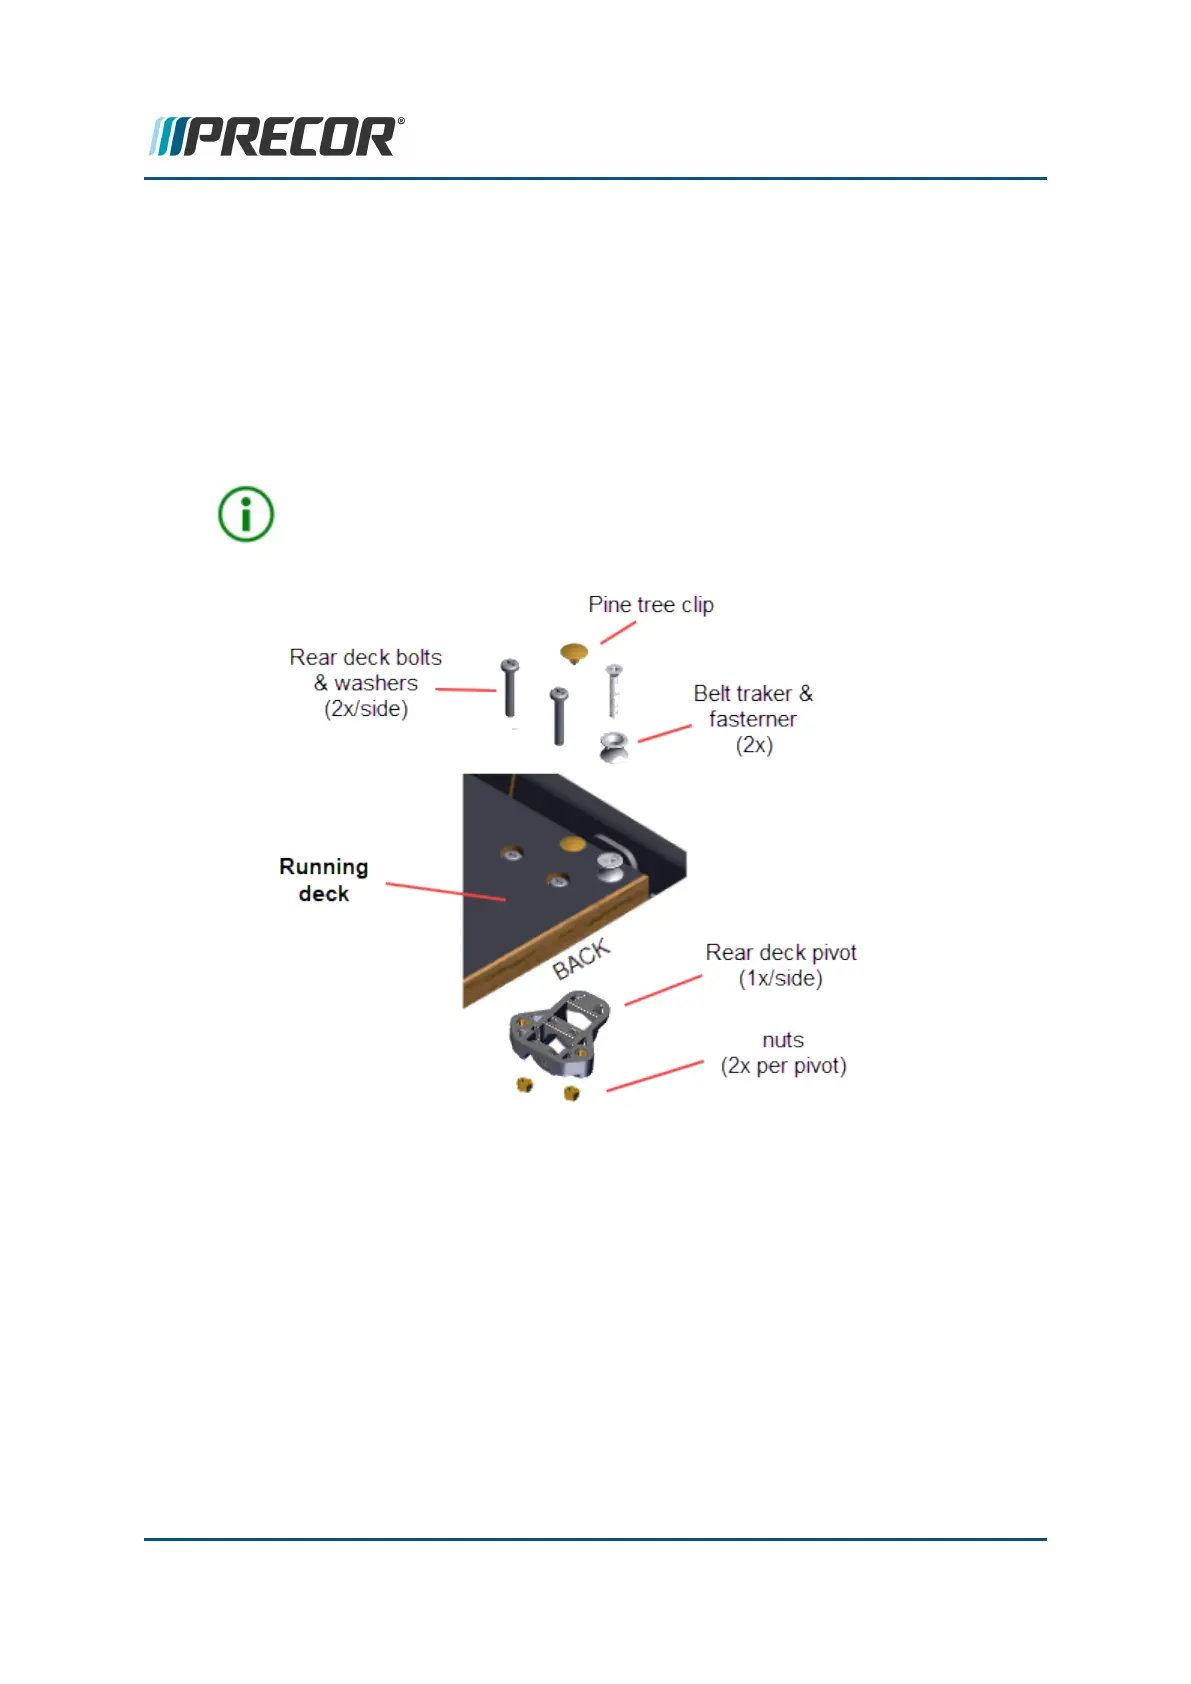
2. Reinstall the combined Deck & Belt into the treadmill frame aligning the left/right rear
and left/right front deck mounting holes to the frame bracket bolt threads. Verify that
the bottom of the belt is not caught on any frame weldment brackets (such as; the
GFX cushion brackets) or any other frame hardware that could impede belt move-
ment.
3. Secure the left and right rear sides of the deck to the pivot assemblies using the four
#3 Phillips screws (4x) and washers (4x). Note that the rear deck fasteners screw into
the pivot assembly press fit nuts. Pressing to hard could cause the nuts to fall from the
pivot assembly housing. If this occurs, find and reinsert the nut into the pivot housing.
TIP: Avoid applying heavy downward pressure on the pivot assembly bolts
while installing. Pressing down to hard could push the nuts out of the pivot
housing. If this occurs, .reinstall the nut into the pivot housing.
4. Reinstall the left/right rear deck belt tracker (2x) and secure using the #3 Phillips
screws (2x).
5. Reinstall the left/right rear deck pine tree clips (2x).
Contact Precor Customer Support at support@precor.com or 800.786.8404 with
any questions.
Page 154
6 Replacement Procedures
Running Belt and Deck Replacement Procedure